Honor 8X LCD Replacement: The Ultimate Guide 2025
Why Honor 8X LCD Replacement is Essential for Your Device
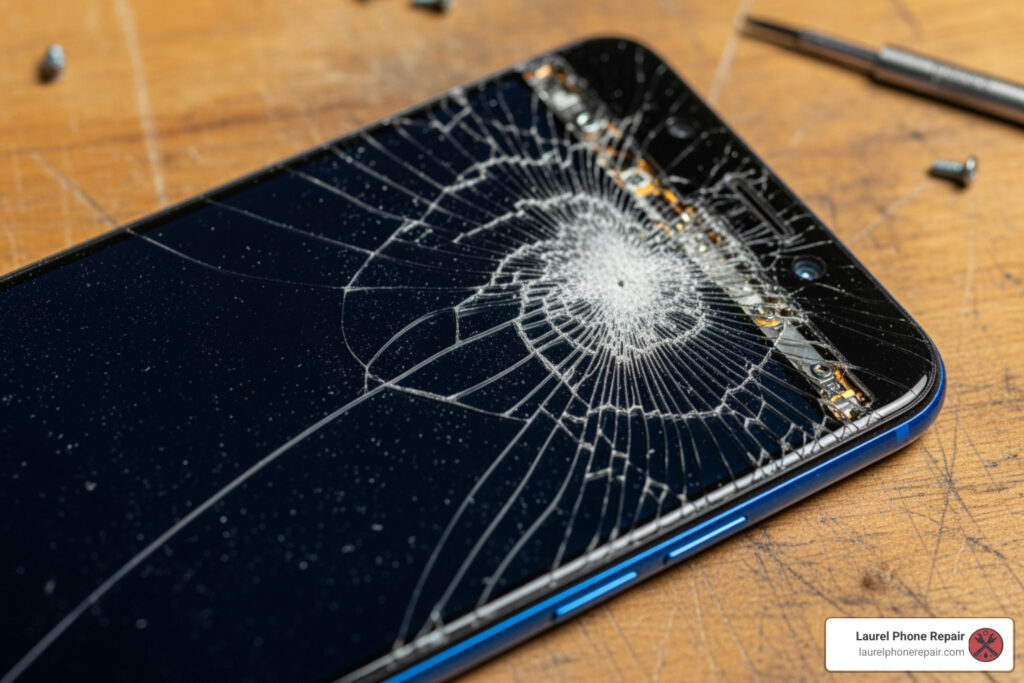
Honor 8x lcd replacement is a common repair need for this popular 2018 smartphone, which features a large 6.5-inch LTPS IPS LCD display. Whether you’re dealing with a cracked screen, unresponsive touch, backlight issues, or strange colored lines across your display, replacing the LCD assembly can restore your device to full functionality.
Quick Answer: The Honor 8X Screen Replacement Process
- Discharge battery below 25% for safety
- Heat and remove the back panel using a suction cup and opening picks
- Disconnect the battery, fingerprint sensor, and display flex cables
- Remove the damaged screen by heating and carefully separating it from the frame
- Install the new LCD assembly with fresh adhesive
- Test the display before final reassembly
- Estimated time: 1-3 hours for DIY, under 1 hour for professionals
The Honor 8X (model numbers JSN-L21 and JSN-L42, also known as Honor View 10 Lite) requires careful disassembly due to its internal layout. You’ll need to remove the battery to access the display cables, which differs from many modern smartphones. Replacement screens typically cost around $36-$40 for quality parts, making DIY repair a cost-effective alternative to buying a new device.
Common symptoms that indicate you need an honor 8x lcd replacement include:
- Visible cracks or shattered glass
- Black screen or no display output
- Unresponsive or erratic touch response
- Colored lines, dead pixels, or screen artifacts
- Backlight issues (too bright, too dim, or flickering)
- Display works but shows physical damage
I’m Ralph Harris, and with over 20 years in electronics repair, 500+ Apple repair certifications, and over 2,000 published repair guides, I’ve helped thousands save money and extend their device’s life. I’m here to guide you through a successful honor 8x lcd replacement.
, Opening (heat back panel, use suction cup, insert opening picks, disconnect fingerprint cable), Disconnecting (remove motherboard shield, disconnect battery and display cables, remove battery), Replacing (heat front screen, separate damaged LCD, clean adhesive, apply new screen with fresh adhesive), and Reassembling (test display function, reconnect all cables, secure back panel) - honor 8x lcd replacement infographic")
Pre-Repair Checklist: Tools, Parts, and Precautions
Before starting your Honor 8X LCD replacement, it’s crucial to prepare your workspace and gather all necessary items. A well-prepared repair is a successful one. First and foremost, safety. We always recommend discharging your phone’s battery below 25% before starting. This is a critical precaution because the 3750 mAh lithium-ion battery can be a fire or explosion risk if accidentally punctured. To minimize the risk of electrostatic discharge (ESD), work on a clean, uncluttered surface, ideally using an anti-static mat.
What You’ll Need: Tools and Parts
To successfully complete an honor 8x lcd replacement, you’ll need a specific set of tools and, of course, the replacement screen itself. Here’s a comprehensive list:
- Phillips #00 Screwdriver: For those tiny screws holding internal components.
- iOpener or Heat Gun: Essential for softening the adhesive that secures the back panel and the screen. An iOpener provides even, controlled heat, which we prefer.
- Suction Cup: To help create a gap between the back panel and the frame, or the screen and the frame.
- Opening Picks (Plastic): Thin, non-marring tools to slice through adhesive without damaging the phone’s delicate frame.
- Spudger (Plastic): A versatile tool for prying, disconnecting cables, and manipulating small components.
- Tweezers: For handling small screws, flex cables, and removing stubborn adhesive bits.
- Isopropyl Alcohol (>90% concentration): Great for cleaning adhesive residue and gently loosening stubborn adhesive.
- New Adhesive Strips: Crucial for securely sealing your new screen and back panel. Many replacement screens come with these, but it’s good to have extra.
- New Huawei Honor 8X LCD and Digitizer Assembly: This is the star of the show. Ensure it’s compatible with your specific Honor 8X model (JSN-L21 or JSN-L42).
For the replacement screen, you’ll find two main types: OEM (Original Equipment Manufacturer) and aftermarket. OEM parts are identical to the original, offering the best quality, while aftermarket parts are from third parties and can vary in quality. While cheaper, we recommend investing in a high-quality replacement for optimal performance. The Honor 8X uses a LTPS IPS LCD capacitive touchscreen. You can find parts from online suppliers like eTech Parts for around $36.83, but for our Screen Repair services in Laurel, Hattiesburg, Jackson, and Jones County, Mississippi, we use only high-quality, warrantied components.
Sourcing Your Honor 8X LCD Replacement Kit
Finding a reliable source for your Honor 8X LCD replacement kit is paramount, as a cheap screen can lead to poor color and unresponsive touch. Here’s how to ensure you’re getting a good part:
- Look for Reputable Sellers: Stick to well-known suppliers and check their reviews and return policies.
- Understand the Warranty: A good screen should have a warranty for manufacturing defects. Our services include robust warranties, reflecting our confidence in our parts.
- Screen with Frame vs. Screen Only: Screens pre-installed in a new frame are easier to install but more expensive. A “screen only” replacement requires more careful work. For the Honor 8X, a complete assembly often simplifies the process.
- Ensure Compatibility: Double-check that the screen is compatible with the Huawei Honor 8X, model numbers JSN-L21 or JSN-L42 (Honor View 10 Lite).
Key Safety Precautions
We can’t stress enough the importance of safety during an honor 8x lcd replacement. Your safety and the device’s integrity depend on it.
- Discharge Battery Below 25%: As mentioned, this significantly reduces the risk of thermal events if the battery is accidentally damaged.
- Lithium-ion Battery Risks: Be extremely gentle when handling the battery. Do not bend, puncture, or excessively pry it. If you notice swelling or damage, proceed with extreme caution or seek professional help. Never reuse a lithium-ion battery once it has been removed.
- Disconnect Power First: Always disconnect the battery flex cable from the motherboard as one of your first steps after opening the device to prevent short circuits.
- Careful Handling of Flex Cables: These are easily torn. Use plastic tools like spudgers to disconnect them, never pulling on the cable itself.
- Work in a Well-Lit, Organized Space: This helps prevent losing tiny screws or damaging components.
- Avoid Excessive Force: If something isn’t coming apart easily, stop and reassess. Patience is key.
If you ever feel out of your depth, our experienced technicians are here to help. You can find more repair help on our Support page.
The Step-by-Step Honor 8X LCD Replacement Process
Alright, it’s time to get our hands dirty! This section will guide you through the intricate steps of disassembling your Honor 8X and installing a brand-new screen. While some may suggest using a guide for the older Honor 8 model, we strongly advise against it. The Honor 8X (released in late 2018) has a different internal layout, including screw placements, flex cable routing, and component connections, compared to the Honor 8. A guide for the Honor 8X is essential to avoid mistakes and potential damage to your device.
The Honor 8X features dimensions of 160.4 mm in height, 76.6 mm in width, and 7.8 mm in depth, weighing 175 g, which gives it a specific internal structure to steer.
Step 1: Opening the Back Panel
The Honor 8X’s back panel is secured with strong adhesive, so we’ll need to apply some heat to loosen it up.

- Heat the Back Panel: Use an iOpener or a heat gun to gently heat the edges of the Honor 8X’s back glass. We recommend heating for about 1-2 minutes, focusing on the perimeter. The goal is to make the adhesive pliable, not to cook your phone!
- Attach Suction Cup: Once heated, attach a suction cup to the lower portion of the back glass, near the charging port.
- Create a Gap: Gently pull up on the suction cup while simultaneously inserting a thin opening pick into the gap that forms between the back glass and the phone’s frame. If the glass is heavily cracked, you might need to use strong tape over the cracks first to allow the suction cup to adhere, or even superglue the suction cup in place and let it cure.
- Slice Through Adhesive: Once you have an opening pick inserted, carefully slide it around the perimeter of the phone, slowly slicing through the adhesive. Be patient and reapply heat if the adhesive becomes difficult to cut. Avoid inserting the pick too deeply, especially near the top where the fingerprint sensor cable is located.
- Lift the Back Panel: Once the adhesive is mostly severed, gently lift the back panel. Crucially, do not pull it off completely! The fingerprint sensor cable is connected to the motherboard underneath. Carefully pry up the small bracket securing the fingerprint flex connector, then use a plastic spudger to disconnect the fingerprint sensor cable. Now you can fully remove the back panel and set it aside.
Step 2: Disconnecting Components and Removing the Battery
With the back panel off, we gain access to the phone’s internals. Our next steps involve disconnecting power and other essential flex cables.

- Remove Motherboard Shield Screws: You’ll see a protective shield covering the motherboard. This shield is typically secured by several Phillips #00 screws. Carefully remove all of them and set them aside in an organized manner.
- Disconnect Battery Flex Cable: This is a vital safety step. Locate the battery’s flex cable connector on the motherboard. Use a plastic spudger to gently pry up and disconnect the cable. This cuts power to the entire device.
- Remove the Battery: The Honor 8X’s battery is secured with adhesive. You might need to gently apply heat to the front of the screen (on the outside) to soften the adhesive underneath the battery. Use a plastic card or spudger to carefully pry the battery out. Be extremely cautious not to bend or puncture the battery. If it’s very stubborn, a few drops of high-concentration isopropyl alcohol along the edges can help dissolve the adhesive. Do not reuse a removed lithium-ion battery.
- Disconnect Display Flex Cable: Locate the display flex cable connector on the motherboard. Similar to the battery cable, use a plastic spudger to gently disconnect it. This cable runs to the screen assembly you’re about to remove.
Step 3: Removing the Damaged Screen
Now that the power is off and the display cable is disconnected, we can focus on removing the faulty screen.
- Apply Heat to the Front Screen: Just like with the back panel, we need to soften the adhesive holding the screen in place. Use your iOpener or heat gun to apply heat evenly around the edges of the front screen for 1-2 minutes.
- Create a Gap: Attach a suction cup to the lower part of the screen. Gently pull up to create a small gap. If the screen is severely cracked, apply tape over the cracks first to help the suction cup adhere.
- Use Opening Picks: Once a gap is created, insert an opening pick and carefully slide it around the perimeter of the screen, cutting through the adhesive. Be mindful of the display cable’s location (usually at the bottom) and avoid inserting picks too deeply, as you could damage internal components or sensors.
- Separate Screen from Frame: Once the adhesive is sufficiently cut, carefully separate the screen from the phone’s frame. Gently thread the display flex cable through its opening in the frame as you lift the screen away. Remove the damaged screen and dispose of it responsibly.
- Clean Old Adhesive: This is a crucial step for a clean installation. Use your tweezers and a spudger to carefully scrape away all remnants of old adhesive from the phone’s midframe and screen bezel. Then, use isopropyl alcohol and a lint-free cloth to thoroughly clean the glued areas. Any old adhesive left behind can prevent the new screen from sitting flush, leading to gaps or even damage.
Step 4: Installing and Testing the New Screen
We’re on the home stretch! This is where your Honor 8X starts looking like new again.
- Apply New Adhesive: If your new screen didn’t come with pre-applied adhesive, carefully apply new adhesive strips to the perimeter of the phone’s frame where the screen will sit. Ensure even coverage.
- Feed the New Display Cable: Carefully feed the new display flex cable through its opening in the phone’s frame.
- Temporarily Reconnect: Before fully adhering the new screen, we perform a crucial test. Temporarily reconnect the display flex cable to the motherboard. Then, temporarily reconnect the battery flex cable.
- Power On and Test: Gently power on your Honor 8X. Go through the initial setup or open up your phone if possible. This is your chance to test everything. Check the touch response across the entire screen, ensuring there are no dead spots. Look for any dead pixels, discoloration, or backlight issues. If you notice any problems, carefully power down, disconnect the battery, and re-check all connections. We have comprehensive tools for Device Diagnostics if you need more in-depth testing.
- Final Installation: If everything checks out, power down the phone and disconnect the battery and display flex cables again. Carefully remove the protective films from the new screen’s adhesive (if applicable). Align the new screen perfectly with the phone’s frame and gently press it into place, ensuring a secure fit. Reconnect the display flex cable and the battery flex cable.
- Reassemble: Follow the disassembly steps in reverse order: re-install the battery, re-attach the motherboard shield, reconnect the fingerprint sensor cable, and finally, re-adhere the back panel with fresh adhesive. Apply gentle, even pressure around the edges of the phone for a few minutes to ensure the adhesive cures properly.
Congratulations, you’ve just completed an honor 8x lcd replacement!
DIY vs. Professional Repair: Making the Right Choice
Deciding whether to tackle an honor 8x lcd replacement yourself or seek professional help is a common dilemma. Both options have their merits, and the best choice often depends on your comfort level, budget, and the value you place on your time. We believe in empowering our customers with information, whether they choose DIY or our expert services.
Cost and Time Analysis
Let’s break down the typical costs and time commitment for both approaches:
| Factor | DIY Repair | Professional Repair |
|---|---|---|
| Cost of Parts | $35 – $60 (for a quality Honor 8X LCD replacement, like the $36.83 screen from eTech Parts) | Included in professional service cost (typically higher quality, warrantied parts) |
| Cost of Tools | $15 – $30 (for a basic kit, though you might have some items already) | None (technician supplies) |
| Professional Repair Cost | N/A | $80 – $150+ (can vary based on location and service provider, includes parts & labor) |
| DIY Time | 1-3 hours (for a first-timer, this includes prep, careful execution, and potential troubleshooting) | Under 1 hour (experienced technicians are efficient) |
| Professional Time | N/A | Varies, but often same-day service or within 24 hours |
As you can see, the DIY route can save you a significant amount on labor costs, potentially reducing the overall expense of your Honor 8X LCD replacement to just the cost of the part and some basic tools. However, this saving comes with a time commitment and the risk of error. You can get more details on our service costs and what’s included by visiting our Pricing page.
What to Do If the New Screen Doesn’t Work
It’s disheartening when you’ve put in all that effort and the new screen doesn’t light up. Don’t panic! Here’s a troubleshooting guide:
- Check Cable Connections: The most common culprit is a loose or improperly seated flex cable. Power down your phone, open it up again, and carefully disconnect and reconnect the display and battery flex cables. Ensure they click firmly into place.
- Ensure Correct Part Model: Double-check that the replacement screen is indeed for the Honor 8X (JSN-L21 or JSN-L42). An incompatible part simply won’t work.
- Test Old Screen Again (if possible): If your old screen still displayed something (even if cracked), reconnect it temporarily. If it works, you might have a faulty new screen. If neither works, the issue might be with the motherboard or another component.
- Non-Working Backlight, Display Lines, or Unresponsive Touch:
- No backlight/Black screen: Could be a damaged display cable, a faulty screen, or an issue with the display connector on the motherboard.
- Lines/Discoloration: Often indicates a damaged screen, a crimped flex cable, or a faulty display driver.
- Unresponsive touch: Can be a faulty digitizer (part of the screen assembly), a damaged flex cable, or a software glitch.
- Inspect for Damage: Carefully examine the motherboard connectors and flex cables for any signs of damage (tears, bends, corrosion) that might have occurred during the repair.
If after these steps you’re still facing issues, it might be time to call in the cavalry.
When to Seek Professional Help
DIY repairs are incredibly rewarding, but they’re not for everyone, and sometimes even experienced DIYers hit a wall. Here are some signs it’s time to seek professional assistance for your honor 8x lcd replacement:
- Lack of Tools or Confidence: If you don’t have the specialized tools, or you’re simply not comfortable with the intricate process, forcing it can lead to more damage.
- Fear of Causing More Damage: It’s easy to accidentally damage other components like flex cables, the battery, or even the motherboard during a complex repair. If the thought of this stresses you out, a professional is a safer bet.
- Repair is Unsuccessful: You’ve tried troubleshooting, but your new screen still isn’t working, or you’ve encountered a new problem. Our technicians have the diagnostic tools and expertise to identify and fix issues that might be beyond a typical DIY repair.
- No Time for DIY: Life gets busy! If you simply don’t have the 1-3 hours (or more, if things go wrong) to dedicate to the repair, a professional service offers convenience and speed.
- Warranty Concerns: A professional repair from a reputable shop like ours typically comes with a warranty on both parts and labor, providing peace of mind that your investment is protected.
Our expert technicians at Laurel Phone Repair are highly experienced in all types of phone repairs, including the Honor 8X LCD replacement. We offer quick, affordable repairs with transparent part options and high customer satisfaction. If you’re in Laurel, Hattiesburg, Jackson, or Jones County, Mississippi, and need reliable help, don’t hesitate to reach out for Repair services.
Frequently Asked Questions about Honor 8X Screen Repair
We hear a lot of questions about the Honor 8X LCD replacement, so we’ve compiled some of the most common ones to provide clear, concise answers.
How long does a Huawei Honor 8X screen replacement typically take?
For a first-timer attempting a DIY Honor 8X LCD replacement, the process can typically take anywhere from 1 to 3 hours. This timeframe accounts for gathering tools, carefully following each step, dealing with stubborn adhesive, and potentially troubleshooting minor issues. Patience is key when you’re doing it yourself!
However, for a professional technician with specialized tools and extensive experience, the same repair can often be completed in under 1 hour. Our technicians are adept at these repairs, ensuring efficiency without compromising quality.
What are the symptoms of a damaged Honor 8X screen?
Recognizing the signs of a damaged screen is the first step in knowing you need an honor 8x lcd replacement. Common symptoms include:
- Visible Cracks or Shattered Glass: This is the most obvious sign, ranging from minor hairline cracks to a completely spiderwebbed display.
- Black or Blank Screen: The phone powers on and receives notifications, but the screen remains completely dark. This indicates a display panel failure.
- Unresponsive or Erratic Touch: The screen doesn’t register your touches, or it registers them incorrectly (ghost touches).
- Colored Lines or Dead Pixels: Vertical or horizontal lines appearing on the display, or small black/colored dots that never change, indicate damage to the LCD panel.
- Backlight Issues: The screen is too dim, too bright, flickering, or has uneven lighting.
- Flashback: The display shows remnants of previous images or has a “ghosting” effect.
- Over-bright Display: The screen is excessively bright and cannot be adjusted, indicating a display driver issue.
Any of these symptoms can severely impact your phone’s usability and warrant a screen replacement.
What is the difference between replacing an Honor 8 and an Honor 8X screen?
While both are Huawei Honor devices, there are notable differences in their design and internal architecture that impact the screen replacement process. The Honor 8X (released in 2018) is a physically larger device with a 6.5-inch LTPS display, compared to the Honor 8’s 5.2-inch display (released in 2016).
Crucially, the Honor 8X LCD replacement involves a different internal layout, including the placement of screws, flex cables, and how the battery is secured. For instance, in the Honor 8X, you typically need to remove the battery to access the display cables, which might be positioned differently or require different steps than the Honor 8. Although some community forums might suggest that an Honor 8 guide is “similar enough,” we strongly advise against using it as a direct replacement guide for the Honor 8X. Using an incorrect guide can lead to mistakes, damage to sensitive components, or an unsuccessful repair. Always seek out guides specifically custom for your Honor 8X model (JSN-L21 or JSN-L42) to ensure a safe and effective repair.
Conclusion
Starting on an Honor 8X LCD replacement can be a rewarding and cost-effective solution for a broken device. With patience, the right tools, and careful attention to detail, you can restore your phone to its former glory. We hope this comprehensive guide has equipped you with the knowledge and confidence to tackle this repair yourself.
However, we understand that not everyone has the time, tools, or comfort level for a DIY repair. If the process seems too complex, you’ve run into trouble, or you simply prefer the peace of mind that comes with professional service, don’t risk further damage to your valuable device. The expert technicians at Laurel Phone Repair, serving Laurel, Hattiesburg, Jackson, and Jones County, Mississippi, are ready to help. We offer fast, reliable, and warrantied services to get your Honor 8X working perfectly again, using high-quality parts and our extensive experience.
Ready to get your Honor 8X screen fixed? Schedule Repair with us today!