Where to Fix Your Keys: The Ultimate List of Computer Keyboard Repair Shops Nearby

Computer keyboard repair shop near me: Best 2025 Fix

Why a Broken Keyboard Doesn’t Have to Mean Downtime

A computer keyboard repair shop near me is your best bet when keys stop responding, coffee spills ruin your day, or your laptop’s built-in keyboard malfunctions. Most keyboard issues—from sticky keys to connectivity problems—are fixable, often within the same day. Here’s what you need to know:

Quick Answer: Finding Keyboard Repair Near You

  • Best option: Walk into a local repair shop like Laurel Phone Repair for free diagnostics
  • Typical turnaround: Same-day to 24 hours for most repairs
  • Cost: Often more affordable than replacement, especially for laptops and high-end mechanical keyboards
  • What they fix: Liquid damage, unresponsive keys, connectivity issues, individual key replacements
  • Warranty: Most reputable shops offer 1-year limited warranties

When your keyboard fails, it can bring your work, gaming, or daily tasks to a grinding halt. Whether you’ve spilled a drink on your laptop, have keys that won’t respond, or are dealing with a completely dead keyboard, the good news is that many of these problems are repairable. You don’t always need to buy a new device or keyboard.

The key is finding a trustworthy repair shop nearby that can diagnose the problem quickly and fix it right.

Most repair shops handle everything from external mechanical keyboards to built-in laptop keyboards. They can tackle sticky keys, liquid spills, broken switches, and connectivity issues with USB or Bluetooth keyboards. Many shops offer same-day service for common problems, and most provide free diagnostics so you know exactly what you’re dealing with before committing to a repair.

I’m Ralph Harris, and with over 20 years in electronics repair and more than 500 Apple repair certifications, I’ve helped countless customers find the right computer keyboard repair shop near me to get their devices back in working order. Whether you’re in Laurel, Hattiesburg, Jackson, or Jones County, Mississippi, the right local repair shop can save you time and money.

infographic showing the most common causes of keyboard failure including liquid spills, stuck keys, connectivity issues, physical damage to individual keys, dust and debris buildup, and wear from heavy use, with percentage breakdowns and typical repair times for each issue - computer keyboard repair shop near me infographic

First Steps: Can Your Keyboard Be Fixed?

When your keyboard starts acting up, the first question that usually pops into mind is, “Is this thing even fixable?” We’re here to tell you that in most cases, the answer is a resounding yes! From a single stubborn key to a completely unresponsive board, many common keyboard ailments don’t spell the end for your trusty input device.

various keyboard types (mechanical, laptop, wireless) - computer keyboard repair shop near me

Common Repairable Issues

Let’s explore some of the most frequent problems we see and how a professional computer keyboard repair shop near me can bring your keys back to life:

  • Sticky or Unresponsive Keys: This is often caused by dust, crumbs, pet hair, or that unfortunate coffee spill. Even a tiny bit of debris can prevent a key from registering a press or cause it to stick. Our technicians can carefully clean beneath the keycaps or address any underlying switch issues to restore smooth functionality.
  • Liquid Damage: The dreaded spill! Whether it’s water, soda, or that morning cup of joe, liquid can wreak havoc on a keyboard’s internal circuitry. Depending on the extent and type of liquid, we can often clean the corrosion, repair damaged traces on the circuit board, or replace affected components. Don’t throw out a liquid-damaged keyboard until you’ve had it professionally assessed; many are salvageable!
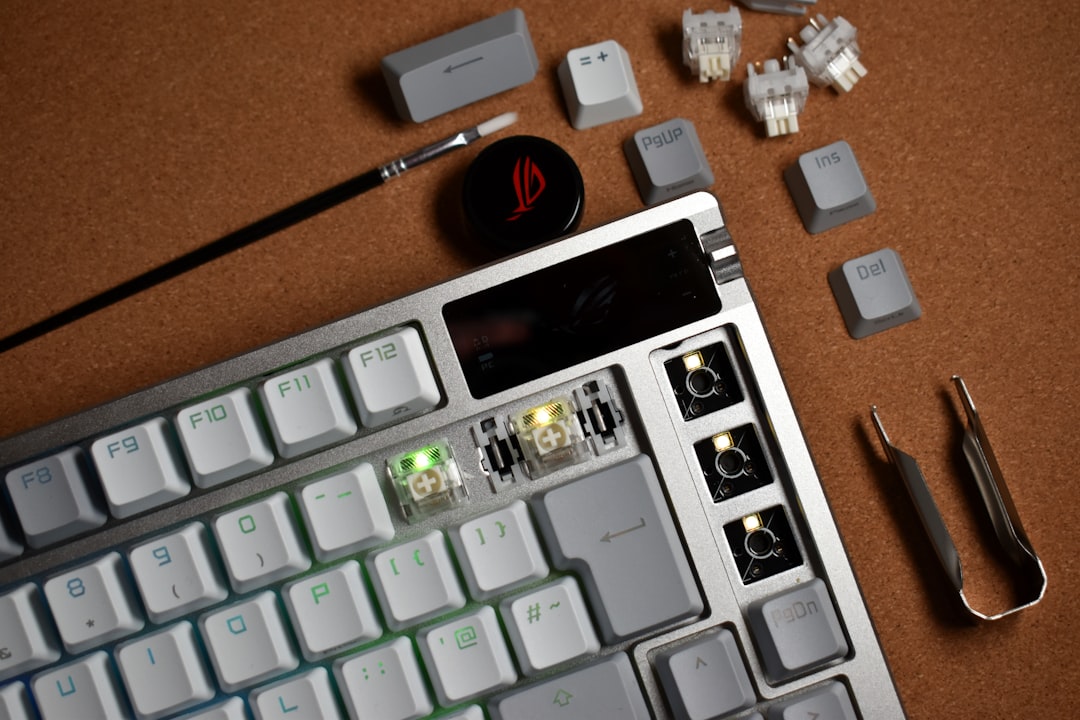
  • Broken Individual Keys: Did a keycap pop off and refuse to go back on? Is a switch completely dead? We can often replace individual keycaps, repair or replace damaged switches (especially common in mechanical keyboards), or fix the underlying mechanism that makes the key work.
  • Connectivity Problems (USB, Bluetooth): If your keyboard isn’t connecting to your computer, it could be a simple driver issue, a damaged USB cable, a faulty Bluetooth module, or even a ripped-off USB port. We can diagnose these connection woes, whether it’s soldering a new port onto a PCB or troubleshooting wireless pairing issues.

Types of Keyboards Serviced

At Laurel Phone Repair, our experienced technicians are equipped to handle a wide array of keyboard types. We understand that whether you’re a gamer, a professional, or a casual user, your keyboard is essential.

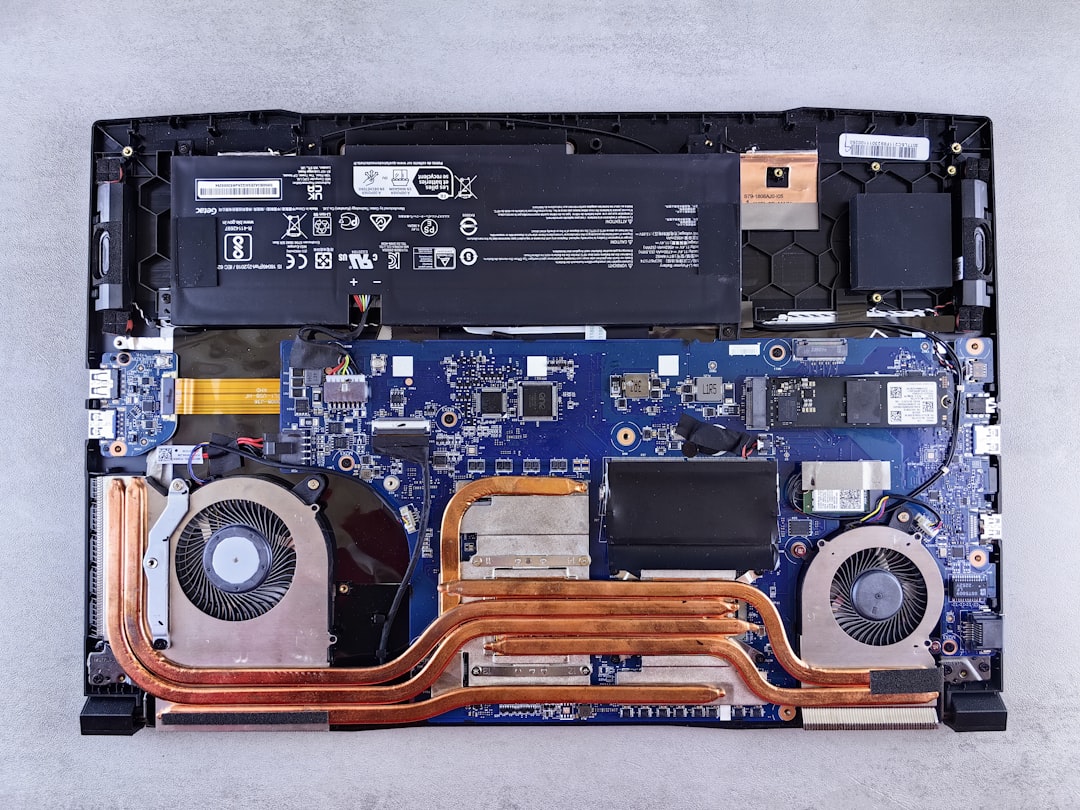
  • Laptop Keyboards: These are often the trickiest because they’re integrated into the laptop’s chassis. A single broken key can sometimes necessitate replacing the entire keyboard assembly. Our experts are skilled in disassembling laptops carefully to replace these built-in keyboards, ensuring your laptop feels good as new.
  • External Mechanical Keyboards: Beloved by enthusiasts for their tactile feedback and durability, mechanical keyboards can still suffer from individual switch failures, PCB issues, or connectivity problems. We can diagnose and repair these intricate components, often replacing specific switches or repairing circuit board damage.
  • Wireless Keyboards: From Bluetooth to 2.4GHz wireless models, these keyboards can face unique challenges related to battery issues, signal interference, or receiver malfunctions. We can troubleshoot these connectivity woes and ensure your wireless freedom is restored.

No matter the type of PC keyboard you have, if it’s broken, our trusted experts at Laurel Phone Repair can provide reliable repairs—fast. We’re committed to getting your device working perfectly again. Visit our Computer Repair page to learn more about how we can help.

The Repair Process: From Diagnosis to Done

Understanding what happens when you bring your ailing keyboard to a repair shop can ease your mind and help you feel more confident in the process. We pride ourselves on a transparent and efficient repair journey, ensuring you’re informed every step of the way.

technician examining a keyboard - computer keyboard repair shop near me

The Diagnostic Process

The first and most crucial step in any repair is a thorough diagnosis. Just like a doctor needs to understand your symptoms, we need to understand what’s ailing your keyboard.

When you bring your keyboard (or laptop with an integrated keyboard) to us, we’ll ask you to provide some key information:

  • Keyboard Make and Model: This helps us understand the specific components and design of your device.
  • Detailed Description of the Issue: Explain exactly what’s happening. Is it a single key? The whole board? Did something spill? The more details, the better we can pinpoint the problem.

At Laurel Phone Repair, we offer free diagnostics. This means our skilled technicians will carefully inspect your keyboard to identify the root cause of the malfunction without any upfront cost to you. This includes checking for physical damage, testing individual keys, examining internal circuitry, and assessing connectivity.

You can learn more about this initial assessment on our Device Diagnostics page.

Upfront Price Estimates and Low Price Guarantee

Once the diagnosis is complete, we’ll provide you with a comprehensive and upfront price estimate for the repair. We believe in complete transparency, so you’ll know the cost before any work begins. This estimate will detail the parts needed, labor charges, and any other associated fees.

We’re confident in our competitive pricing. While we don’t offer a specific dollar-amount price beat, we strive to keep our services affordable without sacrificing quality. Our goal is to provide exceptional value, making repair a more attractive option than replacement. We ensure our transparent pricing reflects our commitment to quality parts and expert service.

Turnaround Times

We know you rely on your keyboard, and downtime is frustrating. That’s why we prioritize speed and efficiency in our repairs.

  • Same-Day Service: For many common issues, like a single sticky key, minor cleaning, or simple part replacements, our experts can complete repairs as soon as the same day.
  • 24-Hour Repairs: Most diagnoses and common repairs that don’t require specialized parts are often completed within 24 hours of check-in. Our team works diligently to get your device back in your hands quickly.
  • Part-Ordering Delays: Sometimes, a repair requires a specific, less common part that we don’t have immediately in stock. In these instances, the repair might take an additional 1-2 days after the diagnostic, or potentially longer if the part needs to be special ordered from a manufacturer. We’ll always keep you informed about any potential delays due to parts availability.

Repair Warranties

We stand behind the quality of our work. That’s why every keyboard repair we perform comes with a 1-year limited warranty. This warranty covers the parts and labor associated with your repair, giving you peace of mind that your fixed keyboard will continue to perform as expected. If an issue related to the original repair arises within this period, simply bring it back, and we’ll make it right.

How to Find the Best Computer Keyboard Repair Shop Near Me

When your keyboard is on the fritz, finding a reliable computer keyboard repair shop near me is paramount. You want a service that’s not only close by but also trustworthy, efficient, and affordable. Here’s how to steer your options and what to look for, especially if you’re in the Laurel, Hattiesburg, Jackson, or Jones County, Mississippi areas.

Online Search Strategies

Your first step should always be a targeted online search. Using phrases like “computer keyboard repair shop near me” or “laptop keyboard repair Laurel MS” will give you a list of local businesses.

  • Using Map Searches: Google Maps is an invaluable tool. It will show you repair shops in your immediate vicinity, along with their operating hours, contact information, and, crucially, customer reviews. This visual approach helps you quickly identify the closest and most convenient options.
  • Reading Customer Reviews: Don’t skip this step! Reviews offer real-world insights into a shop’s service quality, turnaround times, and customer satisfaction. Look for patterns in feedback: are people consistently praising their speed, professionalism, or fair pricing? Conversely, be wary of shops with numerous negative reviews about unresolved issues or poor communication.
  • Checking for Certifications: While not always explicitly listed for keyboard repairs, a shop that highlights certifications for major brands (like Apple, Samsung, or Google) often indicates a higher standard of technical expertise and access to quality parts. This suggests a commitment to professional training and adherence to industry best practices.
  • Evaluating Local Options: Specifically for our communities in Laurel, Hattiesburg, Jackson, and Jones County, Mississippi, we encourage you to look for businesses with a strong local presence and a reputation for serving the community well. A local business often means more personalized service and a vested interest in customer satisfaction.

What to Look for in a Quality Repair Service

Once you have a list of potential repair shops, it’s time to evaluate them based on key criteria that define a truly quality service.

  • Experienced Technicians: This is non-negotiable. You want someone who has seen it all, from liquid spills to intricate circuit board repairs. Our technicians at Laurel Phone Repair are not only experienced but also undergo meticulous training programs to stay ahead of evolving technology. They are proven professionals, equipped with the tools and knowledge to tackle a wide range of keyboard issues.
  • Transparent Pricing: No one likes hidden fees. A reputable shop will offer free diagnostics and provide a clear, upfront estimate before any work begins. This ensures you know exactly what you’re paying for. Our Pricing structure is designed to be as straightforward as possible, reflecting our commitment to honesty and fairness.
  • Use of Quality Parts: The longevity of your repair often depends on the quality of the replacement parts. A good shop will use high-quality components, and ideally, offer transparent part options, such as OEM (Original Equipment Manufacturer) or high-grade aftermarket parts, explaining the differences and benefits.
  • Strong Warranty Policies: A shop that stands behind its work offers a warranty. As mentioned, we provide a 1-year limited warranty on our keyboard repairs, giving you confidence in the durability and effectiveness of our service. This shows our commitment to ensuring your satisfaction long after you leave our shop.
  • Excellent Customer Service: A friendly, communicative staff can make all the difference. Look for shops that prioritize customer service, offering clear explanations, regular updates, and a willingness to answer all your questions. We focus on helpful communication and a professional approach to make your repair experience as smooth as possible.

Exploring Different Repair Models

How you get your keyboard repaired can vary based on the shop’s model and your personal convenience.

  • Walk-In Stores: Many repair shops operate on a walk-in basis, allowing you to drop off your device without an appointment. This is often the quickest way to get a diagnostic and start the repair process. We welcome walk-ins at our locations in Laurel, Hattiesburg, Jackson, and Jones County.
  • Schedule a Repair Online: For those who prefer planning ahead, many shops offer online scheduling. This can save you time and ensure a technician is ready for your specific issue. You can easily schedule a repair online with Laurel Phone Repair at your convenience.
  • In-Store Diagnostics and Repairs: The most common model involves bringing your keyboard directly to the shop. Here, technicians perform the diagnostics and all repair work on-site, providing a controlled environment for intricate repairs.

Questions to ask a potential computer keyboard repair shop near me

Before committing to a repair, asking a few key questions can help you gauge the shop’s expertise and policies:

  • Do you offer free estimates? This is a crucial indicator of transparency. A reputable shop should be willing to diagnose the problem and provide a cost breakdown without an initial charge.
  • What is your warranty? Understand the length and scope of their warranty. Does it cover parts and labor? For how long? Our 1-year limited warranty offers peace of mind.
  • How long will the repair take? Get a realistic timeframe. While many simple repairs are done quickly, complex issues or part orders can extend the duration. We aim for same-day or 24-hour turnaround for most common repairs.
  • Do you have experience with my keyboard brand/type? While most shops can handle general repairs, specific brands or niche keyboard types (like custom mechanical boards) might require specialized knowledge. Our experienced technicians are familiar with a broad range of keyboard brands and types.

Frequently Asked Questions About Keyboard Repair

We often hear similar questions from customers seeking a computer keyboard repair shop near me. Let’s address some of the most common concerns to help you make an informed decision about your keyboard repair.

Is it cheaper to repair or replace a computer keyboard?

This is a common dilemma, and the answer often depends on several factors:

  • Cost-Benefit Analysis: For external keyboards, especially basic membrane models, replacement might sometimes be cheaper or nearly equivalent to repair costs. However, for higher-end external mechanical keyboards, where a new unit can cost upwards of $100-$300+, repairing a few switches or a PCB issue is almost always more cost-effective.
  • Laptop Keyboard vs. External: Laptop keyboards are integrated, meaning their replacement often involves significant labor to disassemble and reassemble the laptop. A new laptop keyboard assembly can range from $50 to $150+, plus labor. In these cases, repair is almost always the more affordable solution compared to buying a new laptop.
  • High-End Mechanical Keyboards: If you own a premium mechanical keyboard with specific switches or custom features, repair is definitely the way to go. Replacing a few faulty switches or a damaged USB port is far more economical than buying a brand-new, expensive enthusiast keyboard.
  • Environmental Impact: Beyond cost, consider the environmental impact. Repairing your current keyboard reduces electronic waste and extends the life of your device, which is a more sustainable choice.

Getting a free diagnostic and upfront estimate from a trusted computer keyboard repair shop near me like Laurel Phone Repair will give you the precise cost comparison for your specific situation. Don’t risk ruining your favorite electronics by attempting repairs yourself when professional, affordable help is available.

What is the average turnaround time for a computer keyboard repair shop near me?

The speed of repair can vary, but reputable shops prioritize getting your device back to you quickly. Here’s a general breakdown:

  • Varies by Issue: Simple fixes, like cleaning sticky keys or replacing a single keycap, are much faster than complex issues involving liquid damage, circuit board repair, or a full laptop keyboard replacement.
  • Simple Fixes Within Hours: For straightforward problems, some services can indeed be completed within just a few hours. This is especially true for external keyboards with readily available parts.
  • Same-Day Service is Common: For the majority of common keyboard malfunctions, our experts at Laurel Phone Repair aim for same-day service. Many repairs are completed and ready for pickup by the end of the day.
  • Diagnostics Take 2-3 Days in Some Cases: While we strive for quick diagnostics, some complex issues might require more in-depth testing. In such cases, diagnostics (finding the issue) might take 2-3 days, with the repair typically taking an additional 1-2 days after the diagnostic is approved. Most diagnoses and common repairs are still completed within 24 hours of check-in.
  • Part Orders Add Time: If your repair requires a specialized part that isn’t immediately in stock, there might be a delay while we wait for the part to arrive. In rare cases, for very specific or obscure components, this could extend the repair time. We always keep you informed about such situations.

We understand the urgency and will keep you updated on the status of your repair every step of the way.

Do repair shops fix both mechanical and membrane keyboards?

Yes, absolutely! Most professional repair shops, including Laurel Phone Repair, are equipped to service a wide range of keyboard types, including both mechanical and membrane keyboards, whether they are external or integrated into a laptop.

  • Membrane Keyboards: These are common in many standard external keyboards and most laptops. Repairs often involve cleaning beneath the keys, addressing liquid damage to the underlying membrane layers, or replacing the entire keyboard assembly in a laptop. Our technicians are adept at these precise operations.
  • Mechanical Keyboards: Known for their individual switches under each keycap, mechanical keyboards offer a different repair challenge. We can diagnose and replace individual faulty switches, repair damaged PCB (Printed Circuit Board) traces, or address issues with stabilizers and keycaps. Our expertise extends to all brands and types of keyboards, ensuring that even your high-performance gaming or custom mechanical keyboard can be restored.
  • Laptop Keyboard Replacements: As discussed, built-in laptop keyboards are a common repair. We have the tools and experience to carefully replace these assemblies, ensuring your laptop functions perfectly.

For more detailed information about our comprehensive computer repair services, including how we handle various keyboard types, please visit our Computer Repair page. We’re here to help you with any keyboard issue, big or small.

Conclusion: Get Your Keys Clacking Again

A malfunctioning keyboard doesn’t have to lead to frustration or the expense of a new device. As we’ve explored, many common keyboard issues—from sticky keys and liquid damage to connectivity problems and broken individual switches—are highly repairable. Repairing your keyboard is not only often more affordable than replacement, especially for integrated laptop keyboards or high-end mechanical models, but it also contributes positively to reducing electronic waste.

Choosing a reputable computer keyboard repair shop near me is key to a successful repair. Look for shops that offer transparent pricing, free diagnostics, and a solid warranty on their work. Experienced technicians who communicate clearly and use quality parts are essential for a lasting fix.

At Laurel Phone Repair, we’re proud to be your trusted local experts for computer keyboard repair in Laurel, Hattiesburg, Jackson, and Jones County, Mississippi. Our commitment to experienced technicians, transparent part options, high customer satisfaction, and a 1-year limited warranty means you can confidently bring us your keyboard issues. We’re here to help you get your keys clacking smoothly again, quickly and affordably.

Don’t let a broken keyboard slow you down. Schedule your computer repair today and let us bring your device back to life!

Honor 8X Repair Costs: Navigating Screen Replacement Prices and Options

Honor 8X Screen Replacement Price 2025: Smart Choices

Why Understanding Honor 8X Screen Replacement Costs Matters

The honor 8x screen replacement price varies significantly depending on where you get the part and who does the repair. Here’s a quick overview:

Quick Price Overview:

  • DIY Parts Only: $4.00 – $55.76 (depending on quality)
  • Professional Repair (Estimated): $50 – $120 (parts + labor)
  • Key Price Factors: Part quality (OEM vs. aftermarket), shipping, and installation method

If you’ve cracked your Honor 8X screen, you’re facing a tough decision. Should you fix it yourself? Is the cheapest part online worth it? What’s the real difference between a $5 and a $50 screen?

The mobile repair market is booming, which means more options but also more confusion about pricing and quality. The truth is simple: understanding what drives the honor 8x screen replacement price helps you make a smart choice that balances cost, quality, and convenience. Knowing the difference between OEM and aftermarket screens, factoring in hidden costs, and deciding between DIY and professional installation all impact your final bill.

With over 20 years in electronics repair, I’m Ralph Harris. I’ve helped countless people steer repair decisions. This guide breaks down everything you need to know to make an informed choice.

Infographic showing Honor 8X screen replacement price breakdown: DIY parts range from $4-$56, professional installation adds $15-$65 in labor, key factors include part quality tier (OEM vs aftermarket vs high-copy), shipping and import fees can add $25-$40, and total professional repair typically costs $50-$120 - honor 8x screen replacement price infographic

Understanding the Average Honor 8X Screen Replacement Price

When your Honor 8X screen shatters, the first question is, “How much will this cost?” The average honor 8x screen replacement price is a range influenced by part quality and whether you choose a DIY or professional repair.

The growing global mobile repair market means more parts are available, but also wider price variations. Independent repair shops like ours handle over 45% of screen replacements, offering a trusted, affordable alternative to manufacturer services.

For the Honor 8X, parts are readily available. Wholesale B2B prices for screens can be as low as $4.00-$5.00 for bulk orders, which sets the baseline cost for the component. For individual buyers, prices are higher. Online retailers like eTech Parts or ETScreen.com might sell a screen for $35-$50. On marketplaces like eBay, you might find a replacement screen assembly for around $40-$55. These prices are typically for the part only, sometimes with a basic tool kit.

Professional installation includes a labor charge on top of the part cost, covering the technician’s expertise, time, and a warranty. Based on market rates, a professional Honor 8X screen replacement in our shops in Laurel, Hattiesburg, Jackson, or Jones County, Mississippi, typically falls within the $50 to $120 range. This includes a quality screen and expert installation.

Here’s a quick comparison:

Repair Option DIY Part Cost Range (USD) Estimated Professional Repair Cost (USD)
Honor 8X Screen Replacement $4.00 – $55.76 $50 – $120

This table shows that while DIY seems cheaper, a professional repair provides peace of mind, expertise, and a warranty.

Different Quality Tiers and How They Affect Price

Not all replacement screens are equal, and understanding quality tiers is key to navigating the honor 8x screen replacement price.

  1. OEM (Original Equipment Manufacturer) Quality: These screens meet the original manufacturer’s specifications for brightness, color, and touch response. While true OEM parts are rare outside of authorized centers, high-quality aftermarket screens can be nearly identical. They are the most expensive but offer the best user experience.
  2. High-Quality Aftermarket: Produced by third-party manufacturers, these screens aim to replicate the OEM experience at a lower cost. They offer a great balance of price and performance and are used by many reputable repair shops, including ours.
  3. Standard Aftermarket (or “Copy”): These are the most budget-friendly options but may use lower-grade components. You might notice differences in color, brightness, or touch sensitivity. They function, but the user experience may be compromised.

The price difference between these tiers can be substantial. A professional service will typically use high-quality aftermarket or OEM-grade parts and will be transparent about your options.

The Cost of DIY Repair Kits

For the technically inclined, a DIY repair kit can seem like a way to save money on the honor 8x screen replacement price. These kits bundle the screen with basic tools.

A typical kit includes:

  • LCD/Digitizer Assembly: The complete screen unit.
  • Basic Tool Kit: Plastic pry tools, small screwdrivers, a suction cup, and adhesive strips.

The price for these kits is usually $40-$60, depending on the screen’s quality. While the upfront cost is lower than a professional repair, there’s a risk of damaging other components in your phone, which could lead to more expensive repairs. We recommend caution with DIY repairs unless you are experienced.

Key Factors That Influence Your Final Repair Cost

technician's hands working on a phone screen - honor 8x screen replacement price

The true honor 8x screen replacement price isn’t just the cost of the screen. Several factors influence the final bill, including part quality, installation method, and potential hidden fees.

OEM vs. Aftermarket: A Critical Choice for your Honor 8x screen replacement price

Your choice between OEM-quality and aftermarket parts is one of the biggest factors affecting the honor 8x screen replacement price.

  • Original Equipment Manufacturer (OEM) Quality: These parts match the original screen’s specifications for color, brightness, and touch response. Choosing an OEM-quality screen ensures your phone will look and feel like new.

  • Aftermarket Affordability: Made by third-party manufacturers, these screens come in various quality grades. High-quality aftermarket screens offer a great balance of cost and performance, while lower-quality screens are the cheapest but may compromise on display vibrancy and durability.

At Laurel Phone Repair, we offer transparent part options. We’ll discuss the different quality tiers for your Honor 8X, explaining the pros and cons so you can choose based on your budget and needs. Learn more about our process and parts at More info about our Repair process.

Professional Installation vs. DIY: Weighing the Pros and Cons

Who installs the screen significantly influences the final honor 8x screen replacement price and the repair’s success.

Professional Installation:

  • Expertise & Warranty: You pay for a technician’s skill and receive a warranty on both the part and labor. This protects you if something goes wrong.
  • Reduced Risk: Experienced technicians know how to handle delicate components, minimizing the risk of further damage.
  • Convenience: A professional repair is quick and hassle-free. Drop off your phone, and we handle the rest.

DIY (Do-It-Yourself) Repair:

  • No Labor Costs: You only pay for the part and tools, which is the main financial appeal.
  • High Risk of Damage: A wrong move can damage the motherboard, battery, or other components, leading to a more expensive problem or a dead phone.
  • No Labor Warranty: If you break something, you’re responsible for the cost.
  • Time Commitment: A DIY repair can take several hours of research and careful work.

While DIY can be rewarding, the risk of costly errors makes professional installation a safer choice for most people. You can explore More info about our Services to see how we can help.

Hidden Costs: Shipping, Tools, and Import Fees

When calculating the honor 8x screen replacement price for a DIY project, don’t forget the hidden costs.

  • Shipping Costs: The price listed online rarely includes shipping, which can add a significant amount, especially for international orders. An international shipment could add $30 or more to your total.
  • Import Duties: If you order from another country, you may have to pay import fees or customs duties to the shipping carrier before delivery. These fees are unpredictable and add an unexpected surcharge.
  • Tools and Adhesive: If your part doesn’t come with a tool kit, you’ll need to buy screwdrivers, pry tools, and special adhesive to seal the new screen, adding to the overall cost.

When comparing prices, remember to add these potential costs to the DIY option. The price gap between DIY and a professional service often narrows once you factor everything in.

Where to Find Reliable Honor 8X Screen Replacements

computer screen showing an online store for phone parts - honor 8x screen replacement price

Finding a reliable Honor 8X screen replacement is crucial. You can search online suppliers or visit local repair shops, but it’s important to know what to look for.

Online Parts Suppliers and Marketplaces

The internet offers a vast selection of phone parts, with competitive pricing for your Honor 8X screen.

  • Wholesale and Retail: B2B suppliers offer the lowest per-unit prices (as low as $4-$5) for bulk orders. For individuals, online retailers like eTech Parts and ETScreen.com sell screens for around $35-$50, while marketplaces like eBay also have numerous listings.
  • Vetting Sellers: When buying online, always check the seller’s feedback and reviews. Look for high positive feedback scores and read comments about product quality and shipping.
  • Tips for Buying Online:
    • Read descriptions carefully to ensure it’s the correct model (Honor 8X JSN-L21, etc.) and a full assembly.
    • Look for quality indicators like contrast ratios or detailed specifications.
    • Check the seller’s warranty and return policy.
    • Factor in all costs, including shipping and potential import fees.

Online shopping offers great prices, but it requires careful research to avoid low-quality parts.

The Value of Independent Repair Shops

For many, an independent repair shop is the most reliable and stress-free option for an honor 8x screen replacement price. Local businesses like our shops in Laurel, Hattiesburg, Jackson, and Jones County, Mississippi, offer a complete solution.

  • Expert Installation: Our experienced technicians have the proper tools and training to install screens with precision, minimizing risk.
  • Post-Repair Support & Warranty: We provide ongoing support and a warranty covering both the part and our labor. This gives you peace of mind that your investment is protected.
  • Convenience: A local repair is fast and convenient. You can often get your phone back the same day, avoiding the hassle of ordering parts and attempting a complex repair yourself.
  • Transparent Options: We believe in transparency and will discuss the different screen quality tiers available for your Honor 8X, helping you find a balance between cost and performance.

Independent shops account for over 45% of screen replacements globally, highlighting their value and reliability. The cost of professional service includes expertise, warranty, and convenience, making it a worthwhile investment. To see our commitment to quality, Check our Pricing.

Frequently Asked Questions about Honor 8X Screen Repair

We often get asked similar questions about Honor 8X screen replacements. Here are the most common ones with our expert answers.

What should I look for in a warranty when comparing the honor 8x screen replacement price?

When comparing the honor 8x screen replacement price, a good warranty is a key indicator of quality. It should cover manufacturing defects like touch issues or dead pixels for at least one year.

It’s important to clarify what the warranty covers:

  • Part-only warranty: Common with online purchases, this covers a defective part but not any damage that occurs during a DIY installation.
  • Part and labor warranty: Offered by professional repair services like ours, this is the most comprehensive option. It covers both the replacement part and the installation, protecting you from defects and repair-related issues.

A strong warranty reflects the quality of the parts and the service, adding significant value to your repair.

How does the total repair cost compare to buying a new phone?

This is a practical question, especially for an older model like the Honor 8X. A professional screen replacement, typically costing between $50 and $120, is almost always a fraction of the cost of a new smartphone.

Beyond the financial savings, repairing your Honor 8X is an environmentally friendly option. Extending the life of your device reduces electronic waste and the demand for new manufacturing. If your Honor 8X is otherwise in good working condition, a screen replacement is a smart, sustainable investment.

Are there different screen qualities available?

Yes, absolutely. This is a crucial factor that influences both the honor 8x screen replacement price and your phone’s performance after repair. The main tiers are:

  • OEM (Original Equipment Manufacturer) Quality: Matches the original screen’s specifications for the best performance.
  • High-Quality Aftermarket: Offers a great balance of quality and cost, closely mimicking OEM performance.
  • Standard Aftermarket (or “Copy”): The most budget-friendly option, but may have noticeable compromises in display quality and touch response.

At Laurel Phone Repair, we are transparent about these options and help you choose the best screen for your needs and budget.

Conclusion

Navigating the honor 8x screen replacement price is easier when you understand the key factors. We’ve covered the cost of parts (from $4 wholesale to over $55 retail) and professional repairs (typically $50-$120). We’ve also detailed the differences between OEM and aftermarket screens, the pros and cons of DIY vs. professional installation, and hidden costs like shipping and import fees that can affect your final bill.

Choosing to repair your Honor 8X is not just a cost-effective decision compared to buying a new phone; it’s also a sustainable choice that reduces electronic waste.

For a transparent, reliable, and expertly handled repair, a professional service is your best bet. At Laurel Phone Repair, our experienced technicians use quality parts and provide warranties on both parts and labor. We’re ready to give your Honor 8X a new lease on life. Get your free screen repair estimate today!

Chevy Volt Battery Replacement: What You Need to Know Before You Start

Chevy Volt Battery Replacement: Crucial Tips 2025

What You Need to Know About Replacing Your Chevy Volt’s Battery

Chevy Volt battery replacement is a significant decision that most owners will face at some point during their vehicle’s lifetime. Whether you’re experiencing reduced electric range, dashboard warning lights, or sluggish performance, understanding your options can save you thousands of dollars and help you make the right choice for your situation.

Quick Answer: Key Facts About Chevy Volt Battery Replacement

  • Average Lifespan: 8-10 years or 100,000-150,000 miles
  • New Battery Cost: $6,000-$9,000 (varies by model year)
  • Remanufactured Battery Cost: $4,500-$8,000
  • Used Battery Cost: $1,500-$3,000
  • Labor Cost: $1,000-$2,000 (professional installation)
  • Warranty Coverage: 8 years/100,000 miles (standard); 10 years/150,000 miles (PZEV states)
  • Replacement Time: 1 day (professional) or 4-5+ hours (DIY)
  • Main Warning Signs: Reduced electric range, dashboard alerts, frequent engine startups

The good news? Chevy Volt batteries are known for their durability and typically only need replacement after severe damage or normal end-of-life degradation. Many owners report their batteries lasting well beyond 100,000 miles with proper care.

I’m Ralph Harris, and with over 20 years of experience in electronics repair and technical diagnostics, I’ve guided countless customers through complex battery replacement decisions. While Chevy Volt battery replacement involves high-voltage systems beyond typical consumer electronics, the fundamental principles of battery health, cost analysis, and repair options remain the same across all devices.

Infographic showing signs of Chevy Volt battery failure including reduced electric range bar graph from 40 miles to 15 miles, dashboard warning light icon, average lifespan timeline of 8-10 years, and cost breakdown showing new batteries at $9000, remanufactured at $4500-8000, and used at $1500 plus with warranty coverage periods illustrated - chevy volt battery replacement infographic 4_facts_emoji_light-gradient

Understanding Your Chevy Volt’s Battery Health

The Chevrolet Volt is a unique plug-in hybrid electric vehicle, meaning it relies on two distinct battery systems: a large high-voltage (HV) battery that powers the electric motor, and a smaller 12V auxiliary battery that functions much like a traditional car battery, powering the vehicle’s accessories and starting the car’s internal combustion engine (ICE) when needed. When we talk about Chevy Volt battery replacement, we’re typically referring to the larger, more complex high-voltage battery pack. However, it’s worth noting that the 12V battery can also cause starting or electrical issues, and its lifespan is generally shorter, typically 3-5 years, compared to the HV battery.

The HV battery in your Chevy Volt is designed for longevity. Hybrid high-voltage batteries, like the one in your Volt, typically last, on average, about 8 to 10 years or between 100,000 to 150,000 miles. This impressive lifespan is significantly longer than the 3-5 years you might expect from a conventional gas-powered vehicle’s battery. Factors such as driving style, climate, and how well you maintain your vehicle can influence how long your battery performs optimally. For example, a Volt driven primarily in extreme heat or cold, or with very aggressive driving habits, might see its battery degrade faster.

Battery degradation is a natural process where the battery’s capacity to hold a charge diminishes over time and use. This degradation directly impacts your Volt’s performance and electric range.

Chevy Volt dashboard showing a battery-related warning message - chevy volt battery replacement

Signs Your High-Voltage Battery is Failing

Knowing the signs of a failing high-voltage battery can help you address issues promptly. While Chevy Volt batteries are known for standing the test of time, replacement becomes necessary if the battery is severely damaged (e.g., in a collision) or experiences significant degradation. Here are the key indicators that your Volt’s HV battery might need attention:

  • Reduced All-Electric Range (AER): This is often the most noticeable sign. If your Volt used to get 40 miles of electric range, but now you’re consistently seeing much less (e.g., 25 miles or less) on a full charge, it’s a strong indicator of degradation. The car’s computer might still show a higher estimated range, but the actual miles you can drive on electricity will be lower.
  • Sluggish Acceleration: A degraded battery may struggle to deliver the power needed for brisk acceleration, making your Volt feel less responsive than it once was.
  • Dashboard Warning Lights: Your Volt’s sophisticated diagnostic system will often alert you to battery issues. Look out for generic check engine lights, specific “Service High Voltage Charging System” messages, or other electrical warning messages on your dashboard. These warnings should always prompt an immediate service check.
  • Frequent or Uncommanded Engine Startup: The Chevy Volt’s design prioritizes electric driving. If your internal combustion engine (ICE) is starting up more frequently, at lower speeds, or when the battery still shows a decent charge, it could mean the HV battery isn’t performing as expected. This might manifest as “unusual switches between electric and gas-powered driving.”
  • Inability to Hold a Charge: If your Volt struggles to fully charge or rapidly loses its charge even when parked, this points to a significant issue with the battery’s health.

It’s important to differentiate between issues with the high-voltage battery and the 12V auxiliary battery. A weak 12V battery can cause a variety of electrical anomalies, including strange warning messages or the car not starting. We recommend having your 12V battery tested if you experience starting issues or general electrical malfunctions, as these are often simpler and less costly to resolve than HV battery problems.

How Battery Degradation Affects Performance

As your Chevy Volt’s high-voltage battery ages and degrades, its ability to store and deliver energy diminishes. This has several direct impacts on your vehicle’s performance:

  • Gradual Range Loss: The most significant effect is a continuous reduction in your all-electric range. Over time, you’ll find yourself relying on the gasoline engine more often, even for shorter commutes that once were fully electric. Old or degraded batteries cause the hybrid system to work harder, leading to poor mileage and increased gasoline consumption.
  • Reduced Power Output: The battery may not be able to provide the peak power required by the electric motor, leading to a noticeable decrease in acceleration and overall responsiveness. Your Volt might feel “sluggish” or less potent, especially when demanding full power.
  • Strain on Other Vehicle Systems: A struggling battery can put additional stress on other components of your vehicle’s hybrid system. The gasoline engine might run more frequently or at higher loads to compensate for the battery’s shortcomings, potentially leading to increased wear and tear or even costly repairs on other components if ignored.
  • Impact of Climate and Driving Style: The rate of battery degradation can be influenced by external factors. Extreme temperatures, both hot and cold, can accelerate battery aging. Similarly, aggressive driving with frequent hard accelerations and decelerations can put more strain on the battery than smooth, moderate driving. Conversely, a well-maintained Volt, driven with care and in temperate climates, often sees its battery exceed average lifespan estimates.

The Chevy Volt Battery Replacement Process: Options and Costs

Deciding on a Chevy Volt battery replacement is a major decision, primarily due to the specialized nature of hybrid vehicle high-voltage systems and the associated costs. It’s not a job for the faint of heart or the inexperienced. Working with high-voltage systems carries significant dangers, including the risk of severe injury or even death. For this reason, we cannot stress enough the importance of certified technicians who are specifically trained in handling these complex and dangerous components. They understand the necessary safety protocols, such as performing high-voltage disabling procedures and wearing appropriate Personal Protection Equipment (PPE).

When considering a Chevy Volt battery replacement, you generally have three main avenues, each with its own benefits and drawbacks regarding cost, warranty, and required expertise:

Replacement Option Average Cost (Parts + Labor) Warranty Typically Offered Expertise Required Pros Cons
Dealership $7,000 – $12,000+ OEM (8yr/100k mi) Certified, specialized OEM parts, expert technicians, comprehensive diagnostics, often covered by original warranty Highest cost, slower service often, may push for full replacement vs. repair
Aftermarket/Specialist $5,000 – $9,000 1-3 years (unlimited mileage) Trained hybrid/EV technicians Lower cost than dealership, often quicker, mobile installation options, remanufactured batteries available Warranty can vary, quality of parts/service varies by provider
DIY (Used Battery) $1,500 – $3,500+ None to limited (from seller) Advanced electrical/mechanical, specialized tools, high risk Lowest parts cost, sense of accomplishment, educational Extremely high risk, no official warranty, specialized tools/knowledge, potential for serious injury, no support

Where to Get Your Battery Replaced

For a crucial service like Chevy Volt battery replacement, where you choose to have the work done is as important as the decision to replace it.

  • Chevrolet Dealerships: These are the official service centers. They use OEM (Original Equipment Manufacturer) parts and their technicians are specifically trained by GM. If your Volt is still under its 8-year/100,000-mile warranty, the dealership is often your first and only stop, as the replacement may be covered.
  • Certified EV Repair Shops and Independent Hybrid/EV Specialists: Across Mississippi, you can find independent shops that specialize in hybrid and electric vehicles. These establishments often offer more competitive pricing than dealerships, sometimes using remanufactured batteries that meet or exceed OEM standards. We recommend seeking out shops with technicians specifically trained and certified in high-voltage systems.
  • Mobile Installation Services: Some specialized providers offer mobile installation, where technicians come directly to your home or workplace. This option offers unparalleled convenience, saving you the hassle of towing your vehicle or arranging transportation.

While we at Laurel Phone Repair specialize in consumer electronics, we understand the critical need for expert, accessible vehicle repair services in communities like Laurel, Hattiesburg, Jackson, and across Jones County, Mississippi. For specialized services such as Chevy Volt battery replacement, we advise seeking out certified automotive professionals who are equipped to handle these high-voltage systems safely and effectively.

Understanding the Cost of a Chevy Volt Battery Replacement

The cost of a Chevy Volt battery replacement can vary significantly based on several factors, including the model year of your Volt, whether you opt for a new, remanufactured, or used battery, and where you have the service performed.

  • Average New Battery Cost: A new Chevy Volt battery can range from around $6,000 to $9,000 on average. For instance, replacement packs for 2016-2019/2020 Chevy Volts might cost around $7,989 (original price) to $9,999.
  • Remanufactured Battery Costs: These are often a more budget-friendly option, typically ranging from $4,500 to $8,000. Remanufactured batteries are reconditioned to meet specific performance standards and often come with a warranty, such as an 18-month or 36-month warranty. For example, 2011-2015 remanufactured hybrid batteries could be found for around $4,499.
  • Used Battery Costs: If you’re considering a used battery, perhaps from a salvage yard, costs can drop significantly, potentially starting from $1,500 or more. However, the condition and remaining lifespan of used batteries can be highly variable, and they typically come with little to no warranty. One individual reported purchasing a used 2013 pack for $1,500 plus tax.
  • Labor Costs: Beyond the battery itself, you’ll need to factor in labor. Professional installation, including support, typically costs between $1,195 and $2,195. Even just removing and replacing the pack (R&R) can cost over $1,000 at a dealership.
  • Variation by Model Year: The cost can definitely vary by model year. Early models (Gen 1, like 2011-2015) might have different pricing than later models (Gen 2, 2016-2019/2020) due to differences in battery capacity and availability. For example, a 2011-2012 hybrid battery might be around $5,889, while a 2016-2020 battery could be $6,089 (sale prices).

We believe in transparent pricing for all our services, and we encourage you to seek clear, upfront quotes for your Chevy Volt battery replacement to avoid any surprises.

Sourcing a Replacement Battery

Finding the right replacement battery is a critical step in the Chevy Volt battery replacement process. Your options generally fall into three categories:

  • New OEM Parts from Dealers: This is the most straightforward option if you want a brand-new battery directly from Chevrolet. Dealerships will source the correct OEM part for your specific model year. While this is typically the most expensive route, it ensures compatibility and comes with the manufacturer’s warranty.
  • Remanufactured Batteries with Warranties: Several companies specialize in remanufacturing hybrid batteries. These batteries are often rebuilt with new or reconditioned cells and components, then tested to ensure they meet or exceed OEM standards. They are a popular choice as they offer a significant cost saving over new OEM batteries while still providing a warranty (e.g., 18 to 36 months).
  • Used Batteries from Salvage Yards: For those looking for the lowest cost, used batteries can be sourced from salvage yards. Websites like www.car-part.com can help you locate used batteries. When considering this option, it’s crucial to be cautious. Inspect the battery’s physical condition and, if possible, check its voltage readings. Be aware that used batteries may have an unknown history and often come with no warranty or a very limited one. One owner found a 2013 pack for $1,500, but it had a crunched electrical plug, requiring negotiation.

Warranty, DIY, and Aftercare

Once your Chevy Volt battery replacement is complete, or as you consider the options, understanding warranty coverage, the feasibility of a DIY approach, and how to care for your new or existing battery are all vital.

Technician wearing high-voltage safety gloves working on a Chevy Volt battery pack - chevy volt battery replacement

Chevy Volt Battery Warranty Coverage

Chevrolet stands behind its Volt batteries with a robust warranty, reflecting their confidence in the technology.

  • Standard 8-Year/100,000-Mile Warranty: The Chevy Volt comes with Limited Warranty coverage for its high-voltage battery. This coverage typically lasts for eight years or until you’ve driven 100,000 miles in your Volt, whichever comes first. This warranty covers battery replacements and repairs due to defects in materials or workmanship.
  • PZEV State Warranties: While not explicitly mentioned in our specific research for the Volt, some vehicles sold in Partial Zero Emission Vehicle (PZEV) states may have extended battery warranties, sometimes up to 10 years or 150,000 miles. It’s always wise to check your specific vehicle’s documentation or contact a Chevrolet dealership to confirm your coverage, especially if you purchased your Volt in a PZEV state.
  • What’s Covered: Generally, the warranty covers significant degradation that impacts performance, manufacturing defects, or failures of battery components. It’s designed to protect you from premature battery failure.

We always recommend checking your vehicle’s warranty status before pursuing any major repair, as it could save you a substantial amount of money.

DIY Chevy Volt Battery Replacement: Is It Worth It?

A Chevy Volt battery replacement is one of the most complex and dangerous automotive repairs you can undertake. While some dedicated DIY enthusiasts have successfully replaced their Volt batteries at home, we generally advise against it for most owners due to the inherent risks and specialized knowledge required.

  • Complexity and Risks: The Volt’s high-voltage battery operates at hundreds of volts, which can be lethal if handled improperly. There’s a significant risk of electric shock, fire, and damage to the vehicle. The process involves disabling the high-voltage system, disconnecting numerous electrical connectors and coolant lines, and handling a very heavy and cumbersome battery pack. This is why technicians wear specialized Personal Protection Equipment (PPE) and follow strict safety guidelines, as outlined in official documents like the Official GM Service Bulletin for reference for the Chevy Bolt EV battery exchange process (which shares similar high-voltage safety principles).
  • Required Tools: You’ll need more than just a basic wrench set. High-lift jacks (to get the car at least 20-21 inches off the ground), sturdy jack stands, furniture dollies (to maneuver the heavy battery pack, which can weigh several hundred pounds), and specialized diagnostic tools (like a GDS2 setup) are often necessary.
  • Swapping the Battery Energy Control Module (BECM): One of the most intricate parts of a DIY replacement, particularly with used batteries, is swapping the Battery Energy Control Module (BECM) and the four module-level slave controllers from your old battery pack to the “new” used one. This crucial step is what allows you to avoid a trip to the dealer for programming, as the car’s computer will then recognize the “new” pack as its original.
  • Bleeding the Coolant System: The high-voltage battery has its own dedicated liquid cooling system. After replacement, the coolant system must be properly bled to remove air pockets, which can be a time-consuming process involving specific procedures to ensure efficient cooling. The TSB for the Bolt EV emphasizes the “Vac-N-Fill” method for battery coolant replacement due to recurring issues with low coolant levels post-repair, indicating the precision required.
  • No Dealer Programming Needed (if done correctly): The good news for DIYers is that if you successfully swap the BECM and slave controllers, the car should recognize the new pack without needing dealer programming or bleeding the pack’s cooling system. This can save significant costs. However, if this step is not done correctly, you will likely need professional intervention.

Given the extreme safety hazards, specialized tools, and technical expertise required, we strongly recommend entrusting Chevy Volt battery replacement to certified professionals in Laurel, Hattiesburg, Jackson, or Jones County.

Battery Disposal and Maintenance Tips

Proper disposal of an old high-voltage battery is not just about convenience; it’s an environmental and safety imperative.

  • Eco-Friendly Recycling Process: Hybrid batteries contain valuable materials and hazardous chemicals, making proper disposal crucial. Professionals involved in Chevy Volt battery replacement will handle the eco-friendly recycling or refurbishment of your old battery. Many companies, and even GM itself, have programs to return failed batteries for potential refurbishment or to extract usable materials, ensuring they don’t end up in landfills. This also applies to the core deposit you might pay when purchasing a replacement battery; it incentivizes the return of the old unit.
  • Tips to Extend Battery Life: While battery degradation is inevitable, you can take steps to maximize your Volt’s battery lifespan:
    • Avoid Extreme Temperatures: Parking your Volt in extreme heat or cold can accelerate battery aging. Whenever possible, park in shaded areas in summer and consider using the pre-conditioning feature when plugged in during winter.
    • Moderate Driving Style: Aggressive driving (hard acceleration and braking) puts more stress on the battery. A smoother driving style can help prolong its life.
    • Regular Driving: Hybrid batteries need to be “exercised” to prevent decay. If you leave your Volt unused for extended periods, the 12V battery can die, and the HV battery can also suffer. If you must store your car, consider using a battery maintainer for the 12V system.

Frequently Asked Questions about Your Volt’s Battery

How long does a Chevy Volt battery replacement take?

For a professional service center, a Chevy Volt battery replacement typically takes one full day to complete. This includes the removal of the old battery, installation of the new or remanufactured unit, reconnection of all systems, coolant bleeding, and any necessary post-installation checks.

For a DIY enthusiast, the time can vary significantly. An experienced individual who has planned carefully and has all the right tools might be able to complete the physical swap and reassembly in 4-5 hours. However, for a first-timer, especially accounting for potential challenges, troubleshooting, and learning the intricate steps (like module swapping and coolant bleeding), it could easily take much longer, spanning several days.

Do I need to reset my car’s computer after a replacement?

This depends on who performs the Chevy Volt battery replacement and how it’s done:

  • Professional Service: If you have your battery replaced by a certified technician or a specialized shop, they will handle all necessary system resets, programming, and calibration. This includes programming the Battery Energy Control Module (BECM), performing hybrid/EV pack capacity resets, and battery capacity relearns using diagnostic software like GDS2. They ensure the new battery communicates correctly with the vehicle’s other systems.
  • DIY Replacement: If you’re undertaking a DIY replacement using a used battery, you can often avoid a trip to the dealer for programming by carefully swapping the Battery Energy Control Module (BECM) and the four module-level slave controllers from your old battery pack to the replacement one. This makes the “new” battery appear to the car’s computer as the original, bypassing the need for dealer-specific reprogramming. However, other minor resets, like radio station presets, might still be necessary.

What happens to my old Volt battery?

When you get a Chevy Volt battery replacement from a professional service, your old battery doesn’t just get thrown away. It undergoes one of two primary fates:

  • Recycling: The old high-voltage battery is sent to specialized recycling facilities. These facilities safely dismantle the battery, extract valuable materials like lithium, nickel, and cobalt, and dispose of hazardous components responsibly. This eco-friendly approach minimizes environmental impact.
  • Refurbishment: Many manufacturers and aftermarket companies have programs to refurbish old hybrid batteries. These batteries are sent to a facility where they are tested, and any weak or failing cell modules are replaced or reconditioned. The refurbished battery can then be sold as a remanufactured unit, extending its life and reducing waste.

The core charge you typically pay when purchasing a replacement battery is designed to ensure that the old battery is returned to the vendor or manufacturer for proper handling, whether that’s recycling or refurbishment. This means the installer will handle the proper disposal and recycling as part of their service.

Conclusion

The Chevy Volt battery replacement is a significant investment in your vehicle, but one that can restore its performance and extend its life for many more years. Our research and experience show that Volt batteries are remarkably durable, often lasting 8-10 years or 100,000-150,000 miles, far exceeding conventional car batteries. However, like all batteries, they will eventually degrade, leading to reduced electric range, sluggish performance, and dashboard warnings.

When faced with a failing battery, you have several options: from the comprehensive, warrantied service of a dealership to the more cost-effective remanufactured options from specialists, and even the challenging, high-risk path of a DIY replacement. We’ve seen that the costs can vary wildly, from $1,500 for a used pack to over $10,000 for a new, professionally installed battery.

The decision comes down to weighing the costs, the desired warranty, and your comfort level with the complexity and safety risks involved. For a task as critical and potentially dangerous as Chevy Volt battery replacement, entrusting the job to certified professionals who understand high-voltage systems and have the right tools is paramount.

For any questions or to schedule-repair for your electronic devices, our team at Laurel Phone Repair offers expert battery-repair services with professional support. While we specialize in phones, tablets, and computers, we understand the importance of quality repair services for all your battery-powered devices in Laurel, Hattiesburg, Jackson, and throughout Jones County, Mississippi.

Ghost in the Machine? Troubleshooting and Fixing Common Keyboard Woes

Computer Keyboard Repair: Ultimate Fix 2025

Why Your Keyboard Suddenly Stops Working (And What to Do About It)

Computer keyboard repair is often simpler than you think. Here’s what to try first:

  1. Reboot your computer – This fixes most keyboard issues immediately
  2. Check connections – Ensure USB cables are plugged in or wireless batteries aren’t dead
  3. Test in BIOS/UEFI – If keys work there, it’s a software problem
  4. Clean debris – Use compressed air to remove dust and crumbs
  5. Reinstall drivers – Windows Device Manager can reset keyboard drivers
  6. Check for liquid damage – Spills often cause sticky or dead keys

A broken keyboard is no laughing matter. Whether it’s a single key that stopped responding, an entire section that’s gone dark, or a keyboard that cuts out randomly, these issues can halt your productivity instantly. The good news? Many keyboard problems stem from simple causes like dirty contacts, loose connections, or software glitches that you can fix yourself in minutes.

The research shows that most keyboard failures fall into predictable patterns. A few keys failing in sequence often indicates a problem with the keyboard matrix – the internal grid that registers your key presses. Random failures might point to a loose cable connection. And keys that work in your computer’s BIOS menu but fail in Windows? That’s almost always a driver or settings issue, not hardware failure.

I’m Ralph Harris, and with over 20 years of electronics repair experience and more than 500 Apple repair certifications, I’ve diagnosed and fixed countless keyboard issues – from simple cleaning jobs to complex circuit board repairs requiring specialized soldering equipment. This guide will walk you through everything from basic troubleshooting to knowing when computer keyboard repair requires professional help.

Step-by-step keyboard troubleshooting flowchart showing decision points: Does keyboard have power? → Check USB/batteries. Do keys work in BIOS? → Software issue, reinstall drivers. Is it one key or many? → Clean single keys, replace keyboard if multiple sections fail. Is there visible damage? → Professional repair needed for liquid damage or circuit issues. - computer keyboard repair infographic brainstorm-4-items

First Steps: Diagnosing the Problem

When your keyboard throws a tantrum, the first step is to calmly assess the situation. Often, the solution is much simpler than we anticipate. We’ll start with the easiest fixes and gradually move to more involved diagnostics.

The absolute first thing we recommend is a simple reboot. It might sound cliché, but a “simple reboot can correct a thousand ails,” including many keyboard issues. If your computer is completely unresponsive, you might need to hold down the power button for 10-15 seconds to force a shutdown, then power it back on.

Next, let’s check the connections. For an external keyboard, ensure the USB cable is firmly plugged into your computer. Sometimes, a loose connection is all it takes to disrupt communication. If it’s a wireless keyboard, confirm that the batteries aren’t dead. A lost USB dongle for a wireless keyboard is another common issue, but if the keyboard itself isn’t powering on, fresh batteries are usually the first thing to check.

To help us test the keyboard without relying on its physical keys, we can use an On-Screen Keyboard. This virtual keyboard allows us to type with a mouse, helping us determine if the issue is with the physical keys or something deeper within the system.

Need help diagnosing the issue? Don’t hesitate to visit our experts for quick and accurate Device Diagnostics.

Is It a Hardware or Software Issue?

One of the most crucial steps in computer keyboard repair is determining if the problem is rooted in hardware or software. This distinction guides our troubleshooting path significantly.

A great way to test this is by performing a BIOS/UEFI test. When you first power on your computer, before the operating system loads, you can usually enter the BIOS or UEFI setup menu by pressing a specific key (often F2, Delete, F10, or F12). If your keyboard works perfectly within this menu – meaning you can steer and select options using the problem keys – then we know the issue lies within your operating system (Windows, macOS, etc.), not the physical keyboard itself. If the keys still don’t work in BIOS/UEFI, it’s a strong indicator of a hardware problem.

For Windows users, booting into Safe Mode can also help. Safe Mode loads Windows with only essential drivers and services, which can help determine if a third-party application or driver is causing the conflict. While Safe Mode won’t permanently fix the problem, it helps us narrow down the cause.

If you have an external keyboard, testing it on another computer is a quick way to isolate the problem. If it works on another machine, the issue is with your original computer; if it fails on another machine too, the keyboard itself is the culprit.

Finally, consider the scope of the failure. Is it just one key not working, or is the entire keyboard dead? This helps us differentiate between a localized hardware fault (like a single key switch) and a more systemic issue (like a complete connection failure or a major software bug).

Identifying the Type of Failure

Understanding the pattern of your keyboard’s malfunction can provide valuable clues for effective computer keyboard repair.

  • Specific Key Failure: If only one or two keys are not working, it often points to a physical issue with that particular key switch, or debris lodged underneath.
  • A Section of Keys Not Working: This is a classic sign of a problem within the keyboard’s matrix. Keyboards operate on a grid system, with rows and columns. If keys like ‘minus’, ‘left bracket’, ‘semi-colon’, and ‘Space’ all fail simultaneously, and they follow a pattern on the keyboard layout, it’s highly indicative of a failure in one of the “X and Y axes of that matrix.” This could be a damaged trace on the flexible circuit board inside the keyboard.
  • Intermittent Issues: A keyboard that works sometimes and then stops, or keys that register erratically, often suggests a loose or partially damaged connection. For laptops, “sometimes the keyboard loses connection with the laptop’s motherboard, and you have a keyboard that either works intermittently or not at all.”
  • Complete Keyboard Malfunction: If the entire keyboard is unresponsive, it could be a complete connection failure, a major driver issue, or a more serious hardware problem like a faulty encoder chip.

By carefully noting which keys are affected and whether there’s a pattern, we can often pinpoint the area of concern and guide our troubleshooting efforts more efficiently.

Tackling Software and Settings Glitches

Once we’ve ruled out obvious hardware failures, it’s time to dive into the software side of things. Many keyboard problems aren’t physical at all, but rather stem from driver conflicts, incorrect settings, or even malicious software.

Image of the Windows Device Manager or macOS System Settings keyboard section - computer keyboard repair

Software issues can manifest in various ways: keys typing the wrong characters, keys repeating excessively, or keys being unresponsive despite the hardware being fine. “If none of the above solutions solve the problem, it’s possible that your keyboard is the victim of a virus.” So, a thorough malware scan might be in order if nothing else works.

Reinstalling Keyboard Drivers

Drivers are the essential software that allows your operating system to communicate with your keyboard. If these drivers become corrupted or outdated, your keyboard can stop working correctly.

For Windows users, the process is straightforward:

  1. Open Device Manager: You can typically find this by searching for “Device Manager” in the Windows search bar.
  2. Locate Keyboards: Expand the “Keyboards” section.
  3. Uninstall Driver: Right-click on your keyboard device (it might be listed as “Standard PS/2 Keyboard” or similar) and select “Uninstall device.” Do NOT select “Delete the driver software for this device” unless specifically instructed.
  4. Reboot: Restart your computer. Windows should automatically detect the keyboard and “grab the generic drivers for the keyboard, which may fix the problem.”
  5. Update from Manufacturer: If the issue persists, visit your computer or keyboard manufacturer’s website and download the latest keyboard drivers for your specific model. Install these drivers and reboot again.

For Mac users, uninstalling individual drivers can be tricky. Instead, we recommend:

  1. Software Update: Go to System Settings > General > Software Update and install any available updates. macOS updates often include driver fixes.
  2. SMC, PRAM, or NVRAM Reset: For more persistent issues, you can try resetting your Mac’s System Management Controller (SMC), Parameter RAM (PRAM), or Non-Volatile RAM (NVRAM). The procedure varies by Mac model, so check Apple’s support documentation for the correct steps.

Adjusting Your Keyboard Settings

Sometimes, the keyboard isn’t broken; it’s just configured in a way that makes it seem broken! Windows and macOS offer several accessibility and typing settings that, if misconfigured, can lead to frustrating keyboard behavior.

  • Filter Keys: If your keyboard is behaving strangely, “make sure Filter Keys and Sticky Keys are also turned off.” Filter Keys is an accessibility feature designed to ignore brief or repeated keystrokes, which can make your keyboard seem unresponsive or laggy.
  • Sticky Keys: Another accessibility feature, Sticky Keys allows modifier keys (like Shift, Ctrl, Alt, or Windows key) to remain active until another key is pressed. While helpful for some, it can cause unexpected behavior if accidentally enabled.
  • Repeat Delay Settings: If you find that “pressing a key might type two or more characters” even with a single press, your keyboard’s Repeat Delay setting might be too short. Adjusting this in your keyboard settings (often found under Accessibility or Ease of Access) can resolve unwanted double-typing.
  • Checking and Changing Keyboard Layout: If your keys are typing entirely different characters than what’s printed on them (e.g., you press “A” and get “@”), your keyboard layout or language settings might be incorrect. Ensure your operating system is set to the correct keyboard layout for your region and language.

Hands-On Hardware Fixes: Cleaning and Simple Repairs

Now we move on to the physical aspects of computer keyboard repair. Many issues, especially sticky or unresponsive keys, are due to physical obstructions or minor damage that can be fixed with a bit of elbow grease and the right tools.

“Quality keyboards die because of abuse. A few drops of any beverage with acid in it will surely cause an eventual failure.” Liquid spills, dust, and debris are the arch-nemeses of keyboards. Crumbs, hair, and everyday grime can easily get lodged under keycaps, preventing switches from functioning correctly.

Image of keyboard cleaning tools like compressed air, isopropyl alcohol, and microfiber cloths - computer keyboard repair

The Essential Keyboard Cleaning Guide

A clean keyboard is a happy keyboard. Here’s our essential guide to cleaning your keyboard effectively:

  1. Shut It Down: Always power off and unplug your computer or keyboard before cleaning. Safety first!
  2. Loose Debris: Turn your keyboard upside down and gently shake it to dislodge any large crumbs or debris. Follow up with compressed air, holding the can upright and using short bursts to blow out particles from between the keys. For laptop keyboards, “if you notice something stuck under a certain key, try tilting the laptop to different angles while blowing the compressed air to get it out.”
  3. Grease & Grime: For general cleaning and removing oil and grime, dampen a microfiber cloth with isopropyl alcohol (preferably >90% purity) and gently wipe down the surface of the keycaps and the areas between them. Do not spray liquid directly onto the keyboard.
  4. Cleaning Up Spills & Sticky Keys: If “one or two keys are stuck because of soda spillage, pop the offending key caps off (if possible) and try to clean as much dried liquid from the key switch as possible.” Use a cotton swab lightly dampened with isopropyl alcohol or soapy water to carefully clean the key switch mechanism. For deeply sticky key retainers on laptops, you might need to remove them and soak them in hot, soapy water for about 5 minutes, then dry thoroughly before reinstallation.
  5. Popping Off Keycaps: Be extremely careful when removing keycaps. “Key caps are held on by tiny fragile clips. Be careful as you pry up any keys.” Use a keycap puller or a small, flat prying tool. For Apple’s “butterfly” keyboards (found on some 2015+ MacBooks and 2016+ MacBook Pros), “we don’t recommend attempting to remove keys from your keyboard” due to their extreme fragility. If you have one of these, consult Apple’s Keyboard Service Program.

For more detailed instructions, especially for laptop keyboards, consult a comprehensive Laptop Keyboard Cleaning Guide.

Basic DIY computer keyboard repair

Beyond cleaning, some minor hardware repairs are possible at home, provided you have the right tools and a steady hand.

Necessary Tools: For most keyboard disassembly, you’ll need “a small Phillips screwdriver. Some, such as this one, may also need a tiny Allen or Torx driver.” An Ohm Meter or Multimeter can be invaluable for testing continuity, and an On-Screen Keyboard helps with live testing. For prying, a thin plastic tool (like a guitar pick or specific electronics opening tool) is useful. Cotton swabs and isopropyl alcohol are also staples.

Removing Keycaps Safely: As mentioned, proceed with caution. Once a keycap is off, you can inspect the switch underneath for damage or debris. Sometimes, a broken keycap or its stabilizer can be replaced.

Checking and Reseating Internal Ribbon Cables on Laptops: If your laptop keyboard is working “intermittently or not at all,” it might be due to a loose ribbon cable connection to the motherboard. This is a more involved repair as it requires disassembling part of your laptop. If you’re comfortable opening your laptop, locate the keyboard’s ribbon cable and gently disconnect and reconnect it to ensure it’s seated properly. Be extremely careful not to tear the delicate ribbon.

Advanced Computer Keyboard Repair and When to Call a Pro

When simple cleaning and software tweaks don’t cut it, we enter the field of more advanced computer keyboard repair. This often involves delving into the keyboard’s internal circuitry, a task that requires specialized tools, a good understanding of electronics, and a lot of patience.

Signs of permanent hardware failure include widespread key malfunction without a clear software cause, or visible damage to the circuit board. If a significant section of keys is dead in a pattern, it points to the keyboard matrix. If nothing works, it could be the encoder chip. This is where “the more advanced repair techniques for keyboard circuitry” come into play.

Laptop vs. External computer keyboard repair

The approach to computer keyboard repair differs significantly between integrated laptop keyboards and external keyboards.

  • External Keyboards: These are generally easier to disassemble and access the internal components. You can usually separate the keycaps, the flexible membrane sheets (the “matrix” with X and Y axes), and the encoder board. This allows for detailed inspection and repair of damaged traces using conductive ink or for replacing faulty components. An example repair showed “33 screws on the metal plate” of a typical keyboard, and warned to “take great care” when lifting the matrix sheets to avoid disturbing the tiny flexible caps at each key position.
  • Integrated Laptop Keyboards: Repairing a laptop keyboard is often more complex and can be expensive. The keyboard is frequently integrated into the laptop’s top case, meaning replacing it often involves replacing a large portion of the chassis. These are not designed for easy DIY repair. “If an extensive section of the keyboard is stuck because of liquid damage, like a spilled cup of soda or coffee, your best recourse may be to have the keyboard assembly replaced” rather than attempting to repair individual keys. Special caution is needed for models like Apple’s “butterfly” keyboards, which were “particularly fragile and difficult to remove intact,” leading to a class-action lawsuit settlement.

When to Consider Professional Repair or Replacement

While some DIY fixes are possible, there comes a point when a user should consider professional computer keyboard repair or even full replacement.

  • Extensive Liquid Damage: If a large amount of liquid, especially acidic beverages, has seeped into the keyboard, it can cause widespread corrosion and damage to the delicate circuitry. While you might clean individual sticky keys, “if an extensive section of the keyboard is stuck because of liquid damage… your best recourse may be to have the keyboard assembly replaced.”
  • Swollen Laptop Battery: In laptops, “if your laptop battery becomes swollen, for instance, it can push on other parts and prevent them from working properly,” including the keyboard. A swollen battery is a serious safety hazard and requires immediate professional attention.
  • Failed Encoder Chip: This is the brain of your keyboard, converting key presses into signals the computer understands. If “the bad keys did not appear while testing either connector than the Encoder chip is bad,” it’s a complex component to replace, often requiring micro-soldering skills and specialized equipment.
  • Broken Traces on the Circuit Board: While a single broken trace might be fixable with conductive ink by an experienced DIYer, extensive or hidden damage requires professional diagnostics. One repair case involved a “21Mhz pixel clock” trace damaged by a leaking battery that was “totally invisible” and required careful tracing and a “short jumper later” to fix.
  • Cost vs. Benefit Analysis: Sometimes, the cost and effort of a complex repair outweigh the price of a new keyboard. Especially for older, less expensive external keyboards, replacement might be the more practical choice. For integrated laptop keyboards, however, replacement can be costly, making professional repair a viable option if it’s less than a new laptop.

If you’re still under warranty, it’s always worth checking with your laptop manufacturer’s tech support line before attempting any repairs yourself. For everything else, that’s where we come in. Our skilled technicians in Laurel, Hattiesburg, Jackson, and Jones County, Mississippi, are equipped to handle complex computer keyboard repair issues.

Conclusion

We’ve covered a lot of ground in our journey through computer keyboard repair, from simple reboots to intricate circuit board diagnostics. Many keyboard woes can be resolved with basic troubleshooting steps like checking connections, rebooting your system, or a thorough cleaning. Software issues, such as corrupted drivers or misconfigured settings, are also common culprits and often have straightforward solutions.

However, some problems, particularly those involving extensive liquid damage, internal hardware failures like a faulty encoder chip, or delicate integrated laptop keyboards, demand a more expert touch. It’s crucial to know your limits and when to seek professional help to avoid further damage to your device. Always prioritize safety when dealing with electronics, especially when opening up devices.

At Laurel Phone Repair, our experienced technicians specialize in quick, affordable, and high-quality repairs for phones, tablets, and computers. We’re here to help you with everything from simple diagnostics to complex component-level repairs. Don’t let a faulty keyboard slow you down – our team in Laurel, Hattiesburg, Jackson, and Jones County, Mississippi, is ready to get your device back in top shape.

Get professional computer repair services and let us take care of your keyboard woes, so you can get back to typing away with ease!

Crossing Borders, Fixing Devices: Your Guide to International Warranty Repair

Warranty repair services for international device brands 2-Day

Why International Device Owners Need Specialized Repair Solutions

Warranty repair services for international device brands can be a maze of confusion, delays, and unexpected costs. When your Samsung phone, Sony laptop, or other global brand device breaks down, you’re often left wondering: where do I send it, how long will it take, and who pays for shipping?

Here’s what you need to know:

  • Domestic US repair depots eliminate cross-border shipping delays and fees
  • Typical turnaround time: 2 days with parts in stock (vs. 10-14 days for cross-border)
  • Key services: Component-level repair, dedicated support, data security (ISO 27001)
  • Cost savings: No brokerage fees, fewer duties under trade agreements like the USMCA
  • Supported devices: Mobile phones, tablets, laptops, POS systems, A/V equipment

The challenge with international device brands is that many manufacturers route warranty repairs back to their home countries. This means your device crosses borders—twice. Each crossing adds customs paperwork, brokerage fees, and weeks of waiting. For US consumers and businesses, this creates frustration and downtime.

The solution? Specialized domestic warranty repair depots that partner with international brands to keep repairs within the country. These facilities offer factory-trained technicians, genuine or certified parts, and the same quality standards as the original manufacturer—without the cross-border headaches.

I’m Ralph Harris, and with over 20 years in electronics repair and more than 500 Apple certifications, I’ve seen how warranty repair services for international device brands can make or break customer satisfaction. Whether it’s a cracked screen or a logic board failure, understanding your repair options saves time and money.

infographic showing side-by-side comparison of traditional cross-border RMA process with 10-14 day shipping delays, customs fees, and multiple handoffs versus streamlined Canadian domestic repair with 2-day turnaround, no border crossing, bilingual support, and direct customer communication - warranty repair services for international device brands infographic

The Cross-Border Challenge for International Brands in the US

Imagine you’ve just purchased the latest gadget from an international brand, only for it to malfunction within the warranty period. Your first thought might be to send it back to the manufacturer. But for consumers and brands alike, this isn’t as simple as dropping a package in the mail. The journey a device often takes for warranty repair can involve crossing international borders, leading to a host of logistical nightmares.

Industry experts highlight that shipping warranty units across borders can add 10-14 days, brokerage fees, and import/export duties. This illustrates the core problem: what seems like a straightforward repair often becomes a complex, multi-stage process. These added delays and costs are not just an inconvenience; they directly impact customer satisfaction and the brand’s reputation. The logistical complexity of managing cross-border shipments, customs declarations, and fluctuating tariffs can overwhelm even the most robust supply chains.

Common Problems for Consumers and Brands

When a device needs repair across borders, both consumers and the international brands themselves encounter significant problems. For consumers, the primary issues revolve around shipping logistics and customs paperwork. They may be unsure how to correctly declare items for customs, what forms are needed, or what taxes and duties might apply. This uncertainty often leads to delays, as packages get held up at the border or returned due to incorrect documentation.

Increased costs are another major concern. Beyond the initial shipping fee, brokerage fees for customs clearance and potential duties can quickly inflate the overall expense. This can be particularly frustrating for a warranty repair, where the consumer expects the repair to be “free” of charge.

Perhaps most impactful is the lack of communication and the resulting negative customer experience. When a device disappears into the international shipping void, tracking its progress can be difficult. Consumers are left in the dark, leading to anxiety and dissatisfaction. For international brands, this translates into higher customer service inquiries, negative reviews, and ultimately, a damaged brand image.

Why Sending Devices Abroad for Repair is Inefficient

The traditional model of sending devices abroad for warranty repair is inherently inefficient.

shipping boxes customs labels - warranty repair services for international device brands

Each step of the international shipping process introduces potential points of failure and delay.

  • Added transit time: As noted, cross-border shipping can add an extra 10-14 days to the repair process. This doesn’t even account for the time the device spends in the repair queue once it arrives. For a consumer, being without their essential device for weeks or even months is simply unacceptable in today’s world.
  • Risk of shipping damage: The more a device travels, and the more hands it passes through, the higher the risk of it sustaining further damage during transit. This can exacerbate the original issue or create new ones, leading to further delays and costs. Proper packaging is crucial, but even then, multiple touchpoints increase vulnerability.
  • Tariff implications: The North American Free Trade Agreement (NAFTA), now the USMCA, has eased some trade barriers. However, navigating the specific rules for warranty returns can still be complex. Manufacturers or consumers may incur unexpected duties or taxes, adding to the financial burden. Many manufacturers explicitly state that for international shipments, the “Customer is responsible for customs and/or import duties.” This highlights a common pain point for end-users.
  • Poor end-user satisfaction: Long wait times, hidden costs, and opaque processes inevitably lead to frustrated customers. In an age where immediate gratification is often expected, a prolonged repair process can severely tarnish a brand’s reputation.
  • Complicated return merchandise authorization (RMA) process: Initiating an international RMA often involves navigating complex online forms, providing detailed customs information, and adhering to strict packaging guidelines. This complexity can deter consumers from even attempting a warranty claim, undermining the value of the warranty itself.

The Domestic Advantage: Why Local Warranty Repair Services for International Device Brands Excel

Recognizing these cross-border inefficiencies, a new model has emerged: specialized US-based repair depots. These facilities offer a streamlined, localized approach to warranty repair services for international device brands, changing what was once a headache into a competitive advantage. By establishing repair operations within the United States, international brands can bypass many of the logistical and financial problems associated with cross-border repairs.

This domestic approach means devices stay within US borders for their entire repair journey. This simple change has profound benefits, leading to significantly reduced RMA turnaround times, often plummeting from weeks to mere days. It also means eliminating cross-border fees, such as brokerage charges and duties, which directly benefits both the brand and the end-user. The result is a vastly improved customer experience through localized support and faster service. Moreover, for brands operating across North America, leveraging USMCA benefits by having a domestic depot ensures smooth trade relations and compliance.

Key Benefits of Partnering with a Domestic Repair Depot

Partnering with a domestic repair depot offers compelling advantages for international brands and their US customers.

  • Faster Turnaround Times: Leading domestic depots can cut RMA turnaround to 2 days* by keeping every unit—and every customer—inside the country. This is a stark contrast to the 10-14 days often added by cross-border shipping. For consumers, this means getting their devices back quicker, minimizing disruption to their daily lives.
  • Cost Savings: By eliminating cross-border delays and tariffs under USMCA, brands save on brokerage fees, duties, and the administrative costs associated with international shipping. These savings can be passed on to consumers or reinvested in better service.
  • Improved Customer Satisfaction: Local service means local support. Customers receive a simple domestic return label, making the process effortless. This localized, efficient service fosters goodwill and strengthens brand loyalty.
  • Simplified Logistics: Managing a single domestic repair hub is far simpler than coordinating international shipments with varying customs regulations. This reduces administrative burden and allows brands to focus on their core business.
  • Keeping customers within the US: By offering a domestic repair solution, international brands ensure that American customers receive service within their own country, which resonates positively with consumers and supports local economies.

What to Expect: Services and Capabilities

Specialized domestic repair depots are not just about logistics; they’re about comprehensive, high-quality repair services.

electronics repair workbench - warranty repair services for international device brands

These facilities are equipped to handle a diverse range of devices and often boast extensive experience. Leading depots, for example, often have decades of experience repairing A/V, Computing, POS, and Mobile products for tier-1 OEMs. This breadth of expertise means they can service:

  • A/V equipment: From professional audio mixers and speakers to home theater systems.
  • Computing devices: Laptops, desktops, and other computing peripherals.
  • POS systems: Critical for retail and hospitality, ensuring minimal downtime.
  • Mobile products: Smartphones and tablets from various international brands, like those serviced by Samsung and Google’s authorized partners.

These depots often offer advanced repair capabilities, including component-level repair and BGA rework, meaning they can fix issues at the circuit board level rather than simply replacing entire modules. This not only saves costs but also reduces electronic waste. Their teams consist of factory-trained technicians who are experts in their field, often undergoing continuous training to stay updated with the latest technologies and repair techniques.

These examples illustrate the robust capabilities of domestic depots, and we at Laurel Phone Repair in Mississippi embody a similar commitment to excellence for our local community. We specialize in quick, affordable repairs for phones, tablets, and computers, ensuring that our customers in Laurel, Hattiesburg, Jackson, and Jones County receive expert care. Our experienced technicians offer transparent part options and stand by our high customer satisfaction with warranties. Find more about our comprehensive repair services by visiting More info about our repair services.

The Logistics of Parts and Turnaround Times

Efficient warranty repair services for international device brands hinge on two critical factors: parts sourcing and rapid turnaround. Domestic depots excel in both. For instance, top depots often boast a 2-day repair TAT (Turnaround Time) with parts in stock. This speed is achieved through strategic inventory management and robust supply chains that ensure essential components are readily available. When parts are not immediately available, a typical 40-hour triage process helps quickly diagnose and prioritize repairs, providing clarity on timelines.

Beyond speed, the safe handling and return of devices are paramount. These depots use ISTA-approved packaging, ensuring that repaired units are shipped back securely and arrive in perfect condition. For local logistics, local courier services can provide rapid transportation, further reducing transit times.

At Laurel Phone Repair, we understand the urgency our customers feel when their device needs attention. While our operations are rooted in Mississippi, we apply similar principles of efficient parts sourcing and quick turnaround times to ensure our local community receives prompt and reliable service. We strive to minimize the time you’re without your device, because we know how essential it is to your daily life. For immediate assistance with your device, please don’t hesitate to Get help with your device.

Modern warranty repair services for international device brands are far more sophisticated than simply fixing a broken component. They involve a carefully planned process, often leveraging advanced technology to ensure efficiency, transparency, and high quality. This end-to-end approach transforms what could be a chaotic experience into a smooth, predictable journey for both the brand and the end-user.

A comprehensive depot process often follows 7 key steps: receive & log, triage, quote & approval, repair/refurbish, QC & burn-in, pack & ship, and reporting. This structured workflow ensures every device receives consistent attention. Crucially, these services often provide real-time visibility into the repair status, often through customer portals or integrated systems. This transparency is powered by technologies like API integration and AI-driven workflow software, which automate tasks, optimize repair paths, and provide actionable data. The emphasis is on quality control at every stage, coupled with stringent data security measures and consistent customer communication.

Understanding Warranty Repair Services for International Device Brands

Let’s dig deeper into the typical repair journey for devices handled by these specialized depots.

The process begins the moment a device arrives:

  1. Receive & Log: Each device is carefully logged into the system, often with unique identifiers and photographic documentation of its initial state.
  2. Triage: Experienced technicians perform an initial assessment to identify the problem, determine if it’s a warranty issue, and estimate the repair complexity. This is where a 40-hour triage process can quickly pinpoint the root cause.
  3. Quote & Approval: For non-warranty repairs or issues not covered, a detailed quote is provided for customer approval. Service providers often require a signed estimate approval for non-warranty repairs before work commences, and if not approved within a set time, a service setup and evaluation charge may apply.
  4. Repair/Refurbish: This is where the magic happens. Factory-trained technicians perform the necessary repairs, whether it’s a simple component replacement, complex BGA rework, or a complete refurbishment.
  5. QC & Burn-in: Quality control is paramount. Devices undergo rigorous testing and “burn-in” periods to ensure the repair is stable and the device functions perfectly under various conditions. Top-tier repair labs can boast impressive first-time-yield rates, a testament to their thorough QC.
  6. Pack & Ship: Once cleared, devices are carefully packed using ISTA-approved methods for safe return.
  7. Reporting: Detailed reports on repair activities, failure rates, and turnaround times are generated, providing valuable insights to the international brand.

We at Laurel Phone Repair follow similarly detailed procedures for every repair we undertake in Laurel, Hattiesburg, Jackson, and Jones County, Mississippi. Our commitment to quality and transparency means you’ll always know the status of your device and what steps we’re taking to bring it back to life. To begin your repair process with us, simply visit Start your repair process with us.

Data Security and Privacy: A Top Priority

In an age where personal data is invaluable, ensuring the security and privacy of customer information during device repair is non-negotiable. Warranty repair services for international device brands must adhere to the highest standards to protect sensitive data stored on devices.

Reputable domestic repair depots, for instance, implement ISO 27001-aligned processes for information security management. This internationally recognized standard demonstrates a commitment to managing sensitive company and customer information securely. Furthermore, they follow standards like NIST 800-88 for data sanitization, which dictates how data should be securely erased from storage devices. This includes thorough drive-wipe procedures to eliminate all digital traces of personal information. In cases where data cannot be securely wiped or the storage media is deemed irreparable, physical shredding ensures complete destruction.

While our local services at Laurel Phone Repair in Mississippi don’t handle the same scale of international data, we understand that every customer’s data is precious. We prioritize customer data protection by employing secure handling practices and ensuring that any necessary data erasure is performed carefully, giving you peace of mind when you entrust your device to us.

The Role of Customer Communication and Support

Even the most efficient repair process can fall short if not backed by stellar customer service. For warranty repair services for international device brands, effective communication is key to managing customer expectations and building trust.

Leading depots provide multiple channels for support, ensuring that all customers can communicate comfortably. This extends beyond phone support to include customer portals where users can track their repair status in real-time, reducing the need for constant inquiries. Phone and email support channels are staffed by knowledgeable representatives who can provide updates, answer questions, and resolve issues promptly.

The goal is proactive communication, informing customers at every stage of the repair process, from receipt to shipment. This transparency and accessibility play a vital role in building brand loyalty for the international manufacturers. When customers feel informed and supported, their overall experience with the brand improves significantly, even when facing a device malfunction.

At Laurel Phone Repair, we pride ourselves on our clear communication and dedicated customer service. For our customers in Laurel, Hattiesburg, Jackson, and Jones County, we provide personalized support, keeping you updated on your repair’s progress. We believe good communication is just as important as a good repair!

Navigating the landscape of warranty repair services for international device brands involves a complex interplay of legal frameworks, technical expertise, and financial planning. International brands outsourcing their warranty repairs must consider various factors to ensure compliance, quality, and cost-effectiveness.

This includes understanding outsourcing regulations in different jurisdictions, which can impact data handling, labor laws, and consumer protection. Each international brand operates under its own unique manufacturer warranty policies, which the repair depot must carefully adhere to. Technically, the demand for highly skilled technician training is continuous, as new devices and technologies emerge rapidly. Financially, establishing clear cost structures and service level agreements (SLAs) is crucial for both parties, defining expectations for turnaround times, repair quality, and pricing.

Staying Current with Technology and Techniques

The electronics industry is in a constant state of evolution, with new devices and complex technologies being introduced at a dizzying pace. For warranty repair services for international device brands to remain effective, staying current is not just an advantage—it’s a necessity.

This commitment manifests in several ways:

  • Continuous training: Technicians must regularly update their skills to handle the latest models and repair methodologies. Leading service providers emphasize having “factory-trained technicians.”
  • Latest diagnostic tools: Investing in cutting-edge diagnostic equipment allows for precise and efficient troubleshooting, reducing repair times and increasing accuracy.
  • Diverse brand expertise: Repair depots often service a wide array of international brands, requiring their technicians to possess broad knowledge across different ecosystems and proprietary technologies.
  • Adapting to new devices: As new form factors and internal architectures emerge, repair techniques must evolve. This might involve new soldering methods, specialized tools for delicate components, or updated software for diagnostics.
  • Certifications: Industry certifications and manufacturer-specific training programs ensure that repairs meet the highest standards.

At Laurel Phone Repair, we share this dedication to continuous learning. Our experienced technicians in Mississippi are committed to staying updated with the latest technologies and repair techniques for a diverse range of devices. This ensures that whether you have a brand-new smartphone or a slightly older tablet, we have the expertise to fix it right. Learn more about our commitment to quality by visiting Read about our commitment to quality.

Cost Implications of Warranty Repair Services for International Device Brands

The financial aspect is a major driver for international brands when choosing their warranty repair strategy. While the goal of a warranty repair is to be free for the customer, there are significant costs incurred by the manufacturer, which can be optimized by choosing the right service provider.

Key cost components include:

  • Service setup charges: Initial costs associated with establishing a repair partnership, integrating systems, and setting up inventory.
  • Per-unit repair fees: The direct cost for each repair, which can vary based on complexity, parts used, and labor.
  • Shipping costs: As discussed, cross-border shipping adds substantial freight and brokerage fees. For example, it’s common for customers to be responsible for shipping to the repair facility, while the company covers return shipping for warranty repairs, highlighting how these costs are apportioned.
  • Evaluation charges: For non-warranty items, an evaluation fee may be charged if the customer declines the repair. For example, a service provider might have a minimum charge if the repair is declined.
  • Comparing domestic vs. international costs: The insight that operating a domestic depot “eliminates cross-border delays and tariffs under USMCA” directly points to significant cost savings compared to sending units abroad. These savings are not just in tariffs but also in reduced administrative overhead and faster inventory turnover.

The value proposition of local warranty repair services for international device brands extends beyond just the repair cost. It encompasses the avoided costs of customer dissatisfaction, expedited resolution times, and the improved brand reputation that comes from a seamless service experience. While we operate locally in Mississippi, we are committed to providing transparent and affordable repair solutions, ensuring our customers receive excellent value without the hidden costs often associated with less reputable services.

Frequently Asked Questions about International Device Repair

What is a typical turnaround time for a domestic warranty repair?

With parts in stock, specialized domestic depots aim for a 2-day repair turnaround time (TAT), a significant reduction from the 10-14 days often required for cross-border shipping. This efficiency is a major draw for warranty repair services for international device brands operating in the US, ensuring minimal downtime for customers.

How is my personal data protected during a repair?

Reputable service providers follow strict data security standards, such as ISO 27001-aligned processes and NIST 800-88 for data wiping, ensuring your personal information is secure or completely erased as required. Before sending your device for repair, it’s always a best practice to back up your data and perform a factory reset if possible, or use features like Google Pixel’s Repair Mode for eligible devices. We at Laurel Phone Repair also prioritize your data security with careful handling procedures.

What happens if a device is damaged during shipping?

Responsibility for shipping damage often depends on packaging. Using ISTA-approved packaging and following the service provider’s shipping instructions is crucial. Always clarify insurance options before sending your device. Service providers often explicitly state that shipping damages due to improper packaging are the customer’s responsibility and may recommend contacting the carrier directly for claims.

Conclusion: Bringing World-Class Repair Service Home

The complexities of warranty repair services for international device brands no longer need to be a source of frustration. As we’ve explored, specialized local repair depots offer a powerful solution to the logistical, financial, and customer service challenges posed by cross-border repairs. By fostering efficiency, reducing costs, and prioritizing customer satisfaction, these services create a win-win scenario for international brands and their consumers.

Choosing a domestic repair partner offers international brands a strategic advantage by improving efficiency, reducing costs, and boosting customer satisfaction. For consumers, it means faster, more reliable service without the headaches of cross-border logistics.

This commitment to a better repair experience is exactly what we at Laurel Phone Repair bring to our local community in Laurel, Hattiesburg, Jackson, and Jones County, Mississippi. For expert, transparent, and warrantied repairs on your phones, tablets, and computers, our experienced technicians provide the peace of mind and quality service you deserve. We’re here to ensure your devices are fixed quickly, affordably, and with the utmost care. To understand more about our commitment to quality and the assurance we provide, please Learn more about our warranty.

5 Do’s and Don’ts for Phone Repair Estimates

Phone repair estimates: 5 Smart Do’s & Don’ts

Why Getting an Accurate Phone Repair Estimate Matters

Phone repair estimates are the crucial first step to fixing your broken device without breaking your bank. When your phone screen cracks or your battery dies, knowing what to expect financially helps you make smart decisions about repair versus replacement.

Quick Answer: What You Need to Know About Phone Repair Estimates

  • Average costs vary widely: Screen repairs range from $50-$329, battery replacements from $34-$134+, and charging port fixes from $20-$90
  • Get specific information ready: Your exact phone model, detailed problem description, and damage history help shops give accurate quotes
  • In-person beats online: While online estimators provide ballpark figures in under 2 minutes, physical inspection reveals hidden issues like frame damage or water corrosion
  • Watch for additional costs: Some shops charge diagnostic fees (often waived if you proceed with repair), and final costs may increase if technicians find additional damage
  • Compare your options: Check if you have warranty coverage, understand part quality differences (OEM vs. aftermarket), and ask about repair guarantees

Understanding what influences your estimate helps you avoid surprises and choose the right repair option. Device age, damage extent, part quality, and technician expertise all play significant roles in your final cost.

Most repair shops offer free diagnostics, and reputable providers will explain their findings before proceeding with any work. The estimate validity period typically lasts 7-30 days, though this varies by shop.

I’m Ralph Harris, and with over 20 years of experience in electronics repair and more than 500 Apple repair certifications, I’ve personally provided thousands of phone repair estimates and understand exactly what factors drive repair costs. Let me walk you through the essential do’s and don’ts that will help you get accurate estimates and make informed repair decisions.

infographic showing 5 Do's and Don'ts for phone repair estimates including understanding cost factors, avoiding online-only estimates, providing detailed information, reading warranty terms, and comparing repair options - Phone repair estimates infographic

DO: Understand What Influences Repair Costs

When your phone takes an unexpected tumble or starts acting sluggish, the first thought might be, “How much is this going to cost me?” The truth is, there’s no one-size-fits-all answer. The cost of a phone repair is a dynamic figure, influenced by a variety of factors that we carefully assess to provide you with a fair and accurate phone repair estimate.

various phone components like a screen, battery, and charging port - Phone repair estimates

From the moment you walk through our doors in Laurel, Hattiesburg, Jackson, or Jones County, Mississippi, our experienced technicians begin evaluating these elements. Understanding them is key to making an informed decision about your repair. You can learn more about how we determine pricing on our Pricing page.

Key Factors That Affect Your Estimate

Our goal is always to bring your device back to life efficiently and affordably. Here’s a breakdown of what goes into your phone repair estimate:

  • Phone Brand and Model: This is often the biggest factor. A repair for a brand-new flagship smartphone, like the latest iPhone or Samsung Galaxy, will almost always be more expensive than for an older model or a less common brand. This is primarily due to the cost and availability of replacement parts. Newer models often use more advanced, proprietary components that are pricier to source.
  • Type of Damage: Not all damage is created equal. A simple software glitch might be a quick fix, but a shattered screen, a faulty charging port, or extensive water damage requires more intensive labor and costly parts.
    • Screen Repair Costs: A cracked phone screen is one of the most common issues we see. The average cost to repair a cracked phone screen can range from $50 to $329. This wide range reflects the difference between replacing an LCD on an older, more basic model versus a high-resolution OLED display on a premium smartphone.
    • Battery Replacement Costs: If your phone isn’t holding a charge like it used to, a new battery can breathe new life into it. iPhone battery replacement starts from $34, but costs can range up to $134 or more depending on the model and whether it’s an official service. The cost typically depends on the device model and the battery’s accessibility.
    • Charging Port Repair Costs: When your phone refuses to charge, a damaged charging port might be the culprit. Cell phone charging port repair costs can range from $20 to $90. This is often a less expensive repair than a screen, but still crucial for your phone’s functionality.
  • Extent of Damage: A small crack in the corner of a screen might only require the glass to be replaced, while a completely shattered screen with underlying display issues will need a full screen assembly replacement. Similarly, water damage can range from a minor spill that only affects a few components to a complete submersion that causes widespread corrosion and multiple part failures.
  • Technician Expertise: We pride ourselves on having experienced technicians who are experts in their field. Their skill ensures that the repair is done correctly the first time, preventing further issues and saving you money in the long run. Highly trained technicians, especially those with specialized certifications, contribute to the quality and reliability of the repair, and this expertise is reflected in the overall service.

Why Part Quality Matters

When it comes to replacement parts, you generally have two main options: Original Equipment Manufacturer (OEM) parts or aftermarket parts. Understanding the difference is crucial for your phone repair estimate and the longevity of your device.

  • OEM Parts: These are parts made by the original manufacturer of your phone (e.g., Apple, Samsung). They are designed to exact specifications, ensuring perfect fit, functionality, and performance. Using OEM parts often means your phone will feel and function exactly as it did before the damage, and they typically come with a manufacturer’s warranty. However, they are usually more expensive.
  • Aftermarket Parts: These are parts manufactured by third-party companies. While some high-quality aftermarket parts can perform nearly as well as OEM, others might be of lower quality. They are generally more affordable, which can significantly reduce your repair cost. However, there can be performance differences, such as color accuracy or touch sensitivity on a screen, and they might not be as durable. In some cases, using non-OEM parts on iPhones, for example, can even trigger an “important display message” notification due to proprietary licensing and software.

At Laurel Phone Repair, we believe in transparent part options. We’ll discuss the pros and cons of both OEM and high-quality aftermarket parts with you, helping you choose the best option for your budget and needs. Our goal is to ensure you understand how your choice impacts the repair’s cost, performance, and any warranty implications. We stand behind our work, offering warranties on our repairs regardless of the part type chosen, ensuring your peace of mind. Find out more about our services, including part options, on our Phone Repair Services in Laurel page.

DON’T: Rely Solely on Online Estimators

It’s tempting to type your phone model and problem into an online estimator and expect a definitive answer. While these tools can be incredibly fast and provide a convenient ballpark figure, relying solely on them for your phone repair estimate can lead to surprises down the road. An online estimator might give you a price in “6 easy steps” and “less than 2 minutes,” but it can’t see the full picture.

The Difference Between an Online Estimate and an In-Person Quote

Think of an online estimate tool as a helpful starting point, but not the finish line.

  • Online Estimate (Ballpark Figure): These tools typically ask for your phone model and the most obvious issue (e.g., “cracked screen,” “battery not holding charge”). They then pull up a generalized price range based on common repairs. This is useful for getting a quick idea of potential costs and comparing services at a high level. However, they are often limited by the information you can provide.
  • In-Person Quote (Firm Assessment): This is where our expertise truly shines. When you bring your device to us for a free, no-obligation diagnostic, our certified technicians can perform a comprehensive inspection. This involves physically examining your phone, potentially disassembling it, and using specialized tools to uncover hidden issues that an online form simply can’t detect.

Accuracy Limitations and Unforeseen Issues:

An online tool can’t account for complex problems. For example, if your screen is cracked, an online estimator might quote you for a screen replacement. But what if the fall also damaged the phone’s frame, or worse, the internal components? A damaged frame, for instance, can prevent a new screen from seating properly, leading to further issues. A physical inspection allows us to identify these “unforeseen issues” and provide a truly accurate phone repair estimate.

When to Get an In-Person Inspection

While online tools have their place, certain scenarios absolutely warrant an in-person diagnostic to ensure you get the most accurate phone repair estimate possible:

  • Complex Issues: If your phone is experiencing multiple problems, or if the issue isn’t immediately obvious (e.g., intermittent freezing, unusual sounds, camera not focusing), a hands-on diagnostic is essential. These symptoms could point to anything from a software glitch to a failing motherboard.
  • Water Damage: This is perhaps the most critical scenario for an in-person inspection. Water-damaged phone repair costs can range from as little as $30 to well over $100, but the true cost depends entirely on the extent of internal corrosion. An online tool can’t tell you if the water has fried your logic board or just caused a minor short. We need to open the device, clean it, and assess the damage to provide a realistic estimate. Taking water-damaged phones to a repair professional immediately is crucial to prevent further corrosion.
  • Phone Not Turning On: A dead phone could be due to a completely depleted battery, a faulty charging port, a damaged power button, or a critical internal failure. Our free diagnostic will help pinpoint the exact cause.
  • Multiple Problems: If your phone has a cracked screen and a battery that drains quickly and the speaker isn’t working, an in-person inspection allows us to diagnose all issues simultaneously and provide a bundled phone repair estimate, potentially saving you money compared to addressing each problem separately.
  • Intermittent Faults: If your phone works sometimes but not others, or if a feature randomly stops functioning, these “ghost in the machine” problems are notoriously difficult to diagnose without a technician’s direct examination and testing.

We offer free, no-obligation diagnostics on all devices. Our professional technicians will help you determine the repair needed and the best price for it. Don’t guess – let us take a look. Get a professional Device Diagnostics with us.

DO: Provide Detailed Information for Accurate Phone Repair Estimates

Imagine trying to fix a car without knowing its make, model, or what sound it’s making. You wouldn’t get very far, right? The same applies to your phone. The more detailed information you can provide, the more accurate and efficient your phone repair estimate will be. It helps us understand the problem, anticipate potential complications, and prepare the right parts and tools.

customer talking to a repair technician at a counter - Phone repair estimates

When you come to us at Laurel Phone Repair, our friendly staff will guide you through this process. Providing comprehensive details ensures we can give you the most precise quote and get your repair underway swiftly. You can even start by scheduling your repair with us online on our Schedule Your Repair page.

What Information to Give the Repair Shop

When discussing your phone’s issues with our technicians, here’s a list of crucial information that will help us provide the most accurate phone repair estimate:

  • Exact Phone Model (e.g., iPhone 14 Pro, Samsung Galaxy S23): This is paramount. Even small variations between “iPhone 13” and “iPhone 13 Pro” can mean different parts, different costs, and different repair procedures. Knowing the exact model helps us quickly identify compatible components.
  • Detailed Description of the Issue: Don’t just say “it’s broken.” Tell us: “The screen is cracked, and there are black lines running through the display,” or “The phone charges slowly and only if I hold the cable at a specific angle,” or “My phone turns off randomly even when the battery percentage is high.” The more specific, the better.
  • When the Problem Started: Did it happen suddenly after an event, or has it been a gradual decline? This can offer clues about the nature of the damage (e.g., impact vs. wear and tear).
  • Any Recent Accidents (Drops, Water Exposure): Be honest! Even if you think a drop wasn’t severe or a splash quickly dried, it could be the root cause of your current problem. Water damage, especially, can manifest days or weeks after exposure. Knowing about an accident helps us look for specific types of damage.
  • If You Have a Warranty or Protection Plan: This is vital for determining your out-of-pocket costs. If you have a manufacturer’s warranty, AppleCare+, or a third-party protection plan (like Asurion), your repair might be covered, or you might only owe a deductible. We can help you steer these options.

Getting an Accurate Estimate for Complex Issues

Some phone issues aren’t as straightforward as a cracked screen. For these more complex problems, providing detailed information, combined with our expert diagnostics, is absolutely essential for an accurate phone repair estimate.

  • Water Damage Diagnosis: As mentioned, water damage is tricky. Knowing when and how your phone was exposed can help us prioritize our diagnostic approach. Our technicians will perform a complete water-damage diagnostic to assess the extent of corrosion and identify all affected components. This initial assessment is critical because corrosion can set in quickly and cause secondary failures.
  • Motherboard Issues: If your phone isn’t turning on, has severe performance issues, or exhibits strange behavior, it might be a problem with the logic board (motherboard). These repairs are highly specialized and often involve micro-soldering. Providing a thorough history of the phone’s symptoms and any events leading up to the failure helps our technicians narrow down the potential issues on the board.
  • Data Recovery Needs: If your phone is severely damaged and your primary concern is recovering precious photos or contacts, our diagnostic process will focus on assessing the feasibility and cost of data recovery alongside potential device repair. It’s a different skillset and often a separate service.
  • Why a Diagnostic is Essential: For complex issues, a diagnostic isn’t just recommended; it’s a necessity. We use advanced diagnostic tools to identify and fix problems quickly. Our free diagnostic service means you’ll know exactly what’s wrong and what it will cost before we proceed with any repair. This transparency ensures there are no surprises in your final phone repair estimate. Learn more about our comprehensive offerings on our Services page.

DON’T: Ignore the Fine Print and Warranty Details

Getting a phone repair estimate is just the first step. To truly protect yourself and avoid unexpected costs, it’s crucial to pay close attention to the fine print, understand the shop’s policies, and clarify all warranty details. Skimming these details can lead to frustration and additional expenses.

At Laurel Phone Repair, we believe in complete transparency. We want you to feel confident and informed throughout the entire repair process. We’re always happy to walk you through our terms and conditions. For more detailed information, please visit our Warranty Information page.

Understanding Potential Additional Costs

While we strive to provide accurate upfront estimates, sometimes additional costs can arise. Here’s what to look out for:

  • Hidden Fees: Reputable repair shops will be upfront about all charges. Be wary of estimates that seem too low, as they might have hidden fees tacked on later. Always ask for a breakdown of costs, including parts, labor, and any potential surcharges.
  • Diagnostic Charges (Sometimes Waived): While many shops, including ours, offer free diagnostics, some might charge a small fee, especially for advanced diagnostics on very complex issues. Often, this diagnostic fee is waived or applied toward the repair cost if you decide to proceed with the service. Always clarify this before the diagnostic begins.
  • Additional Damage Found During Repair: It’s not uncommon for technicians to find secondary damage once they open up a device. For example, a cracked screen might hide a bent frame, or a battery replacement might reveal a corroded charging port. If additional damage is found, a trustworthy shop will always contact you, explain the new findings, and get your explicit approval before performing any additional work that would alter your original phone repair estimate.
  • Tax and Service Fees: Your estimate might not always include local sales tax or specific service fees. Always confirm if the quoted price is the “out-the-door” final cost.

What to Do if the Final Cost is Higher Than the Estimate

It’s a frustrating situation to be told one price and then presented with a higher bill. If the final repair cost differs significantly from your initial phone repair estimate, here’s what you should do:

  1. Ask for a Detailed Explanation: Don’t hesitate to ask why the cost increased. A reputable shop will be able to clearly explain what additional work was performed, what extra parts were needed, and why these weren’t identified during the initial estimate.
  2. Request to See the Damaged Parts: If new parts were replaced due to previously hidden damage, ask to see the old, damaged components. This provides tangible proof of the necessity of the additional work.
  3. Approve All Additional Work Beforehand: A crucial best practice is to ensure that the repair shop has a policy to contact you for approval if any additional work beyond the original phone repair estimate is required. Never authorize a repair shop to proceed with additional work without your explicit consent and a clear understanding of the new cost.
  4. Understanding Repair Terms and Conditions: Before any repair, take a moment to read and understand the shop’s terms and conditions, especially regarding price changes and approvals. This helps manage expectations and protects you from unexpected charges.

DO: Compare Your Options and Understand the Guarantee

When your phone needs fixing, it’s natural to want the best service at a fair price. Just as you wouldn’t buy the first car you see, you shouldn’t necessarily jump on the first phone repair estimate you receive. Taking the time to compare your options and understand the guarantees offered can save you money and ensure a quality repair.

At Laurel Phone Repair, we encourage you to compare because we’re confident in our experienced technicians, transparent part options (OEM vs. aftermarket), and high customer satisfaction backed by strong warranties. We’re proud of the certified repairs we offer.

How do phone repair estimates differ between providers?

Different repair services operate with different business models, part sourcing, and technician expertise, all of which influence their phone repair estimates.

  • Cost and Speed: Some shops might offer lower prices but use cheaper, lower-quality aftermarket parts, or have longer turnaround times. Others might charge more but guarantee OEM parts and same-day service. We strive for a balance of affordability, quality, and speed. For instance, many common repairs like screen or battery replacements can often be done in under two hours, sometimes even faster for iPhone display repairs starting from $39.00 or iPhone battery replacements starting from $134.00, with $0 labor fees.
  • Part Sourcing: As discussed, the choice between OEM and aftermarket parts significantly impacts cost. Some providers might exclusively use OEM parts (often authorized service centers), while others offer a choice. We believe in transparency and discussing both options with you.
  • Technician Expertise: The skill and certification of the technicians vary. Our team consists of experienced technicians who are continuously trained and certified, ensuring a high standard of repair, regardless of the device. This expertise is a cornerstone of our service in Laurel, Hattiesburg, Jackson, and Jones County.
  • Warranty and Guarantees: A key differentiator is the warranty offered on repairs. A strong warranty demonstrates a shop’s confidence in their work. We offer robust warranties on our repairs because we stand behind our craftsmanship and the quality of our parts. Learn more about our commitment to quality on our Device Repair with Warranty page.

How do warranty and repair plans affect your phone repair estimates?

Your existing warranty or repair plan can dramatically alter your out-of-pocket costs for a phone repair.

  • Manufacturer Warranty: Most new phones come with a limited manufacturer’s warranty, typically covering manufacturing defects for one year. However, this usually does not cover accidental damage (like a cracked screen or water damage) or wear and tear (like a degrading battery). If your issue is a manufacturing defect, your repair might be free.
  • Protection Plans (e.g., AppleCare+, Carrier Plans, Asurion): These plans are designed to cover accidental damage and often extend warranty coverage.
    • AppleCare+: For iPhones, AppleCare+ covers accidental damage from handling for a service fee per incident. For example, if your iPhone battery holds less than 80% of its original capacity, AppleCare+ can provide a replacement at no additional cost. Screen repairs are also eligible for coverage under AppleCare+ with a service fee. These plans can significantly reduce the cost of major repairs.
    • Third-Party Protection Plans: Many carriers and retailers offer their own protection plans, often backed by companies like Asurion. These plans typically involve a monthly premium and a deductible for each repair claim. If you have such a plan, always start a claim with your provider first, as they might direct you to an authorized repair center or cover a significant portion of the cost.
  • Deductibles and Service Fees: Even with a protection plan, you’ll likely still pay a deductible or service fee per incident. This is your out-of-pocket cost, and factor this into your overall phone repair estimate comparison. Sometimes, a third-party repair shop might offer a repair cost that is lower than your plan’s deductible, making it a more economical choice.
  • Out-of-Pocket Costs: If you don’t have a warranty or protection plan that covers your specific damage, you’ll be paying the full cost out of pocket. This is when comparing phone repair estimates from various reputable shops, like Laurel Phone Repair, becomes even more critical.

Frequently Asked Questions about Phone Repair Estimates

We understand you have questions when your phone breaks. Here are some of the most common inquiries we receive regarding phone repair estimates.

How much does a typical phone screen repair cost?

The cost of a typical phone screen repair can vary quite a bit, generally ranging from $50 to $329. This wide range is primarily due to:

  • Phone Model: Repairing a screen on an older, more basic smartphone will be on the lower end of the spectrum, while replacing the advanced OLED display on a newer flagship model (like the latest iPhone or Samsung Galaxy) will be significantly more expensive. For instance, iPhone display repair costs can start from $79.
  • Part Quality: Your choice between an OEM part and a high-quality aftermarket part will also affect the price. Aftermarket options are often more affordable.
  • Extent of Damage: If only the glass is cracked, it might be cheaper than if the underlying display (LCD/OLED) is also damaged, requiring a full screen assembly replacement.

We always provide a clear phone repair estimate after a diagnostic. You can get more information about our screen replacement services on our Screen Replacement Nearby page.

Are free phone repair estimates always free?

Yes, at Laurel Phone Repair, our initial phone repair estimates and diagnostics are always free. We believe you should know exactly what’s wrong with your device and how much it will cost to fix before committing to anything.

However, it’s worth clarifying with any repair shop you visit:

  • Free Estimates vs. Diagnostic Fees: Some shops might offer a “free estimate” which is simply a quick visual inspection. For more complex issues, they might charge a “diagnostic fee” to fully troubleshoot the problem (e.g., for water damage or a phone that won’t turn on).
  • When a Fee Might Apply: If a diagnostic fee is charged, it’s often for advanced diagnostics that require significant technician time or specialized equipment.
  • Fee Applied to Repair Cost: Many reputable shops that charge a diagnostic fee will apply that fee toward the cost of the repair if you choose to proceed with their service. Always ask about this policy upfront.

Can I get a repair estimate for a water-damaged phone?

Yes, absolutely! We regularly provide phone repair estimates for water-damaged phones. However, it’s important to understand the process:

  • Initial Inspection: We’ll start with an initial visual inspection and gather information about how the water damage occurred.
  • Diagnostic Process for Liquid Damage: Unlike a simple screen repair, water damage requires a thorough diagnostic. We need to open the device, carefully clean any corrosion, and then test each component to determine what is salvageable and what needs replacement. This process is crucial because corrosion can spread and cause secondary failures if not addressed promptly.
  • Corrosion Risk: The longer a water-damaged phone sits, especially if it’s still powered on, the more severe the corrosion can become. This can lead to increased repair costs or even render the phone irreparable.
  • Why Immediate Service is Crucial: Bringing your water-damaged phone to us as soon as possible significantly increases the chances of a successful and more affordable repair. We’ll provide a detailed phone repair estimate after our diagnostic, outlining the necessary repairs and their costs.

Conclusion

Navigating phone repairs can feel daunting, but with the right knowledge, getting an accurate phone repair estimate becomes a straightforward process. By following our “Do’s and Don’ts,” you empower yourself to make smart, informed decisions about your device.

Remember to DO understand what influences repair costs, from your phone’s model to part quality, and DON’T rely solely on quick online estimators when hidden damage could be lurking. Always DO provide detailed information to your repair technician, as your insights are invaluable. Equally important, DON’T ignore the fine print and warranty details; understanding potential extra costs and guarantees protects your wallet. Finally, DO compare your options and comprehend how warranties and repair plans affect your final bill.

At Laurel Phone Repair, serving Laurel, Hattiesburg, Jackson, and Jones County, Mississippi, we pride ourselves on transparency, expertise, and customer satisfaction. We aim to provide clear, reliable phone repair estimates every time, ensuring you know exactly what to expect. We’re here to help you get your device back to peak performance without any unwelcome surprises.

For a reliable estimate and expert service, visit us today or get started with a quote for your Screen Repair.

The Ultimate Guide to Honor 8X Screen Replacement: Disassembly and Teardown

Honor 8X LCD Replacement: The Ultimate Guide 2025

Why Honor 8X LCD Replacement is Essential for Your Device

Honor 8x lcd replacement is a common repair need for this popular 2018 smartphone, which features a large 6.5-inch LTPS IPS LCD display. Whether you’re dealing with a cracked screen, unresponsive touch, backlight issues, or strange colored lines across your display, replacing the LCD assembly can restore your device to full functionality.

Quick Answer: The Honor 8X Screen Replacement Process

  1. Discharge battery below 25% for safety
  2. Heat and remove the back panel using a suction cup and opening picks
  3. Disconnect the battery, fingerprint sensor, and display flex cables
  4. Remove the damaged screen by heating and carefully separating it from the frame
  5. Install the new LCD assembly with fresh adhesive
  6. Test the display before final reassembly
  7. Estimated time: 1-3 hours for DIY, under 1 hour for professionals

The Honor 8X (model numbers JSN-L21 and JSN-L42, also known as Honor View 10 Lite) requires careful disassembly due to its internal layout. You’ll need to remove the battery to access the display cables, which differs from many modern smartphones. Replacement screens typically cost around $36-$40 for quality parts, making DIY repair a cost-effective alternative to buying a new device.

Common symptoms that indicate you need an honor 8x lcd replacement include:

  • Visible cracks or shattered glass
  • Black screen or no display output
  • Unresponsive or erratic touch response
  • Colored lines, dead pixels, or screen artifacts
  • Backlight issues (too bright, too dim, or flickering)
  • Display works but shows physical damage

I’m Ralph Harris, and with over 20 years in electronics repair, 500+ Apple repair certifications, and over 2,000 published repair guides, I’ve helped thousands save money and extend their device’s life. I’m here to guide you through a successful honor 8x lcd replacement.

Step-by-step Honor 8X LCD replacement process infographic showing five main stages: Preparation (gather tools, discharge battery, set up workspace), Opening (heat back panel, use suction cup, insert opening picks, disconnect fingerprint cable), Disconnecting (remove motherboard shield, disconnect battery and display cables, remove battery), Replacing (heat front screen, separate damaged LCD, clean adhesive, apply new screen with fresh adhesive), and Reassembling (test display function, reconnect all cables, secure back panel) - honor 8x lcd replacement infographic

Pre-Repair Checklist: Tools, Parts, and Precautions

Before starting your Honor 8X LCD replacement, it’s crucial to prepare your workspace and gather all necessary items. A well-prepared repair is a successful one. First and foremost, safety. We always recommend discharging your phone’s battery below 25% before starting. This is a critical precaution because the 3750 mAh lithium-ion battery can be a fire or explosion risk if accidentally punctured. To minimize the risk of electrostatic discharge (ESD), work on a clean, uncluttered surface, ideally using an anti-static mat.

What You’ll Need: Tools and Parts

To successfully complete an honor 8x lcd replacement, you’ll need a specific set of tools and, of course, the replacement screen itself. Here’s a comprehensive list:

  • Phillips #00 Screwdriver: For those tiny screws holding internal components.
  • iOpener or Heat Gun: Essential for softening the adhesive that secures the back panel and the screen. An iOpener provides even, controlled heat, which we prefer.
  • Suction Cup: To help create a gap between the back panel and the frame, or the screen and the frame.
  • Opening Picks (Plastic): Thin, non-marring tools to slice through adhesive without damaging the phone’s delicate frame.
  • Spudger (Plastic): A versatile tool for prying, disconnecting cables, and manipulating small components.
  • Tweezers: For handling small screws, flex cables, and removing stubborn adhesive bits.
  • Isopropyl Alcohol (>90% concentration): Great for cleaning adhesive residue and gently loosening stubborn adhesive.
  • New Adhesive Strips: Crucial for securely sealing your new screen and back panel. Many replacement screens come with these, but it’s good to have extra.
  • New Huawei Honor 8X LCD and Digitizer Assembly: This is the star of the show. Ensure it’s compatible with your specific Honor 8X model (JSN-L21 or JSN-L42).

For the replacement screen, you’ll find two main types: OEM (Original Equipment Manufacturer) and aftermarket. OEM parts are identical to the original, offering the best quality, while aftermarket parts are from third parties and can vary in quality. While cheaper, we recommend investing in a high-quality replacement for optimal performance. The Honor 8X uses a LTPS IPS LCD capacitive touchscreen. You can find parts from online suppliers like eTech Parts for around $36.83, but for our Screen Repair services in Laurel, Hattiesburg, Jackson, and Jones County, Mississippi, we use only high-quality, warrantied components.

Sourcing Your Honor 8X LCD Replacement Kit

Finding a reliable source for your Honor 8X LCD replacement kit is paramount, as a cheap screen can lead to poor color and unresponsive touch. Here’s how to ensure you’re getting a good part:

  • Look for Reputable Sellers: Stick to well-known suppliers and check their reviews and return policies.
  • Understand the Warranty: A good screen should have a warranty for manufacturing defects. Our services include robust warranties, reflecting our confidence in our parts.
  • Screen with Frame vs. Screen Only: Screens pre-installed in a new frame are easier to install but more expensive. A “screen only” replacement requires more careful work. For the Honor 8X, a complete assembly often simplifies the process.
  • Ensure Compatibility: Double-check that the screen is compatible with the Huawei Honor 8X, model numbers JSN-L21 or JSN-L42 (Honor View 10 Lite).

Key Safety Precautions

We can’t stress enough the importance of safety during an honor 8x lcd replacement. Your safety and the device’s integrity depend on it.

  • Discharge Battery Below 25%: As mentioned, this significantly reduces the risk of thermal events if the battery is accidentally damaged.
  • Lithium-ion Battery Risks: Be extremely gentle when handling the battery. Do not bend, puncture, or excessively pry it. If you notice swelling or damage, proceed with extreme caution or seek professional help. Never reuse a lithium-ion battery once it has been removed.
  • Disconnect Power First: Always disconnect the battery flex cable from the motherboard as one of your first steps after opening the device to prevent short circuits.
  • Careful Handling of Flex Cables: These are easily torn. Use plastic tools like spudgers to disconnect them, never pulling on the cable itself.
  • Work in a Well-Lit, Organized Space: This helps prevent losing tiny screws or damaging components.
  • Avoid Excessive Force: If something isn’t coming apart easily, stop and reassess. Patience is key.

If you ever feel out of your depth, our experienced technicians are here to help. You can find more repair help on our Support page.

The Step-by-Step Honor 8X LCD Replacement Process

Alright, it’s time to get our hands dirty! This section will guide you through the intricate steps of disassembling your Honor 8X and installing a brand-new screen. While some may suggest using a guide for the older Honor 8 model, we strongly advise against it. The Honor 8X (released in late 2018) has a different internal layout, including screw placements, flex cable routing, and component connections, compared to the Honor 8. A guide for the Honor 8X is essential to avoid mistakes and potential damage to your device.

The Honor 8X features dimensions of 160.4 mm in height, 76.6 mm in width, and 7.8 mm in depth, weighing 175 g, which gives it a specific internal structure to steer.

Step 1: Opening the Back Panel

The Honor 8X’s back panel is secured with strong adhesive, so we’ll need to apply some heat to loosen it up.

Applying heat to the back of the Honor 8X with an iOpener - honor 8x lcd replacement

  1. Heat the Back Panel: Use an iOpener or a heat gun to gently heat the edges of the Honor 8X’s back glass. We recommend heating for about 1-2 minutes, focusing on the perimeter. The goal is to make the adhesive pliable, not to cook your phone!
  2. Attach Suction Cup: Once heated, attach a suction cup to the lower portion of the back glass, near the charging port.
  3. Create a Gap: Gently pull up on the suction cup while simultaneously inserting a thin opening pick into the gap that forms between the back glass and the phone’s frame. If the glass is heavily cracked, you might need to use strong tape over the cracks first to allow the suction cup to adhere, or even superglue the suction cup in place and let it cure.
  4. Slice Through Adhesive: Once you have an opening pick inserted, carefully slide it around the perimeter of the phone, slowly slicing through the adhesive. Be patient and reapply heat if the adhesive becomes difficult to cut. Avoid inserting the pick too deeply, especially near the top where the fingerprint sensor cable is located.
  5. Lift the Back Panel: Once the adhesive is mostly severed, gently lift the back panel. Crucially, do not pull it off completely! The fingerprint sensor cable is connected to the motherboard underneath. Carefully pry up the small bracket securing the fingerprint flex connector, then use a plastic spudger to disconnect the fingerprint sensor cable. Now you can fully remove the back panel and set it aside.

Step 2: Disconnecting Components and Removing the Battery

With the back panel off, we gain access to the phone’s internals. Our next steps involve disconnecting power and other essential flex cables.

The interior of the Honor 8X with components and battery visible - honor 8x lcd replacement

  1. Remove Motherboard Shield Screws: You’ll see a protective shield covering the motherboard. This shield is typically secured by several Phillips #00 screws. Carefully remove all of them and set them aside in an organized manner.
  2. Disconnect Battery Flex Cable: This is a vital safety step. Locate the battery’s flex cable connector on the motherboard. Use a plastic spudger to gently pry up and disconnect the cable. This cuts power to the entire device.
  3. Remove the Battery: The Honor 8X’s battery is secured with adhesive. You might need to gently apply heat to the front of the screen (on the outside) to soften the adhesive underneath the battery. Use a plastic card or spudger to carefully pry the battery out. Be extremely cautious not to bend or puncture the battery. If it’s very stubborn, a few drops of high-concentration isopropyl alcohol along the edges can help dissolve the adhesive. Do not reuse a removed lithium-ion battery.
  4. Disconnect Display Flex Cable: Locate the display flex cable connector on the motherboard. Similar to the battery cable, use a plastic spudger to gently disconnect it. This cable runs to the screen assembly you’re about to remove.

Step 3: Removing the Damaged Screen

Now that the power is off and the display cable is disconnected, we can focus on removing the faulty screen.

  1. Apply Heat to the Front Screen: Just like with the back panel, we need to soften the adhesive holding the screen in place. Use your iOpener or heat gun to apply heat evenly around the edges of the front screen for 1-2 minutes.
  2. Create a Gap: Attach a suction cup to the lower part of the screen. Gently pull up to create a small gap. If the screen is severely cracked, apply tape over the cracks first to help the suction cup adhere.
  3. Use Opening Picks: Once a gap is created, insert an opening pick and carefully slide it around the perimeter of the screen, cutting through the adhesive. Be mindful of the display cable’s location (usually at the bottom) and avoid inserting picks too deeply, as you could damage internal components or sensors.
  4. Separate Screen from Frame: Once the adhesive is sufficiently cut, carefully separate the screen from the phone’s frame. Gently thread the display flex cable through its opening in the frame as you lift the screen away. Remove the damaged screen and dispose of it responsibly.
  5. Clean Old Adhesive: This is a crucial step for a clean installation. Use your tweezers and a spudger to carefully scrape away all remnants of old adhesive from the phone’s midframe and screen bezel. Then, use isopropyl alcohol and a lint-free cloth to thoroughly clean the glued areas. Any old adhesive left behind can prevent the new screen from sitting flush, leading to gaps or even damage.

Step 4: Installing and Testing the New Screen

We’re on the home stretch! This is where your Honor 8X starts looking like new again.

  1. Apply New Adhesive: If your new screen didn’t come with pre-applied adhesive, carefully apply new adhesive strips to the perimeter of the phone’s frame where the screen will sit. Ensure even coverage.
  2. Feed the New Display Cable: Carefully feed the new display flex cable through its opening in the phone’s frame.
  3. Temporarily Reconnect: Before fully adhering the new screen, we perform a crucial test. Temporarily reconnect the display flex cable to the motherboard. Then, temporarily reconnect the battery flex cable.
  4. Power On and Test: Gently power on your Honor 8X. Go through the initial setup or open up your phone if possible. This is your chance to test everything. Check the touch response across the entire screen, ensuring there are no dead spots. Look for any dead pixels, discoloration, or backlight issues. If you notice any problems, carefully power down, disconnect the battery, and re-check all connections. We have comprehensive tools for Device Diagnostics if you need more in-depth testing.
  5. Final Installation: If everything checks out, power down the phone and disconnect the battery and display flex cables again. Carefully remove the protective films from the new screen’s adhesive (if applicable). Align the new screen perfectly with the phone’s frame and gently press it into place, ensuring a secure fit. Reconnect the display flex cable and the battery flex cable.
  6. Reassemble: Follow the disassembly steps in reverse order: re-install the battery, re-attach the motherboard shield, reconnect the fingerprint sensor cable, and finally, re-adhere the back panel with fresh adhesive. Apply gentle, even pressure around the edges of the phone for a few minutes to ensure the adhesive cures properly.

Congratulations, you’ve just completed an honor 8x lcd replacement!

DIY vs. Professional Repair: Making the Right Choice

Deciding whether to tackle an honor 8x lcd replacement yourself or seek professional help is a common dilemma. Both options have their merits, and the best choice often depends on your comfort level, budget, and the value you place on your time. We believe in empowering our customers with information, whether they choose DIY or our expert services.

Cost and Time Analysis

Let’s break down the typical costs and time commitment for both approaches:

Factor DIY Repair Professional Repair
Cost of Parts $35 – $60 (for a quality Honor 8X LCD replacement, like the $36.83 screen from eTech Parts) Included in professional service cost (typically higher quality, warrantied parts)
Cost of Tools $15 – $30 (for a basic kit, though you might have some items already) None (technician supplies)
Professional Repair Cost N/A $80 – $150+ (can vary based on location and service provider, includes parts & labor)
DIY Time 1-3 hours (for a first-timer, this includes prep, careful execution, and potential troubleshooting) Under 1 hour (experienced technicians are efficient)
Professional Time N/A Varies, but often same-day service or within 24 hours

As you can see, the DIY route can save you a significant amount on labor costs, potentially reducing the overall expense of your Honor 8X LCD replacement to just the cost of the part and some basic tools. However, this saving comes with a time commitment and the risk of error. You can get more details on our service costs and what’s included by visiting our Pricing page.

What to Do If the New Screen Doesn’t Work

It’s disheartening when you’ve put in all that effort and the new screen doesn’t light up. Don’t panic! Here’s a troubleshooting guide:

  1. Check Cable Connections: The most common culprit is a loose or improperly seated flex cable. Power down your phone, open it up again, and carefully disconnect and reconnect the display and battery flex cables. Ensure they click firmly into place.
  2. Ensure Correct Part Model: Double-check that the replacement screen is indeed for the Honor 8X (JSN-L21 or JSN-L42). An incompatible part simply won’t work.
  3. Test Old Screen Again (if possible): If your old screen still displayed something (even if cracked), reconnect it temporarily. If it works, you might have a faulty new screen. If neither works, the issue might be with the motherboard or another component.
  4. Non-Working Backlight, Display Lines, or Unresponsive Touch:
    • No backlight/Black screen: Could be a damaged display cable, a faulty screen, or an issue with the display connector on the motherboard.
    • Lines/Discoloration: Often indicates a damaged screen, a crimped flex cable, or a faulty display driver.
    • Unresponsive touch: Can be a faulty digitizer (part of the screen assembly), a damaged flex cable, or a software glitch.
  5. Inspect for Damage: Carefully examine the motherboard connectors and flex cables for any signs of damage (tears, bends, corrosion) that might have occurred during the repair.

If after these steps you’re still facing issues, it might be time to call in the cavalry.

When to Seek Professional Help

DIY repairs are incredibly rewarding, but they’re not for everyone, and sometimes even experienced DIYers hit a wall. Here are some signs it’s time to seek professional assistance for your honor 8x lcd replacement:

  • Lack of Tools or Confidence: If you don’t have the specialized tools, or you’re simply not comfortable with the intricate process, forcing it can lead to more damage.
  • Fear of Causing More Damage: It’s easy to accidentally damage other components like flex cables, the battery, or even the motherboard during a complex repair. If the thought of this stresses you out, a professional is a safer bet.
  • Repair is Unsuccessful: You’ve tried troubleshooting, but your new screen still isn’t working, or you’ve encountered a new problem. Our technicians have the diagnostic tools and expertise to identify and fix issues that might be beyond a typical DIY repair.
  • No Time for DIY: Life gets busy! If you simply don’t have the 1-3 hours (or more, if things go wrong) to dedicate to the repair, a professional service offers convenience and speed.
  • Warranty Concerns: A professional repair from a reputable shop like ours typically comes with a warranty on both parts and labor, providing peace of mind that your investment is protected.

Our expert technicians at Laurel Phone Repair are highly experienced in all types of phone repairs, including the Honor 8X LCD replacement. We offer quick, affordable repairs with transparent part options and high customer satisfaction. If you’re in Laurel, Hattiesburg, Jackson, or Jones County, Mississippi, and need reliable help, don’t hesitate to reach out for Repair services.

Frequently Asked Questions about Honor 8X Screen Repair

We hear a lot of questions about the Honor 8X LCD replacement, so we’ve compiled some of the most common ones to provide clear, concise answers.

How long does a Huawei Honor 8X screen replacement typically take?

For a first-timer attempting a DIY Honor 8X LCD replacement, the process can typically take anywhere from 1 to 3 hours. This timeframe accounts for gathering tools, carefully following each step, dealing with stubborn adhesive, and potentially troubleshooting minor issues. Patience is key when you’re doing it yourself!

However, for a professional technician with specialized tools and extensive experience, the same repair can often be completed in under 1 hour. Our technicians are adept at these repairs, ensuring efficiency without compromising quality.

What are the symptoms of a damaged Honor 8X screen?

Recognizing the signs of a damaged screen is the first step in knowing you need an honor 8x lcd replacement. Common symptoms include:

  • Visible Cracks or Shattered Glass: This is the most obvious sign, ranging from minor hairline cracks to a completely spiderwebbed display.
  • Black or Blank Screen: The phone powers on and receives notifications, but the screen remains completely dark. This indicates a display panel failure.
  • Unresponsive or Erratic Touch: The screen doesn’t register your touches, or it registers them incorrectly (ghost touches).
  • Colored Lines or Dead Pixels: Vertical or horizontal lines appearing on the display, or small black/colored dots that never change, indicate damage to the LCD panel.
  • Backlight Issues: The screen is too dim, too bright, flickering, or has uneven lighting.
  • Flashback: The display shows remnants of previous images or has a “ghosting” effect.
  • Over-bright Display: The screen is excessively bright and cannot be adjusted, indicating a display driver issue.

Any of these symptoms can severely impact your phone’s usability and warrant a screen replacement.

What is the difference between replacing an Honor 8 and an Honor 8X screen?

While both are Huawei Honor devices, there are notable differences in their design and internal architecture that impact the screen replacement process. The Honor 8X (released in 2018) is a physically larger device with a 6.5-inch LTPS display, compared to the Honor 8’s 5.2-inch display (released in 2016).

Crucially, the Honor 8X LCD replacement involves a different internal layout, including the placement of screws, flex cables, and how the battery is secured. For instance, in the Honor 8X, you typically need to remove the battery to access the display cables, which might be positioned differently or require different steps than the Honor 8. Although some community forums might suggest that an Honor 8 guide is “similar enough,” we strongly advise against using it as a direct replacement guide for the Honor 8X. Using an incorrect guide can lead to mistakes, damage to sensitive components, or an unsuccessful repair. Always seek out guides specifically custom for your Honor 8X model (JSN-L21 or JSN-L42) to ensure a safe and effective repair.

Conclusion

Starting on an Honor 8X LCD replacement can be a rewarding and cost-effective solution for a broken device. With patience, the right tools, and careful attention to detail, you can restore your phone to its former glory. We hope this comprehensive guide has equipped you with the knowledge and confidence to tackle this repair yourself.

However, we understand that not everyone has the time, tools, or comfort level for a DIY repair. If the process seems too complex, you’ve run into trouble, or you simply prefer the peace of mind that comes with professional service, don’t risk further damage to your valuable device. The expert technicians at Laurel Phone Repair, serving Laurel, Hattiesburg, Jackson, and Jones County, Mississippi, are ready to help. We offer fast, reliable, and warrantied services to get your Honor 8X working perfectly again, using high-quality parts and our extensive experience.

Ready to get your Honor 8X screen fixed? Schedule Repair with us today!

Mystery Scooter Battery? How to Identify and Replace Your Electric Scooter’s Power Pack

Scooter Battery Replacement: 5 Optimal Tips

Why Scooter Battery Replacement Matters for Your Ride

Scooter battery replacement becomes essential when your electric scooter loses range, refuses to hold a charge, or shows physical damage like swelling. Here’s the quick answer:

Signs You Need a Replacement:

  1. Range drops by 20-30% or more from original performance
  2. Power cuts out suddenly even when the battery indicator shows charge
  3. Charging takes much longer than when the scooter was new
  4. Physical damage like swelling, leaking, or cracks in the battery case

Basic Replacement Steps:

  1. Power off and disconnect the charger
  2. Locate the battery compartment (usually under the deck)
  3. Disconnect the old battery’s connectors
  4. Install the new battery with matching voltage and capacity
  5. Reconnect wires and test before reassembling

Your electric scooter’s battery is its heart. When it fails, your commute stops. Most scooter batteries last 2-3 years with proper care, but eventually, every battery degrades. Whether you’re dealing with a scooter that barely makes it around the block or one that won’t turn on at all, understanding battery replacement saves you money and gets you back on the road fast.

Modern electric scooters use lithium-ion batteries ranging from 24V to 60V. Higher capacity (measured in Ah or Wh) means longer range. The good news? Replacing a battery is straightforward for most models and doesn’t require advanced technical skills.

I’m Ralph Harris, and with over 20 years of electronics repair experience and 500+ Apple repair certifications, I’ve guided countless customers through scooter battery replacement projects that save them hundreds compared to professional service. Whether you choose DIY or professional help, this guide will walk you through everything you need to know.

Infographic showing the 5 key signs your electric scooter battery is failing: 1) Range reduced by more than 20-30%, 2) Inconsistent power delivery or sudden voltage drops, 3) Charging time significantly extended, 4) Physical swelling or damage to battery case, 5) Battery no longer holds charge beyond 80% capacity - scooter battery replacement infographic checklist-dark-blue

Is It Time for a New Battery? Signs of a Failing Power Pack

Nobody wants to be stranded mid-commute because their scooter decided to take an unscheduled nap. Recognizing the signs that your electric scooter battery needs replacement is the first step towards a smooth repair. A failing battery often gives off subtle hints before it completely gives up the ghost.

Significantly Reduced Performance

One of the most common and frustrating indicators of a dying battery is a noticeable drop in your scooter’s performance.

  • 20-30% Range Reduction: Electric scooter batteries can last 2-3 years or more with proper care. However, a 20-30% reduction in range is normal after a couple of years of use. If your scooter used to travel 25 miles on a charge but now only manages 15 miles or less, that’s a clear red flag. Anything beyond this normal degradation indicates a significant capacity loss, meaning your battery can no longer hold as much energy as it once could.
  • Slower Acceleration and Lower Top Speed: Does your scooter feel sluggish off the line? Is it struggling to hit its usual top speed, especially on inclines? This can be due to “voltage sag.” An aging battery struggles to deliver the peak current required by the motor, leading to reduced power output. It’s like trying to run a sprint on an empty stomach – you just don’t have the energy.
  • Battery Indicator Inaccuracy: You might notice your battery indicator showing plenty of charge, only for the scooter to suddenly lose power and shut down. This inconsistent performance is a classic symptom of an unhealthy battery pack that can no longer maintain a stable voltage under load.

If you’re unsure whether your scooter’s performance issues stem from the battery or another component, we offer comprehensive diagnostic services right here in Laurel, Hattiesburg, and Jackson, Mississippi. Our experienced technicians can accurately pinpoint the problem.

Charging and Physical Issues

Beyond performance, how your battery behaves during charging and its physical condition can also tell you a lot.

  • Takes Longer to Charge: If your scooter is taking significantly longer to reach a full charge than it used to, it could be a sign of internal resistance building up within the battery cells. While some extended charging is normal over time, a drastic increase suggests the battery is working harder to accept a charge, often due to degradation.
  • Overheating During Charging: A healthy battery should warm up slightly during charging, but if it becomes excessively hot to the touch, it’s a serious warning sign. Overheating can indicate internal shorts or damaged cells, posing a safety risk.
  • Visible Cracks, Leaking Fluid, or Puffed/Swollen Battery Case: Any visible physical damage to your battery pack is a critical safety concern. Swelling, often referred to as “puffing,” is particularly dangerous in lithium-ion batteries. It indicates a buildup of gases inside the battery, which can lead to fire or explosion. If you see swelling, stop using and charging the battery immediately. Leaking fluid, especially from sealed lead-acid (SLA) batteries, also signals internal damage and potential hazards. These issues are not just about performance; they’re about your safety.

Choosing the Right Replacement Battery

Once you’ve determined that your scooter battery is indeed ready for retirement, the next step is finding its worthy successor. This isn’t just about grabbing the first battery you see; it requires a bit of detective work to ensure compatibility and optimal performance.

different types of scooter batteries side-by-side (Lithium-ion vs. Sealed Lead-Acid) - scooter battery replacement

Key Specifications to Match

To ensure your new battery fits and functions correctly, you need to pay close attention to several crucial specifications. Think of it like buying new shoes – you need the right size, style, and fit!

  • Voltage (V): This is perhaps the most critical specification. Most modern electric scooters use lithium-ion battery packs, typically ranging from 24V to 60V. Your replacement battery must match the original battery’s voltage exactly. Using a battery with the wrong voltage can damage your scooter’s motor and controller. You’ll usually find the voltage printed on your current battery or in your scooter’s user manual.
  • Capacity (Ah or Wh): Capacity determines your scooter’s range.
    • Amp-hours (Ah): This measures how much current the battery can deliver over a certain time. A 10Ah battery can deliver 10 amps for one hour, or 1 amp for 10 hours.
    • Watt-hours (Wh): This is a more direct measure of total energy, calculated as Voltage (V) x Amp-hours (Ah). Higher capacity (Ah or Wh) in an electric scooter battery generally means a longer range. You can often upgrade to a slightly higher Ah rating if the physical dimensions and voltage remain the same, potentially increasing your range without affecting other components. However, always ensure the physical size allows for the upgrade.
  • Physical Dimensions: This might seem obvious, but a new battery won’t do you any good if it doesn’t physically fit in your scooter’s battery compartment. Measure your old battery’s length, width, and height carefully. While some models allow for slight variations, a snug fit is often necessary for safety and stability.
  • Connector Type: Batteries connect to your scooter’s electrical system via specific connectors. These can vary widely, from simple spade terminals to multi-pin plugs. Make sure your new battery has the same connector type as your old one, or be prepared to adapt it (though we recommend matching directly to avoid complications). Taking a photo of the connector on your old battery before ordering is a smart move.
  • Controller Compatibility: This is particularly relevant if you’re considering an upgrade. Your scooter’s controller manages power flow from the battery to the motor. While voltage and capacity are generally flexible for upgrades within reason, some controllers have limitations on current draw. If you significantly increase the battery’s capacity or power output, ensure your controller can handle it. This is a point where professional advice can be invaluable.

OEM vs. Third-Party and Upgrades

When it comes to sourcing your new battery, you’ll generally encounter three main categories:

Feature Original Equipment Manufacturer (OEM) Batteries Third-Party Compatible Batteries Upgrade Batteries (Third-Party)
Cost Highest Moderate to Low Moderate to High (depending on capacity increase)
Compatibility Guaranteed perfect fit and function Variable; requires careful checking of specs and reviews Requires careful checking of specs, dimensions, and controller compatibility
Warranty Typically covered by scooter manufacturer’s warranty Varies by manufacturer; look for reputable brands with good warranties Varies; often from specialized aftermarket providers
Performance Matches original performance Can match or slightly vary from original; quality varies Aims to exceed original performance (e.g., increased range, higher speed)
Safety Designed to meet manufacturer’s safety standards Quality varies; reputable brands have good safety features Quality varies; ensure robust BMS (Battery Management System) and protection features
Availability Directly from scooter manufacturer or authorized dealers Widely available online and from specialty battery retailers Available from specialized e-scooter parts suppliers
  • Original Equipment Manufacturer (OEM) Batteries: These are batteries made by or specifically for your scooter’s brand.
    • Pros: Guaranteed compatibility, often the safest choice, and maintains the scooter’s original performance. If your scooter is still under warranty, using an OEM battery might be required to keep the warranty valid.
    • Cons: Often the most expensive option.
  • Third-Party Compatible Batteries: These are batteries produced by other companies that are designed to work with various scooter models.
    • Pros: Generally more affordable than OEM batteries. A wider selection of capacities might be available.
    • Cons: Quality can vary significantly. It’s crucial to research the manufacturer, read reviews, and ensure the battery meets all the key specifications (voltage, capacity, dimensions, connector type). A cheap, low-quality third-party battery can be a fire hazard or simply fail quickly.
  • Upgrade Batteries: Often a type of third-party battery, these are designed to offer better performance than your scooter’s original battery, such as increased range or higher speed.
    • Pros: Can significantly improve your riding experience, extending your adventures or making your commute more efficient.
    • Cons: Requires the most careful consideration. You must ensure the physical dimensions allow for the larger capacity, and more importantly, that your scooter’s controller and motor can handle the increased power output. Without proper compatibility, you risk damaging your scooter or, worse, creating a safety hazard. We always recommend consulting with professionals like us if you’re considering a performance upgrade, as modifications might be necessary.

A Step-by-Step Guide to Scooter Battery Replacement

Ready to get your hands dirty? Replacing your electric scooter battery can be a rewarding DIY project, but it’s crucial to prioritize safety and follow instructions carefully. Think of us as your pit crew, guiding you through every step!

tools needed for a scooter battery replacement laid out neatly - scooter battery replacement

Tools and Safety Precautions

Before you begin, gather your gear. Having the right tools makes the job smoother and safer.

  • Necessary Tools:

    • Screwdrivers: You’ll likely need a Phillips head and possibly a flathead. Some scooters use Torx screws.
    • Wrenches or Socket Set: For bolts securing battery compartments or brackets (e.g., 5mm Allen wrench, 8mm open wrench for some Razor models).
    • Pliers: Useful for disconnecting stubborn connectors or cutting zip ties.
    • Safety Gloves: Protect your hands from grime and potential exposure to battery acid (especially with SLA batteries).
    • Multimeter (optional but recommended): For checking battery voltage and ensuring connections are live.
    • Zip ties: For tidying up wires after installation.
    • Camera/Smartphone: To take photos of wiring before disconnection.
  • Safety First: This isn’t just a suggestion; it’s non-negotiable. Batteries, especially lithium-ion, store a lot of energy and can be dangerous if mishandled.

    • Power Off Scooter & Disconnect Charger: Always ensure your scooter is completely powered off and disconnected from any charging cables. This eliminates the risk of electric shock and short circuits.
    • Work in a Well-Ventilated Area: If you’re dealing with sealed lead-acid batteries, there’s a slight chance of gas emissions. A well-ventilated space is always a good idea.
    • Avoid Short-Circuiting Terminals: Never let metal tools or objects touch both battery terminals simultaneously. This can cause sparks, heat, and damage the battery or yourself.
    • Handle with Care: Batteries can be heavy. Lift and move them carefully to avoid dropping them or damaging connectors. If you encounter a swollen or leaking battery, handle it with extreme caution and refer to the disposal section immediately.

The Safe Removal and Installation Process for a scooter battery replacement

While specific steps can vary slightly between scooter models (always consult your scooter’s manual first!), this general guide covers the core process.

  1. Locate Battery Compartment: Most electric scooter batteries are housed under the deck, within the stem, or sometimes in a removable external pack. Check your user manual if you’re unsure. You might need to flip the scooter over to access the underside of the deck.
  2. Remove Deck or Cover: Using your screwdrivers or wrenches, carefully remove the screws, latches, or brackets that secure the battery compartment cover or the scooter’s deck. Keep all screws and small parts in a safe place so they don’t go on an adventure without you!
  3. Photograph Wire Connections: This is a crucial step! Before disconnecting anything, take clear photos of how the wires are connected to the old battery and the scooter’s control module. This visual reference will be your best friend during reassembly.
  4. Disconnect Old Battery: Carefully disconnect the wires or connectors attached to the old battery. There might be clips or tabs you need to depress. Remember the “red to red, black to black” rule – positive to positive, negative to negative. If you’re dealing with multiple batteries in a pack (common for SLA scooters), note their series or parallel connections. When replacing electric scooter batteries, it’s advised to replace all batteries at the same time and with the same brand to avoid compatibility issues and internal oxidation.
  5. Remove Battery Pack: Gently lift and remove the old battery from its compartment. If it’s tightly packed, you might need to carefully pry it out, but avoid forcing it. If it’s stuck, a little WD-40 on the sides might help loosen it, as suggested for some models.
  6. Install New Battery: Place the new battery into the compartment, ensuring it sits snugly and oriented correctly. Double-check that its dimensions match your scooter’s requirements.
  7. Reconnect Wires Securely: Using your photos as a guide, connect the wires from the scooter to the new battery. Ensure all connections are firm and secure. Tug gently to confirm they won’t easily come loose. If you cut zip ties during removal, use new ones to tidy up the wiring.
  8. Test the Scooter: Before fully reassembling, it’s a good idea to perform a quick test. Turn the scooter on (if safe to do so with the compartment open) to ensure it powers up and shows a charge. Don’t ride it yet, just check basic functionality.
  9. Reassemble Scooter: Carefully replace the battery compartment cover or deck, securing all screws, latches, or brackets. Ensure everything is tight and flush.

How to Responsibly Dispose of Your Old Battery

An old battery is not just trash; it’s an environmental hazard and contains valuable materials that can be recycled. Proper disposal is essential for our planet and for your safety.

  • Environmental Hazard: Both lithium-ion and sealed lead-acid (SLA) batteries contain chemicals and heavy metals that are harmful if released into the environment. They should never be thrown in regular household trash.
  • Lithium-ion Recycling: Lithium-ion batteries contain valuable materials that can be recovered. Many electronics stores and specialized recycling centers accept them.
  • Sealed Lead-Acid (SLA) Recycling: SLA batteries are particularly heavy due to lead content and are highly recyclable. Most auto parts stores will accept old lead-acid batteries for recycling.
  • Prohibited Disposal Methods: Laws in many states, including Mississippi, prohibit throwing lead-acid batteries in municipal waste. Incineration or landfilling is also generally prohibited.
  • Find a Battery Recycling Center Near You: The easiest way to find a responsible disposal location is to use online resources. For an interactive online map with over 30,000 electric scooter and bicycle battery drop-off locations in the USA and Canada, please visit: www.Call2Recycle.com

Extending Your New Battery’s Lifespan

You’ve invested in a new battery; now let’s make sure it lasts! Proper care and smart habits can significantly extend your battery’s useful life, keeping you zipping around Laurel, Hattiesburg, and Jackson, Mississippi, for longer.

Best Practices for Charging and Storing

Your charging and storage habits are key determinants of battery longevity.

  • Use the Correct Charger: Always use the charger specifically designed for your scooter’s battery. An incompatible charger can lead to overcharging, undercharging, or even fire.
  • Avoid Extreme Temperatures: Batteries hate extreme heat and cold. Avoid charging or storing your scooter in direct sunlight, hot cars, or freezing conditions. The ideal storage temperature for batteries is generally between -10°F and 75°F.
  • Don’t Leave on Charger for Days: While modern chargers often have overcharge protection, continuously leaving a lithium-ion battery at 100% charge can stress the cells over time. Charge it, then unplug it. Never charge longer than 30 hours for SLA batteries, and for new SLA batteries, charge for at least 18 hours before first use.
  • Charge After Every Ride: For optimal lifespan, recharge your battery after every ride, even short ones. This prevents the battery from sitting in a partially discharged state for extended periods, which can lower its useful lifespan. After long rides, wait about 30 minutes for the batteries to cool down before recharging.
  • Store at 50-60% for Long Periods: If you plan to store your scooter for more than a few weeks (e.g., over the winter), charge the battery to about 50-60% capacity. This is the sweet spot for long-term storage of lithium-ion batteries.
  • Recharge Monthly in Storage: When storing your electric scooter, especially for several months, recharging the battery every month is recommended. If scooter batteries are not recharged every 30 days, they will internally oxidize, leading to a shortened lifespan and reduced mileage range. It’s like giving your battery a little sip of energy to keep it healthy.

Riding Habits That Save Battery Life

Your riding style also plays a significant role in how quickly your battery degrades and how far it can take you on a single charge.

  • Smooth Acceleration: Aggressive acceleration draws a lot of power from the battery quickly. Smooth, gradual acceleration is more energy-efficient and puts less stress on the battery.
  • Use Eco-Mode: Many scooters have an “eco-mode” or lower power settings. Using these modes, especially for casual cruising or when you don’t need maximum speed, will conserve battery life and extend your range.
  • Maintain Proper Tire Pressure: Underinflated tires create more rolling resistance, forcing your motor (and battery) to work harder. Check your tire pressure regularly and keep them inflated to the manufacturer’s recommended level. This simple tip can make a surprising difference!
  • Avoid Heavy Loads: While scooters are designed to carry a certain weight, consistently riding with heavy loads (e.g., a backpack full of groceries, or two riders if not designed for it) will drain the battery faster.
  • Reduce Stop-and-Go Riding: Frequent braking and acceleration consume more energy than maintaining a consistent speed. If possible, plan your routes to minimize stop-and-go traffic.

When to Seek Professional Help

While we empower our customers with how-to guides for many repairs, we also know when it’s best to call in the pros. Sometimes, a scooter battery replacement isn’t as straightforward as it seems, or you might simply prefer expert handling.

  • Complex Wiring or Custom Battery Packs: Some high-performance or older scooters can have intricate wiring or custom-built battery packs that require specialized knowledge to safely handle. If your scooter’s internal setup looks like a spaghetti monster, it might be time to step back.
  • Lack of Tools or Confidence: Don’t have the right tools? Or perhaps you’re just not comfortable working with electrical components, especially high-voltage batteries? That’s perfectly fine! Safety should always be your top priority. Attempting a DIY repair without the right equipment or confidence can lead to damage to your scooter or, more importantly, injury to yourself.
  • Warranty Concerns: If your electric scooter is still under warranty, performing a DIY battery replacement might void it. Always check your manufacturer’s warranty policy before undertaking any repairs yourself.
  • Persistent Issues After DIY Attempt: If you’ve tried replacing the battery and your scooter is still acting up, it could indicate a deeper problem with the motor, controller, or other electronic components. Our experienced technicians at Laurel Phone Repair specialize in device diagnostics and repair, and we can help you get to the bottom of it.

For all these reasons and more, our team at Laurel Phone Repair is here to help. We have experienced technicians across our locations in Laurel, Hattiesburg, Jackson, and Jones County, Mississippi, ready to tackle even the trickiest scooter battery replacement or repair. We offer transparent part options (OEM vs. aftermarket) and stand by our work with high customer satisfaction and warranties.

Don’t hesitate to schedule a professional repair with us. We’ll get your scooter back on the road safely and efficiently.

Conclusion

We’ve covered a lot of ground today, from identifying the tell-tale signs of a failing power pack to the nitty-gritty of scooter battery replacement.

Here are the key takeaways:

  • Listen to Your Scooter: Reduced range, inconsistent power, extended charging times, and especially physical swelling are all urgent calls for a new battery.
  • Match Your Specs: Always prioritize matching voltage, capacity (or upgrading wisely), physical dimensions, and connector type when choosing a replacement.
  • Safety is Paramount: Always power off, disconnect, and handle batteries with care. Never short-circuit terminals.
  • Dispose Responsibly: Old batteries are not trash! Use recycling programs like Call2Recycle.com to protect our environment.
  • Nurture Your New Battery: Smart charging, proper storage, and mindful riding habits will ensure your new power pack lives a long and happy life.
  • Know When to Call for Backup: If the task feels too daunting, the wiring too complex, or warranty concerns are at play, our professional technicians are always here to help.

Whether you choose the DIY satisfaction of replacing your scooter’s battery yourself or opt for our expert support, we hope this guide empowers you to keep your electric scooter running smoothly. For expert help with your scooter battery replacement and other electronic repairs, trust our team to get you back on the road.

Learn more about our Battery Repair services

Decoding the Cost: How to Get Affordable Laptop Screen Fixes

Cheap Laptop Screen Repair: Fast 2025 Fixes

Why Finding Affordable Laptop Screen Repair Matters

Cheap laptop screen repair doesn’t mean you have to sacrifice quality or reliability. When your laptop screen cracks, flickers, or goes dark, it can bring your work, school, or entertainment to a grinding halt. The good news? You have options that won’t drain your wallet.

Here’s what you need to know about affordable laptop screen repair:

  • Average repair costs: Typically range from $99.99 to $200+, depending on your laptop model and screen type
  • Same-day service: Many repair shops offer fast turnaround times, often completing repairs within hours
  • Price match guarantees: Some reputable shops will match competitor prices and may even beat them by a small amount
  • Free diagnostics: Most professional services offer no-cost checkups to identify the exact problem
  • Warranty protection: Quality repairs come with a 1-year limited warranty on parts and 90 days on labor

As one customer shared: “A laptop freezing midway through the morning” or dealing with a cracked screen can be incredibly frustrating. Whether you’re missing important tax forms or precious photos of your child’s graduation, a broken screen disrupts everything that matters.

I’m Ralph Harris, and with over 20 years in electronics repair and more than 500 Apple repair certifications, I’ve helped countless customers steer the cheap laptop screen repair landscape to find quality fixes that fit their budget. My experience has shown me that the key is balancing affordability with reliability—and that’s exactly what this guide will help you do.

Infographic showing the cost breakdown of laptop screen repair: factors include laptop brand and model ranging from budget to premium models, screen type comparing LCD LED and touchscreen options, damage extent from screen only to hinge and case damage, labor costs varying by location and shop, and part quality comparing OEM versus aftermarket options with typical price ranges from 100 to 300 dollars - cheap laptop screen repair infographic

Is Your Laptop Screen Crying for Help? Signs You Need a Repair

A laptop screen can suffer from various ailments, from accidental drops to internal malfunctions. Knowing the signs that your laptop screen needs attention is the first step toward finding a solution. We’ve seen it all, and these are the most common indicators that your laptop screen is crying for help.

laptop screen showing vertical lines and dead pixels - cheap laptop screen repair

Obvious Physical Damage

This is often the easiest sign to spot. If your laptop has taken a tumble or suffered an impact, you might see:

  • Cracks or shattered glass: These can range from a hairline fracture to a complete spiderweb pattern across the screen. Even small cracks can expand over time, hindering visibility.
  • Spiderweb patterns: These are characteristic of an impact, where the glass has broken into many small pieces, often centered around the point of impact.

Visual Display Issues

Sometimes, the screen might look physically intact, but the display itself is compromised. These issues often point to internal damage to the LCD panel or its connections:

  • Flickering screen: The display rapidly turns on and off, or its brightness fluctuates erratically. This can be a sign of a loose cable or a failing backlight.
  • Vertical or horizontal lines: Colored or black lines appearing across the screen, either consistently or intermittently, often indicate a damaged LCD panel or a faulty ribbon cable connection.
  • Dead pixels: Small, persistent black or colored dots that don’t change color even when the image on the screen does. While a few dead pixels might be tolerable, a cluster of them can be very distracting.
  • Black spots: Larger areas of the screen that remain black, often caused by pressure damage to the LCD.
  • Color distortion: Colors appearing washed out, discolored, or inverted. This can be a sign of a failing display panel or a graphics card issue.

Backlight Failure

The backlight illuminates your screen, and without it, you’ll barely see anything:

  • Dim screen: Even at maximum brightness settings, the screen remains unusually dark, making it hard to see.
  • Screen not turning on: The laptop powers up, you can hear the fans, and perhaps even connect an external monitor, but the laptop’s built-in screen remains completely black.

Touchscreen Problems

For laptops with touch-enabled displays, additional issues can arise:

  • Unresponsive touch: The screen doesn’t react to your touch inputs in certain areas or at all.
  • Ghost touches: The screen registers touches that aren’t happening, causing applications to open or close randomly, making the laptop difficult to use.

If you’re experiencing any of these symptoms, it’s wise to get a professional diagnosis. Sometimes, what looks like a major screen problem could be a simple connection issue, or vice versa. We offer thorough device diagnostics to accurately pinpoint the problem. More info about our diagnostic process.

The Big Question: How Much Does Laptop Screen Repair Cost?

When faced with a broken laptop screen, one of the first questions that comes to mind is, “How much will this cost?” It’s a valid concern, especially when you’re looking for cheap laptop screen repair. While the intro states costs typically range from $99.99 to $200+, several factors can influence where your repair falls within or even outside this range.

Repair vs. Replacement Cost

The decision to repair your laptop screen or replace the entire device often comes down to age and overall condition. If your laptop is relatively new—say, only 1 or 2 years old—repairing the screen is almost always the more economical choice. The cost of a new laptop can easily run into hundreds or even thousands of dollars, making a screen repair a much more affordable alternative. However, for older laptops, especially those with other performance issues, the repair cost might approach the value of the device, making a replacement more sensible. We always provide transparent options to help you make the best decision.

Key Factors That Determine Your Repair Bill

Understanding what influences the cost can help you find the most affordable solution.

  • Laptop Brand and Model: Just like cars, different laptop brands and models have varying costs for parts. Premium brands or those with specialized designs (like ultra-thin bezels or unique hinge mechanisms) often have more expensive replacement screens. High-resolution displays (e.g., 4K screens) and touchscreens are also typically pricier to replace than standard LCD panels.
  • Type of Screen; LCD vs. LED; OEM vs. Aftermarket Parts:
    • LCD vs. LED: Most modern laptops use LED-backlit LCDs, but older models might have traditional CCFL-backlit LCDs. The technology can affect availability and cost.
    • OEM vs. Aftermarket Parts: This is a crucial factor for cheap laptop screen repair. OEM (Original Equipment Manufacturer) parts are identical to the screen that came with your laptop. They guarantee perfect compatibility and quality but are often the most expensive option. High-quality aftermarket parts, on the other hand, are manufactured by third parties but designed to meet similar specifications. They can significantly reduce the repair cost without a noticeable drop in performance for most users. We believe in transparency and discuss these options with you, so you can choose what best fits your budget and needs.
  • Extent of Damage; Screen Only vs. Hinge or Case Damage: A simple screen replacement is generally straightforward. However, if the impact also damaged the laptop’s hinges, the bezel around the screen, or the laptop’s casing, the repair becomes more complex and requires additional parts and labor, naturally increasing the cost. We carefully inspect all components to ensure nothing is overlooked.
  • Labor Costs: These vary depending on the complexity of the repair and the expertise of the technicians. More intricate repairs, such as those involving integrated components or specialized tools, will command higher labor fees. Our experienced technicians ensure efficient and precise repairs, saving you time and hassle.

For a clear understanding of potential costs, we recommend checking our transparent pricing or visiting us for a free diagnostic.

How to find a cheap laptop screen repair without sacrificing quality

Finding an affordable repair doesn’t mean settling for subpar service. It means being smart about your choices.

  • Comparing Quotes: Don’t just go with the first quote you receive. Reach out to a few reputable local repair shops in Laurel, Hattiesburg, Jackson, or Jones County, Mississippi, to get comparative estimates. This helps you understand the market rate and identify fair pricing.
  • Asking About Part Options: As mentioned, inquire whether the shop offers both OEM and high-quality aftermarket screen options. Discussing the pros and cons of each can help you choose a solution that aligns with your budget for a truly cheap laptop screen repair.
  • Checking for Price Match Guarantees: Many customer-focused repair services understand the importance of competitive pricing. Some even offer low-price guarantees, promising to match a local competitor’s regularly published price for the same repair and even beat it by a small margin, such as $5. This ensures you’re getting the best possible deal.
  • Free Diagnostics: Always look for services that offer free diagnostics. This allows technicians to accurately assess the damage and provide an upfront, no-obligation estimate without any initial cost to you. It’s a sign of a transparent and customer-friendly business.

Your Repair Options: DIY vs. Professional Services

When your laptop screen breaks, you essentially have two paths: try to fix it yourself or entrust it to professionals. While the allure of a DIY fix for a cheap laptop screen repair can be strong, it’s crucial to weigh the risks and rewards.

table comparing DIY vs Professional Repair on cost, time, risk, and quality - cheap laptop screen repair infographic

The DIY Route: A Guide to Self-Repair

For the adventurous and technically inclined, attempting a DIY laptop screen repair might seem like a way to save money.

  • Potential Cost Savings: The primary motivation for DIY is to avoid labor costs. You would only pay for the replacement screen itself, which you’d source online from various retailers. This can sometimes result in a significantly cheap laptop screen repair cost on paper. You’d also need a basic set of tools, like small screwdrivers, plastic spudgers, and sometimes a heat gun, which are relatively inexpensive.
  • Risks and Challenges: This is where the “cheap” can become expensive. Laptop screens are delicate, and internal components are tightly packed.
    • Causing More Damage: One wrong move can lead to further damage to ribbon cables, the webcam, Wi-Fi antennas, or even the motherboard. We’ve seen countless cases where a DIY attempt turned a simple screen replacement into a much more complex and costly repair.
    • Incompatible Parts: Sourcing the correct screen can be tricky. Even slight variations in model numbers or panel types can lead to compatibility issues, resulting in a screen that doesn’t fit, doesn’t display correctly, or lacks full functionality.
    • No Warranty: When you do it yourself, there’s no warranty on your labor or the part you installed. If the new screen fails a week later, you’re back to square one, having to buy another part and repeat the process.
    • Time-Consuming: Researching, ordering parts, waiting for delivery, and then carefully disassembling and reassembling your laptop can take hours, even for experienced individuals. Your time has value!

The Benefits of a Professional Computer Repair

Choosing a professional service, like ours, offers numerous advantages that often outweigh the perceived savings of a DIY attempt.

  • Expertise and Experience: Our certified technicians have years of experience repairing countless laptop models. We understand the intricacies of different manufacturers and designs, ensuring a precise and correct repair every time. We’re skilled in handling delicate components and complex assemblies.
  • Quality Parts: We have access to a reliable supply chain for both OEM and high-quality aftermarket screens. This means we can offer you options that balance performance and cost, ensuring that your cheap laptop screen repair doesn’t compromise on quality. We know which aftermarket parts meet our high standards.
  • Speed and Convenience: Time is valuable. Many professional repair services, including ours, can complete laptop screen repairs as soon as the same day, sometimes within just a few hours, depending on part availability. You drop off your laptop, and we get you back up and running quickly. We aim for fast turnaround times so you’re not without your essential device for long.
  • Peace of Mind: This is perhaps the biggest benefit.
    • Warranty on Parts and Labor: Reputable shops stand behind their work. We offer a 1-year limited warranty on most repairs, covering both the replacement parts and our labor. This means if anything goes wrong related to the repair within that period, you’re covered, providing invaluable peace of mind.
    • Reduced Risk: You eliminate the risk of causing further damage to your laptop, saving you from potential headaches and additional expenses.

In Laurel, Hattiesburg, Jackson, and Jones County, Mississippi, we pride ourselves on offering professional, reliable, and affordable laptop screen repairs that give you confidence in the longevity of your device.

Finding a Reputable and Cheap Laptop Screen Repair Service

When your laptop screen breaks, the instinct might be to search for the absolute lowest price. However, finding a truly cheap laptop screen repair means finding one that offers good value—balancing affordability with quality and reliability. This is where choosing a reputable local repair shop comes in.

What to Look for in a Quality Repair Shop

Choosing the right service can make all the difference in the longevity and performance of your repaired laptop. Here’s what we believe you should prioritize:

  • Free Diagnostics: A trustworthy repair service will offer a no-cost checkup. This allows our technicians to accurately diagnose the problem without any upfront financial commitment from you. Once the issue is identified, we provide you with a clear, upfront estimate for the repair. This transparency is key to avoiding surprises.
  • Warranty on Repairs: This is a non-negotiable for quality service. Look for a shop that offers a solid warranty on both parts and labor. Many reputable services provide a 1-year limited warranty on most repairs. This warranty protects your investment, ensuring that if the new screen or the repair work itself malfunctions within the warranty period, you’re covered. It’s a testament to the repair shop’s confidence in their work.
  • Technician Expertise: Don’t trust your valuable laptop to just anyone. Inquire about the technicians’ qualifications, certifications, and experience. Our team consists of experienced technicians who are continuously trained to handle a wide array of laptop models and screen technologies. Expertise ensures that the repair is done correctly the first time, minimizing the risk of future issues.
  • Customer Reviews: Before committing to a repair shop, check their online ratings and read customer testimonials. Platforms like Google, Facebook, or Yelp can provide insights into other customers’ experiences regarding service quality, turnaround time, and overall satisfaction. Positive reviews are a strong indicator of a reliable and customer-focused business.

The Pitfalls of “Too-Good-to-Be-True” Cheap Laptop Screen Repair

While seeking an affordable solution, be wary of offers that seem too good to be true. Sometimes, an extremely low price can hide significant downsides.

  • Low-Quality Parts: The biggest risk with overly cheap laptop screen repair services is the use of substandard, low-quality aftermarket parts. These screens might have poor color accuracy, lower brightness, a shorter lifespan, or even compatibility issues that lead to flickering or ghosting. What you save upfront, you might pay for later in frustration and another repair.
  • Inexperienced Technicians: Some repair shops cut costs by employing less experienced or untrained technicians. This dramatically increases the risk of further damage to your laptop during the repair process, such as damaged ribbon cables, stripped screws, or even issues with the motherboard.
  • Hidden Fees: Watch out for services that don’t offer upfront estimates or free diagnostics. You might be quoted one price, only to find additional “diagnostic fees,” “handling fees,” or other charges added to your final bill—a classic bait-and-switch tactic.
  • No Warranty: A service that offers no warranty on their repairs is a red flag. Without a warranty, you have no recourse if the repair fails shortly after you leave the shop. This lack of accountability can turn a seemingly cheap repair into a costly gamble.

At Laurel Phone Repair, we believe in providing honest, high-quality, and affordable services. We serve our communities in Laurel, Hattiesburg, Jackson, and Jones County, Mississippi, with integrity, ensuring your cheap laptop screen repair is truly a smart investment.

Frequently Asked Questions About Laptop Screen Repair

We understand you likely have a few more questions swirling around your head when considering a laptop screen repair. Here are some of the most common inquiries we receive:

How long does a laptop screen repair take?

This is one of the most common questions, and for good reason—we all rely heavily on our laptops! The turnaround time for a laptop screen repair can vary, but many reputable services aim for speed and convenience.

  • Same-Day Service Possibility: For less complicated fixes, especially if the required part is in stock, many shops can complete computer screen repairs as soon as the same day, sometimes even within a few hours. We always strive to get your device back to you as quickly as possible.
  • Simple vs. Complex Repairs: A straightforward screen replacement where only the LCD panel needs to be swapped out is generally quicker. If there’s additional damage to the bezel, hinges, or internal components, or if the screen is integrated into a larger assembly (like some touchscreens), the repair will naturally take longer.
  • Part Availability: The most significant variable is often the availability of the specific replacement screen for your laptop model. While we stock common parts, some specialized or older screens might need to be ordered, which can add a few days to the repair process. We keep you informed every step of the way.

Will my data be safe during the repair?

The safety of your personal and professional data is paramount. We take data privacy very seriously.

  • Data Privacy: A reputable repair service will prioritize the security of your data. Our technicians are trained to perform repairs without accessing your personal files. Your data remains confidential and untouched during the screen replacement process.
  • Data Loss Disclaimer: While professional repairs are generally safe for your data, unforeseen circumstances can sometimes occur, especially with complex hardware issues. Therefore, we always strongly advise our customers to back up their important data before bringing in any device for repair. This is a best practice for any electronic device service.
  • Importance of Backups: Having a current backup of your documents, photos, and other critical files is the ultimate safeguard. It protects you against any rare, unexpected data loss, not just during repairs but from any potential hardware failure in the future.
  • Reputable Shop Policies: We adhere to strict protocols to ensure your data’s safety. If a repair might necessitate accessing your operating system (which is rare for a screen replacement), we will always discuss this with you first.

Does a repair warranty really matter?

Absolutely, a repair warranty provides immense value and peace of mind. It’s a critical component of a quality cheap laptop screen repair.

  • Value of a Warranty: A warranty is your assurance that the repair was done correctly and that the parts used are reliable. It protects your investment against defects in materials or workmanship.
  • 1-Year Limited Warranty: Many leading repair services, including ours, offer a 1-year limited warranty on most repairs. This coverage typically includes the replacement screen itself and the labor involved in installing it. If the screen malfunctions or an issue related to the repair arises within that year, you can bring it back for a free fix.
  • Protection Against Faulty Parts: Even high-quality parts can occasionally be defective. A warranty ensures that you won’t have to pay again if a newly installed screen develops issues not caused by new physical damage.
  • Labor Coverage: The warranty also covers the technician’s work. If the screen wasn’t installed correctly and starts to come loose, for example, the warranty ensures the re-installation is free of charge.
  • Peace of Mind: Knowing that your repair is backed by a warranty allows you to use your laptop confidently, without worrying about immediate future expenses should a problem arise. It transforms a potentially stressful situation into a reliable solution.

To learn more about our commitment to quality and customer satisfaction, explore our comprehensive services.

Conclusion: The Smart Choice for Your Laptop’s Screen

Facing a broken laptop screen can be a frustrating experience, but finding an affordable and reliable fix doesn’t have to be. Throughout this guide, we’ve explored the key aspects of cheap laptop screen repair, from identifying the signs of damage to understanding the factors that influence cost, and navigating your repair options.

We’ve seen that what might seem like an obvious problem can sometimes be more complex, highlighting the importance of thorough diagnostics. The cost of repair isn’t just a single number; it’s influenced by your laptop’s model, the type of screen, the extent of the damage, and the quality of parts used. While DIY might tempt with lower upfront costs, the risks of further damage, incompatible parts, and lack of warranty often make it a false economy.

Choosing a professional repair service offers numerous benefits: the expertise of certified technicians, access to quality OEM and aftermarket parts, speedy turnaround times, and, crucially, the peace of mind that comes with a solid warranty. When looking for a reputable service, always prioritize free diagnostics, clear warranty policies, experienced technicians, and positive customer reviews. Be wary of “too-good-to-be-true” prices that might hide low-quality parts, inexperienced labor, or hidden fees.

The smart choice for your laptop’s screen involves balancing cost with quality and warranty. A truly cheap laptop screen repair isn’t just about the lowest price tag; it’s about getting lasting value from a reliable service.

At Laurel Phone Repair, we are dedicated to providing our communities in Laurel, Hattiesburg, Jackson, and Jones County, Mississippi, with exactly that. Our experienced technicians offer transparent part options, ensuring you get a quality fix that meets your budget, backed by our commitment to high customer satisfaction and comprehensive warranties. Don’t let a broken screen slow you down or compromise your productivity. Get a fast, affordable, and reliable fix for your device today.

Contact us for a computer repair quote!

The Price of a Perfect View: Oppo A54 Screen Repair Expenses

Oppo A54 Screen Replacement Cost: 3 Smart Options

Why Understanding Screen Replacement Costs Matters

The oppo a54 screen replacement cost typically ranges from $50 to $150 depending on your repair choice. Here’s what you can expect to pay:

Repair Option Estimated Cost Turnaround Time
DIY Replacement $25-$40 (parts only) 1-2 hours (if experienced)
Local Repair Shop $50-$75 Same day to 2 days
Official Service Center $100-$150 3-7 days
Professional Repair (Laurel Phone Repair) $65-$95 Same day available

A cracked or unresponsive screen turns your reliable smartphone into a frustrating paperweight. Whether you dropped your Oppo A54 or woke up to mysterious screen damage, the immediate question is always the same: How much will this cost to fix?

The answer isn’t as simple as a single number. Screen replacement costs vary widely based on part quality, labor expertise, warranty coverage, and repair location. Some online retailers advertise replacement screens for as low as $25, while official service centers might quote $150 or more. Understanding these price differences helps you make an informed decision that balances your budget with the quality and longevity you need.

This guide breaks down everything affecting your Oppo A54 screen replacement cost so you can choose the repair option that makes sense for your situation and budget.

I’m Ralph Harris, and with over 20 years of electronics repair experience and hundreds of screen replacements under my belt, I’ve seen how understanding oppo a54 screen replacement cost factors helps customers avoid costly mistakes. Let me walk you through what you need to know.

Infographic showing Oppo A54 screen replacement cost breakdown: DIY parts cost $25-40 with tools and time required, local repair shops charge $50-75 with same-day service, official service centers cost $100-150 with 3-7 day wait and genuine parts warranty, and professional repair at Laurel Phone Repair costs $65-95 with same-day availability, high-quality parts, experienced technicians, and workmanship warranty included - oppo a54 screen replacement cost infographic

Factors Influencing Your Oppo A54 Screen Replacement Cost

When your Oppo A54 screen goes kaput, it’s natural to wonder why the repair bill isn’t a fixed price. The truth is, several key factors play a significant role in determining the final oppo a54 screen replacement cost. At Laurel Phone Repair, we believe in transparent pricing, so let’s break down what influences our quotes and why.

Part Quality

This is arguably the biggest differentiator in repair costs. Not all replacement screens are created equal, and the quality of the part directly impacts both the price and the performance of your repaired device.

  • OEM (Original Equipment Manufacturer) Parts: These are screens made by Oppo or their authorized suppliers, identical to the one that came with your phone. They offer 100% compatibility, optimal display quality (like the Oppo A54’s 6.51-inch IPS LCD with 720 x 1600 pixels resolution), and touch responsiveness. Official service centers exclusively use these, which is a major reason for their premium pricing. While we are not an official Oppo service center, we understand the demand for top-tier quality.
  • High-Quality Replacement Screens (Aftermarket): These are manufactured by third-party companies, designed to meet or closely match the specifications of the original. We often use these parts at Laurel Phone Repair because they offer an excellent balance of performance, durability, and affordability. They provide a vibrant display and accurate touch, ensuring your phone feels almost new again without the hefty price tag of an official repair.
  • Cheaper, Lower-Quality Aftermarket Screens: These are typically the screens you find at very low prices online or from less reputable repair shops. While they save you money upfront, they often come with compromises: lower resolution, inaccurate colors, poor touch sensitivity, and a higher risk of failing prematurely. We steer clear of these because they don’t meet our standards for customer satisfaction.

For instance, while a genuine Oppo A54 display might be listed at a very high price in some markets (e.g., 15300 INR, which is roughly $180 USD, though this is an extreme example and likely not reflective of typical US part costs), high-quality aftermarket parts allow us to offer competitive pricing without sacrificing quality.

Labor Charges

Replacing a phone screen isn’t just about swapping out a part; it’s a delicate process that requires skill, specialized tools, and experience. Our technicians are highly trained and experienced in handling intricate phone repairs.

  • Technician Expertise: Our team has the knowledge to safely open your device, disconnect fragile components, remove the damaged screen, clean the housing, and install the new display without causing further damage. This expertise ensures a reliable repair and is factored into the labor cost.
  • Time Investment: The process itself takes time. For an Oppo A54, this involves carefully opening the phone, gently removing the old display (often with the aid of a plastic blade and heat gun), replacing adhesive, and carefully seating the new display. We then reassemble and thoroughly test the device. This careful, professional operation ensures your device functions perfectly post-repair.

Geographic Location

Where you get your phone repaired also influences the cost. Repair services in areas with higher operating costs (like major metropolitan areas) might charge more than those in smaller towns. At Laurel Phone Repair, we serve the communities of Laurel, Hattiesburg, Jackson, and Jones County in Mississippi. Our pricing is set to be competitive and fair within our local market, reflecting local economic factors and the cost of doing business here. While costs might vary globally (for example, some repair shops in India might charge as low as 800-1500 INR for a screen replacement, which converts to a fraction of US prices), we focus on providing value and quality service right here in Mississippi.

Additional Damage

Sometimes, a cracked screen isn’t the only problem. Impact can cause hidden damage to other internal components.

  • Hidden Issues: A fall that shatters your screen might also bend the phone’s frame, damage the charging port, or affect internal connectors. If our initial diagnostic reveals more than just a broken screen, these additional repairs will add to the overall oppo a54 screen replacement cost.
  • Frame Damage: A bent frame can prevent a new screen from sitting flush, leading to future display issues or even cracking. Addressing this is crucial for a lasting repair.

This is precisely why we offer a thorough Device Diagnostics service. We want to ensure we identify all issues and provide you with an accurate, comprehensive quote from the start, so there are no surprises.

Understanding Your Repair Options at Laurel Phone Repair

At Laurel Phone Repair, we understand that every customer’s needs and budget are different. That’s why we offer transparent options for your Oppo A54 screen replacement, designed to give you flexibility while always ensuring high-quality service. We aim to make the process as clear and straightforward as possible, empowering you to make the best decision for your device and your wallet.

Image of a technician's hands carefully installing a new phone screen - oppo a54 screen replacement cost

The Price for Standard Screen Replacement

Our standard screen replacement service is our most popular option, offering a perfect balance of quality, affordability, and reliability. When you choose this service, you’re getting:

  • Genuine or High-Quality Parts: We use either genuine OEM parts (when available and cost-effective) or premium, high-quality aftermarket screens that meet stringent performance and durability standards. These screens are rigorously tested to ensure they provide the same vibrant display and responsive touch you expect from your Oppo A54.
  • Transparent Pricing: We provide a clear, upfront quote, so you know exactly what your oppo a54 screen replacement cost will be. There are no hidden fees or unexpected charges.
  • Warranty on Parts and Labor: We stand by our work. All our standard screen replacements come with a comprehensive warranty covering both the replacement part and our workmanship. This gives you peace of mind knowing your repair is protected.
  • Experienced Technicians: Our skilled technicians perform the repair with precision and care, ensuring every component is handled correctly and your device is restored to optimal condition.
  • Typical Cost: For an Oppo A54, our standard screen replacement typically falls within the $65-$95 range, offering significant savings compared to official service centers while maintaining excellent quality.

Want to learn more about how we get your screen looking good as new? Learn more about our screen repair process.

The Cost for Express Service

Sometimes, you just can’t wait to get your phone back. We get it – life moves fast, and your phone is often your lifeline. Our express service is designed for those moments when you need your Oppo A54 back in your hands as quickly as possible.

  • Faster Turnaround: With express service, we prioritize your repair, often completing it within the same day or even within a few hours, depending on our current workload.
  • Same High-Quality Parts: Speed doesn’t mean compromise. We still use the same high-quality replacement screens and adhere to the same meticulous repair standards as our standard service.
  • Slightly Higher Cost for Speed: Due to the prioritization and expedited process, the express service comes with a slightly higher oppo a54 screen replacement cost than our standard option. This covers the resources allocated to get your device repaired faster.
  • Warranty Included: Just like our standard service, express repairs are backed by our full warranty on parts and labor.

If you’re in a hurry and need your Oppo A54 back in action without delay, our express service is the perfect solution. View our repair services to see all the ways we can help.

The Value of a Diagnostic Evaluation

Before any repair, especially for a damaged screen, a thorough diagnostic evaluation is crucial. It’s not just about identifying the obvious crack; it’s about understanding the full extent of the damage.

  • Identifies Additional Issues: A diagnostic evaluation allows our technicians to thoroughly inspect your Oppo A54 for any underlying problems that might not be immediately apparent. For example, a hard drop might have damaged the internal frame, battery, or camera, which could impact the functionality of a new screen or lead to future problems.
  • Ensures Accurate Repair Quote: By uncovering all issues upfront, we can provide you with a precise and comprehensive oppo a54 screen replacement cost. This prevents unexpected charges later and ensures you’re fully informed about the necessary repairs.
  • May Reveal Hidden Damage: Sometimes, what looks like just a broken screen might actually be a symptom of a more complex problem. Our diagnostics can catch these hidden issues, ensuring we address the root cause of your phone’s malfunction. This is especially important for things like flickering screens or touch issues that might not just be the glass.

We believe in fixing your phone right the first time. That’s why we always recommend a diagnostic evaluation, even for seemingly straightforward screen replacements. It’s a small investment that can save you a lot of headaches and money down the line. Find out more about device diagnostics and why it’s so important.

Service Option Average Cost Part Quality Warranty Risk Level (to phone)
DIY Replacement $25-$40 (parts only) Varies (often low) None High (user error)
Local Repair Shop $50-$75 Varies (can be good) Varies (often limited) Medium (tech skill varies)
Official Service Center $100-$150 OEM Yes (manufacturer) Low
Professional Repair (Laurel Phone Repair) $65-$95 High-Quality Aftermarket/OEM Yes (our own) Low
Standard Screen Replacement $65-$95 High-Quality Aftermarket/OEM Yes (parts & labor) Low
Express Service $75-$105 High-Quality Aftermarket/OEM Yes (parts & labor) Low
Diagnostic Evaluation $25-$45 (often waived with repair) N/A N/A Very Low

Risks and Benefits of Opting for Lower-Cost Parts

It’s tempting to chase the lowest possible oppo a54 screen replacement cost, especially when you see unbelievably cheap parts online. However, we often remind our customers that while saving a few dollars upfront might feel good, it can lead to significant headaches and higher costs in the long run. There’s a reason why some repairs are cheaper, and it almost always boils down to the quality of the parts used.

Image of a phone screen with distorted colors and dead pixels - oppo a54 screen replacement cost

The Allure of Cost Savings

The primary benefit of opting for cheaper, non-official parts is, of course, the initial cost savings. You might find an Oppo A54 screen online for $20-$30, which seems like a steal compared to a professional repair. For those on a tight budget or with an older device they plan to replace soon, this can be a very attractive option. Some individuals even attempt DIY repairs after purchasing these budget-friendly parts, hoping to avoid labor costs entirely.

Quick Fixes, Questionable Quality

While a low-cost part might seem to fix the problem initially, the experience often quickly sours. Here’s what we’ve observed with substandard parts:

  • Substandard Parts: These parts are often made with cheaper materials and lower manufacturing standards. They might not be precisely calibrated for the Oppo A54, leading to a poor fit or functionality issues.
  • Display Issues: You might notice significant differences in screen quality. This can include:
    • Poor Color Calibration: Colors might appear washed out, overly saturated, or simply inaccurate compared to the original display.
    • Lower Brightness: The screen might not get as bright as it used to, making it hard to see outdoors.
    • Dead Pixels or Bright Spots: Small, permanent dots or uneven backlighting can mar your viewing experience.
    • Flickering Screens: The display might intermittently flicker, which is not only annoying but also a sign of a faulty component.
  • Touchscreen Problems: The digitizer (the part that registers touch) in cheaper screens is often less responsive or accurate. You might experience:
    • Ghost Touches: The screen registers touches that aren’t happening.
    • Unresponsive Areas: Certain parts of the screen might not respond to your touch at all.
    • Laggy Performance: A noticeable delay between your touch and the phone’s reaction.
  • Further Damage Risk: A poorly manufactured screen might not be as durable as an original or high-quality aftermarket part. It could crack more easily, or its faulty components could even put a strain on your phone’s battery or other internal parts. We’ve seen cases where cheap screens cause other components to fail.
  • Voided Warranty: If you attempt a DIY repair with non-official parts, or if a local shop uses them, you risk voiding any remaining manufacturer’s warranty on your Oppo A54. Moreover, many repair shops that use these parts offer very limited, if any, warranty on their work. As Oppo themselves warn, using non-official service centers or third-party parts can lead to “substandard performance, or safety problems.”

At Laurel Phone Repair, we prioritize the longevity and optimal performance of your device. We use parts that we trust, ensuring that your oppo a54 screen replacement cost gives you lasting value, not just a temporary fix. Our goal is to fix your phone right the first time, preventing you from having to spend more money on repeat repairs.

Frequently Asked Questions About Oppo A54 Screen Repair

We understand you likely have many questions when facing a broken phone screen. Here, we address some of the most common inquiries our customers have about the oppo a54 screen replacement cost and process.

What kind of warranty is typical for a screen replacement?

Warranty is a huge indicator of a repair shop’s confidence in their parts and workmanship.

  • Professional Repair Warranty: Most reputable professional repair shops, like Laurel Phone Repair, offer a warranty on their screen replacements. This typically covers defects in the part itself and issues arising from the repair process. Common warranty periods range from 30 to 90 days, or even longer. For instance, some services offer a 3-month workmanship warranty, while others guarantee their spare parts for 90 days.
  • Warranty Policies at Laurel Phone Repair: We are proud to offer a comprehensive warranty on all our screen replacements. This warranty covers both the quality of the replacement screen and the labor performed by our technicians. We stand by our work because we use high-quality parts and have experienced professionals. We want you to feel confident that your repair will last.
  • Workmanship Guarantee: Our warranty isn’t just about the part; it’s also a guarantee of our workmanship. If you experience issues directly related to the repair we performed, we’ll make it right. This is a significant advantage over DIY repairs or choosing shops that don’t offer such assurances.

When considering your oppo a54 screen replacement cost, always ask about the warranty. A cheaper repair without a warranty can quickly become more expensive if the screen fails shortly after.

Are there additional costs involved in an Oppo A54 screen replacement besides the part itself?

Yes, often there are. The screen part is just one component of the overall oppo a54 screen replacement cost.

  • Diagnostic Fees: As we mentioned, a thorough diagnostic is crucial. While some shops charge a separate fee for this, we often waive the diagnostic fee if you proceed with the repair. This allows us to accurately assess your phone’s condition without adding to your initial burden.
  • Labor Costs: This is the fee for the technician’s time, skill, and expertise in performing the delicate repair. Disassembling the phone, removing the broken screen, cleaning the frame, installing the new screen, and reassembling everything safely takes time and specialized tools. This is a standard charge at any professional repair shop. For example, some sources indicate that labor for fitting a purchased screen from a local shop might cost around 200-300 INR (roughly $2.50-$3.50 USD), but this is an extremely low example from international markets and not representative of skilled labor costs in the US. Our labor costs reflect the professional service you receive in Mississippi.
  • Frame Damage: If your phone suffered a significant impact, the metal or plastic frame holding the screen might be bent or damaged. Installing a new screen onto a bent frame can cause it to crack again or not sit properly. Repairing or replacing the frame would be an additional cost.
  • Additional Component Repair: Sometimes, the impact that broke your screen also damaged other internal components, such as the camera, charging port, or battery. Our diagnostic process helps identify these issues. If additional repairs are needed, we will provide a separate quote for those, ensuring you’re aware of the full cost before we proceed.

We always provide a detailed breakdown of your oppo a54 screen replacement cost so you understand exactly what you’re paying for.

Can I replace the Oppo A54 screen myself, and what are the associated costs?

While it’s technically possible to replace your Oppo A54 screen yourself, we generally advise against it unless you have prior experience and the right tools.

  • Technical Difficulty: Replacing a modern smartphone screen is an intricate process. The Oppo A54, like many phones, requires careful disassembly, disconnecting tiny ribbon cables, dealing with strong adhesives, and precise reassembly. One wrong move can damage other components, turning a simple screen repair into a much larger, more expensive problem.
  • Specialized Tools: You’ll need specific tools like precision screwdrivers, spudgers, heat guns (or a hairdryer), and specialized adhesives. These tools add to your DIY oppo a54 screen replacement cost.
  • Risk of Permanent Damage: There’s a significant risk of causing irreversible damage to your phone. We’ve seen many DIY attempts where users accidentally tear ribbon cables, crack the new screen during installation, or damage the phone’s logic board, rendering the device irreparable.
  • Time Investment: Researching the process, watching YouTube tutorials, and performing the repair can take several hours, especially for a first-timer. Your time has value!
  • Associated Costs for DIY:
    • Part Cost: You can find replacement screens online ranging from $20-$40 (for the part itself). Be wary of extremely cheap options, as they often correspond to lower quality, as discussed earlier.
    • Tool Kit Cost: A basic phone repair tool kit might cost $10-$20.
    • Hidden Costs: The biggest hidden cost of DIY is the potential for further damage. If you break something else, you’ll either have to buy more parts, or you might end up needing professional repair anyway, costing you more than if you had come to us first.
  • Why Professional Repair is Recommended: For most people, the risks and complexities of DIY outweigh the potential savings. Our experienced technicians at Laurel Phone Repair have performed countless screen replacements. We have the right tools, the expertise, and we back our work with a warranty. We ensure your Oppo A54 is repaired correctly and functions perfectly, giving you peace of mind and saving you from potential headaches.

Conclusion: Making the Smart Choice for Your Oppo A54

Navigating phone repairs, especially when it comes to the oppo a54 screen replacement cost, can feel like a minefield of options and prices. But as we’ve explored, understanding the factors that drive these costs – from part quality and labor expertise to geographic location and potential additional damage – empowers you to make an informed decision.

We’ve seen that while DIY options and extremely cheap parts might offer initial savings, they often come with significant risks, including substandard performance, further damage, and voided warranties. Official service centers provide genuine parts but at a premium price and often with longer turnaround times.

At Laurel Phone Repair, we strive to offer the best of both worlds: a professional, reliable repair service that balances quality and affordability. We provide transparent pricing, use high-quality parts, and back our work with a solid warranty. Our experienced technicians in Laurel, Hattiesburg, Jackson, and Jones County, Mississippi, are dedicated to getting your Oppo A54 back to you quickly and functioning perfectly. We pride ourselves on offering quick, affordable repairs for phones, tablets, and computers, ensuring high customer satisfaction with every service.

Don’t let a cracked screen keep you from enjoying your Oppo A54 to its fullest. Choose the value and peace of mind that comes with professional repair.

Schedule Your Professional Screen Repair Today and get your perfect view back!

Join our mailing list for the latest updates and special offers.

Sign up for our newsletter to receive exclusive promotions and repair tips straight to your inbox.